The Dispatch | Expert | Scudo Hub
Get help & share your Citroen Dispatch (Jumpy) | Peugeot Expert | Fiat Scudo tips
You are not logged in.
- Topics: Active | Unanswered
#26 Re: Camper Conversions » My scudo conversion » 2020-09-02 07:47:52
I love what you're doing, the van looks great. I wouldn't worry about the paintwork, you'll have it covered anyway right?
For what it's worth, the mini bulkhead comes out quite easily. 2 bolts, a bit of sealer and a lump hammer will take care of the spot welds
Thanks, yes the paintwork does not really matter, only the bulkhead is going to show and I guess the solution to that is to remove it! I am leaving that for the moment though as I want basic load area sorted and usuable asap.
#27 Re: Camper Conversions » My scudo conversion » 2020-09-01 18:30:47
Thanks for all that, very helpful, especially the stuff about services, showers etc. I particularly like the idea for clothes washing although my wife wasn't so keep having all her smalls on display on the roof!
Thanks for the info on bed sizes, that gives me something to work from. I think my plan is to mock up a bed indoors and make it as narrow as possible, then see if my wife complains. I do have to be careful though as we both tend to toss and turn at night so I might want to compromise galley space for a slightly larger bed 
Swivel seats do sound a good idea. In fact I was wondering whether I should remove the bulkhead just in case but decided against to start with. I do have a fairly good workshop (welder, lathe etc) so making up a swivel base would not be that difficult. The key I think would be to find seats that are comfortable, adjustable and not too large. That is something for the future though, for the moment I will stick with what I have.
I did make some progress today, the floor is now painted.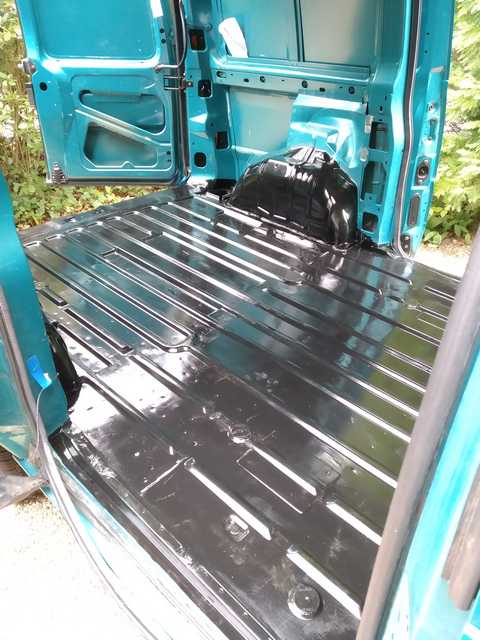
I went with hammerite metal paint brushed on and I think it was a mistake. Despite being thick and gloopy it still shows the brush marks badly, has gone matt where I brushed over it (eg to merge new paint with stuff painted 5 minutes previously) and generally looks like a 5 year old did it! I am really regretting not using spray cans, it would not have taken any longer and would have been a much better finish.
Still, not a big problem as about the only bit that will be visible when the floor is down is the mini bulkhead and rear door opening, I can always sand those back and redo them if they look too bad. Still annoying though!
#28 Re: Camper Conversions » My scudo conversion » 2020-08-31 19:55:20
Oh, and I had an idea that might get some comments (and/or ridicule! ).
What about changing the passenger seat to one that can be removed and folded. eg something like the back seats from a ford galaxy or similar. With appropriate mounting the seat could either be mounted facing backwards (ie an alternative to a rotating seat) or removed and stored under the bed.
If the latter, the space could then be curtained off and used as a toilet cubicle.
My wife thinks I am losing it. Is she right? 
#29 Re: Camper Conversions » My scudo conversion » 2020-08-31 19:50:34
You are right, a nice colour but I would not want to paint it which is a shame as it does have a few scrapes that could do with sorting out.
Thanks for the pic and comments, a few questions if I may......
Interesting that you have the sink encroaching at the cab end. I assume you sleep head to the back and feet pushed together? (assuming two people)
Also, what width is your bed? This is an ongoing discussion with my wife. She quite likes our 5" double at home so thinks a 4'6" in the van would be good (pretty much full width between the pillars) but I am hoping for something smaller to make room for the sink/cooker etc.
I love the idea of a swivel seat but I currently have the 2+1 seating arrangement and cannot find any peugeot/citroen/fiat swivel seats. Not at sensible prices anyway. I guess I need to keep my eyes open or look at a seat from somewhere else that might do the job.
Our toilet is a kampa khazi which is basically a bag in the bucket. We shall see how we get on! I also plan to get a pee bottle but my wife is not so keen! I will have to see how that one goes...
Thanks for the other info on toilet stops etc.
btw. I am hoping the 306 was an estate or it must have been a pretty cramped spanish trip!
#30 Re: Camper Conversions » My scudo conversion » 2020-08-30 15:07:28
Yes, we are used to camping so hopefully the van will be a step up from that. The only thing I haven't figured out is what to do with the toilet. It would be nice not to have to rely on campsites facilities etc so I guess a toilet tent is probably preferable to a toilet in the van?
Not looking so mad max now 
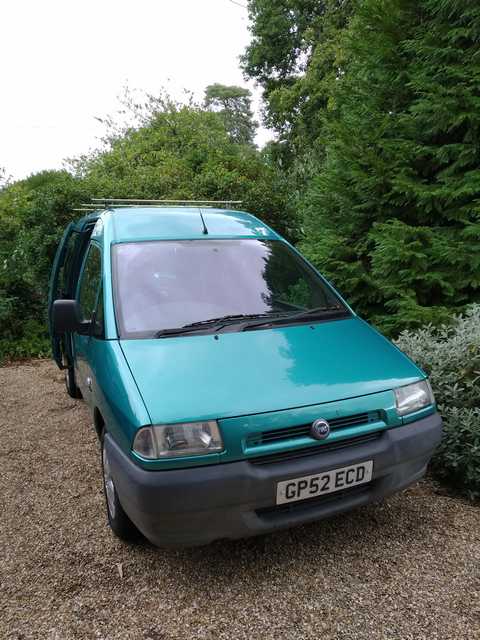
The bumper now fits properly for the first time in my ownership!
I have also zinc primered the cleaned up bits of the floor....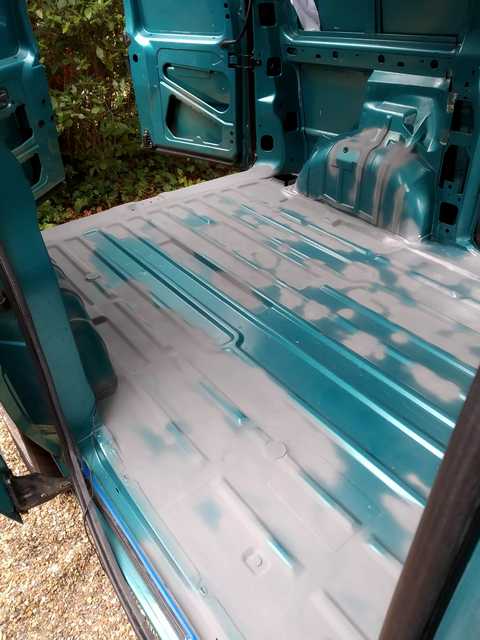
so the next step is a coat of paint then I can get on with insulating/laying the floor. That is going to have to wait a few days though.
#31 Camper Conversions » My scudo conversion » 2020-08-29 17:47:04
- brman
- Replies: 46
Now I have an engine that does not rattle (see https://dispatchexpertscudo.org.uk/foru … 277#p8277) I have decided to dive into converting my scudo to a mini camper. So I thought I would document what I am doing here. Plus probably ask all sorts of silly questions!
So, I am starting with my old works van, a 2.0JTD (110 turbo) and, according to a vin decode, the heavy load version. It was 3rd hand when I got it but supposedly only done 60k miles. That was 7 or 8 years ago and it has now only just managed to get over 70k miles with a massive 57 miles in the last 3 years!
I put a new battery in it and it fired up first turn of the key, not bad for 3 year old diesel. Then a clean with the pressure washer and put it in for an MOT. It failed, but only on tyres being perished. So, after 4 new tyres it had a new MOT,was taxed and insured and ready to go.
Well, not quite ready to go, after spending a few hours digging around I had an A4 list of things that needed fixing, starting with the crank pulley in the other thread.
Since then I have done the following:
1) The wheels were pretty rusty and the covers broken so while they were off to get the tyres done I painted them black and bought some cheap covers from amazon. It is amazing how much smarter they make the van look! I also had to recut the threads and replace two wheel bolts as they were a bit mangled.
2) removed the front bumper (it was hanging off on the left), and repaired all the mounting brackets and bolts that had either been broken or broke when I removed it.
While it was off I noticed the front crossmember was a bit crusty so I wire brushed it and gave it a coat of underseal. I also cleaned and waxed the the power steering pipes and fastened them down properly.
3) For the MOT I had to estimate the mileage for them as the odometer LCD had packed up. I did take it apart and clean up the flexi contacts but the flexit itself was too badly corroded so it needed replacing. I did think of doing this myself but it is heat bonded and that is a bit hit an miss without the correct tools so, despite being an electronic engineer, I decided to pay someone to do it.
Here I would like to give a quick plug to AKspeedo in Stirling (akspeedo.com). I shipped the speedo for arrival thursday and thursday 5.45pm I got a whatsapp message showing it working (he even fixed my clock....) and a promise to send it back friday. Sure enough, when I got up this morning (saturday) there was a parcel on my doorstep. I have to say I am very impressed with their service!
The only downside is that, now the LCD is working, I can see it desperately needs a service! 
In terms of general maintanence I still need to do a few things:
- possibly replace the door seals. They were leaking in any heavy rain although after another adjustment it stayed dry during some pretty torential rain. We shall see...
- clean up and paint the spare wheel carrier before it completely rusts away!
- sort out a stiff gear linkage. I am hoping it just needs a lube after sitting for so long
- change hte antifreeze, it looks more like rusty water....
- oil and filter
- new front pads (a bit low)
- clean out rear drums and work out why they are binding. Again, I am hoping just a bit of a clean and lube but I shall see.
- sort some rust. It is generally fairly good (famous last words...) but the towbar and body behind the rear bumper are pretty crusty. In fact I suspect some welding in the sections behind the rear wheels might be necessary at some point. But it is not urgent and I want to get on and use the van so.......
I have now moved on to turning it into a camper. First step is make something simple, just to prove to my wife we can sleep two (shall we say amply proportioned?) people in a van this small.
So, first step was empty the back and remove all ply lining, door cards etc. I then wired brushed all the rust spots and treated them with rust eater. 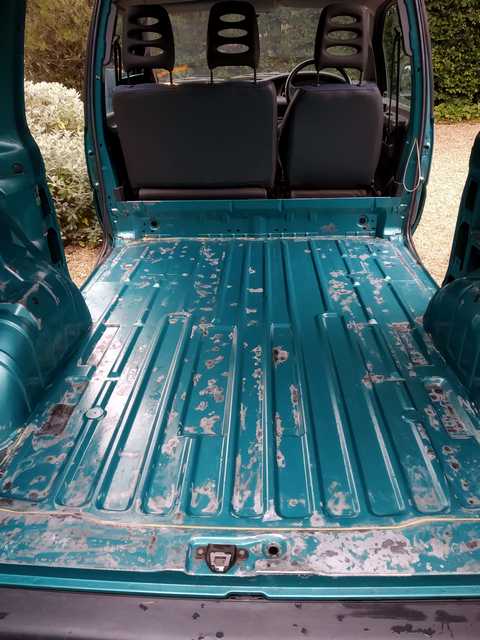
There were more little patches (basically most of the spot welds) that needed cleaning up but actually less real rust given the door seals have been leaking and there was often puddles just behind the mini bulkhead.
One thing I did noticed is what appears to be a design weakness. At the front corner of the rear wheel arches the seam between floor and arch appears to have to lip or weld, it is just the floor butting against the wheelarch with sealant filling the gap. The sealant here has dried out and cracked and I could actually see the road through the crack. So that needs resealing before I put a floor down.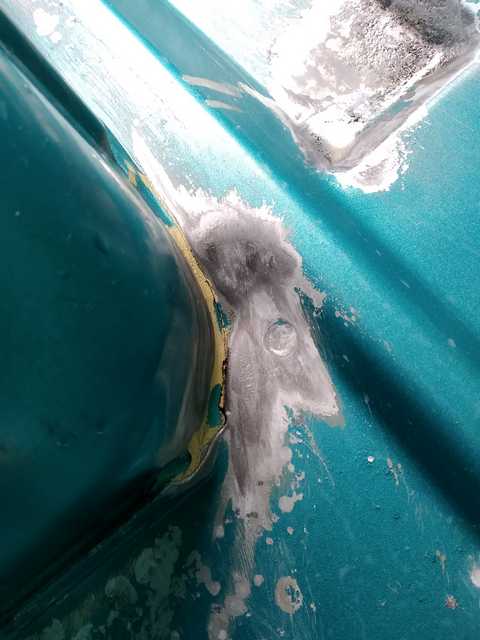
I have not properly investigated underneath yet (so please shout if you know better) but it does not look like there is any real rust there, just the cracked sealant. Easy enough to fix anyway.
So that is it so far. If anyone has any advice (other than don't do it! ) or comments then please dive in
#32 Re: Maintenance » 2003 Scudo 2.0JTD crank bolt problem? » 2020-08-29 16:47:35
A follow up on this case anyone else cares
As I had a new bolt I cut a couple of slots in the old one and used it as a chaser. It turns out no damage to the threads, just a lot of gunk (not sure if it was old threadlock or what) that needed cleaning out. Once that was done the new bolt (and pulley) went in fine. Torquing it was interesting, I was aiming for the 70Nm+62degrees but the breaker bar was flexing and I reckon about 50 degrees was as much as I managed before I gave up. It is f**ing tight anyway so I hope it will stay that way
#33 Re: Maintenance » 2003 Scudo 2.0JTD crank bolt problem? » 2020-08-11 14:56:20
Well, I have a new bolt on order so can start by comparing the two. I'll report back
#34 Re: Maintenance » 2003 Scudo 2.0JTD crank bolt problem? » 2020-08-11 08:03:01
you are both right, there is a colour change on the threads. Looking at the crank there is an unthreaded bit for the first inch of so. So it looks like the colour change co-incides with the thread threaded bit of the crank.
There is no sign of any distortion on the bolt threads though so I assumed that the colour was just contamination from the crank theads.
vaz: interesting comments about the vectras. It could be that I have the same problem here which gives me hope that just a clean up of the threads will sort it.
oat: That is my concern, I don't want to recut the thread and then strip it trying to get the torque required. I might have no choice but the take the risk though.
#35 Re: Maintenance » 2003 Scudo 2.0JTD crank bolt problem? » 2020-08-10 16:30:02
Hi...........I'm unable to Say it's the right or wrong bolt........
But Is the Rattle the reason it was parked up ? .........
Was any major work from your memorey in that area? .........
Is there wear on pulley or woodruff key in and around there? .........You may need when you have identified the thread/bolt size/pitch to use a thread chaser to clean things up a bit............
If as you say no damage to bolt (sounds lucky) ...........
Maybe it wasn't tight enough and you need to chase out the threads anyway and clean it up and make sure it's got enough Torque...........Obviously addressing any wear or slop in woodruff key............
BTW........ MK1 Vehicles are in other section this here is next gen Vans
Thanks.
> But Is the Rattle the reason it was parked up ? .........
No it just stopped being used a few years ago. Then recently my wife told me to either get rid or do something with it. Hence the plan to turn it into a mini-camper
The rattle was noticed first time it was started recently.
>Was any major work from your memorey in that area? .........
not in my ownership but it shows signs the cambelt has been replaced (plus other bodgery round the engine!).
> Is there wear on pulley or woodruff key in and around there? .........
Slight were to the pulley in the key slot plus the slightly odd witness marks shown in the picture. The key inself looks worn and twisted. In fact it looks a little undersized. I don't know if this is normal or it is a (bodged) replacement. I am tempted to make a replacement that is a better fit when I re-assemble.
>You may need when you have identified the thread/bolt size/pitch to use a thread chaser to clean things up a bit............
>If as you say no damage to bolt (sounds lucky) ...........
The removed bolt is M14 x 1.5. I have a suitable tap so can clean the threads with that. I hoped for re-assurance it was the correct bolt/size before doing that though. That said, given this bolt has already been fitted M14x1.5 is the size the threads are now,even if they were not to start with!
No damage to bolt, I am just hoping no damage to the crank either!
> Maybe it wasn't tight enough and you need to chase out the threads anyway and clean it up and make sure it's got enough Torque...........
That is a good point, I guess if the bolt was not tight it could have damaged the threads in the crank. Although I would have that that would make it loose, not tight.
>BTW........ MK1 Vehicles are in other section this here is next gen Vans
How embarassing! Not sure how I managed to get the wrong section. Is there any way to move a thread? Or is it stuck here now?
Thanks for your comments, definitely more food for though.
#36 Maintenance » 2003 Scudo 2.0JTD crank bolt problem? » 2020-08-10 11:48:16
- brman
- Replies: 8
Hi
I have just registered here as I have a 2003 (07/2002 built) scudo 2.0 JTD (DW10CTED). It used to be my work van but has been off the road for a few years so needs a bit of TLC. The longer term plan is to turn it into a mini camper but I need to sort the basics first.
So...... The crank pulley just started rattling so I decided to change it. However it took literally 5 minutes with an impact wrench to get the crank bolt out (working it back and forwards). Having done so it needs an impact wrench to put it back in again past the first few threads. ie it feels like it is cross threaded.
That in itself is odd, but even odder, there is no sign of damage to the threads on the bolt, nor debris in the threads. ie no sign of cross threading. However there are signs that the crank pulley was moving against the timing gear as shown by the wear marks on the back of the pulley plus wear on the key in the crank. So I am wondering if the rattle was actually a loose pulley, not a failed one.
So my questions:
1) Does this look like the right bolt? (it is M14x1.5, 70mm long.
2) Any reason why it should be so tight in the crank? Could it just be over-use of thread locker?
3) My plan is to get a 14x1.5 tap and clean out the crank threads. Good/bad idea?
and finally
4) On refitting, what is the correct torque? I have read 110Nm but also 70Nm+62degrees which implies a stretch bolt. Does this mean the bolt needs replacing?
Any advice gratefully received!