The Dispatch | Expert | Scudo Hub
Get help & share your Citroen Dispatch (Jumpy) | Peugeot Expert | Fiat Scudo tips
You are not logged in.
- Topics: Active | Unanswered
#1 Re: General Discussion » Rear end rust! Have a look at my MOT failure today! » 2023-10-17 23:29:36
Hi John
I have been watching your YouTube vids on this! What a great job you did. Love to know the paint you used.
To be honest, I am very unsure how far this rot monster has gone until I start stripping it all back, yours does look very similar to mine, mine is covered in filler (presumably by some shyster to get through an MOT years ago, it's now showing it's true self!. I know many will just scrap the thing but that's not my thing. I can fabricate and sort of weld (I can make all the parts need) and do all the cutting out etc, just welding back these to the structure needs a good welder me thinks lol.
Your vids on your repairs to your van has given me confidence that I can actually get this thing fixed and better than manufacture with the addition of extra gusset plates from the rear beam to the sub frame. And yep, the mud and crap flys in from the wheels so will be making a close off 'skirt' around the rear of the rear wheel arches.
Thanks for your inspirational vids 
#2 Re: General Discussion » Spare wheel carrier » 2023-10-17 23:11:24
Hi, mine is like the 02 one, I have a 2002 dispatch 2.0 hdi
#3 Re: General Discussion » Rear end rust! Have a look at my MOT failure today! » 2023-10-17 22:58:11
Hi, yep a real shock, thanks for your reply.
I think it's going to be a lot more than a days work for a welder but yes, £300 to £ 400 is about right. The extent of the cover up rust is way beyond this box sections and into the rear structural valance etc
I will be doing most of the work myself, the cutting out and going back to good metal, the fabrication of new box sections and brackets etc. I can weld ok for these things but welding them to the structure is a bit beyond my skills.
I think you maybe right with the structure being 2.5 mil, some of the panels around these places are 1.2 mil so guessing will need a good welder to do the attachment work.
I am going to my mechanic friend Thursday for the appraisal, if he says write off, well I will just have a good go myself, nothing ventured etc
If it is a write off, I will try and take as many pics as I can to post for details of this for others to see if this affects their vans too.
#4 Re: General Discussion » Rear end rust! Have a look at my MOT failure today! » 2023-10-16 21:49:05


#5 General Discussion » Rear end rust! Have a look at my MOT failure today! » 2023-10-16 21:46:31
- Zippypilot
- Replies: 5
Hi all, been a while since I posted.
Today is one eye opener of an MOT!
The issues are....
Offside Rear Vehicle structure excessively corroded within 30cm of towbar mounting (6.1.6 (i) (i))
Nearside Rear Vehicle structure excessively corroded within 30cm of towbar mounting (6.1.6 (i) (i))
Now, this year I removed the tow bar frame and the electrics, to refurbish them, and inspected the areas above (obviously with the spare wheel removed) as we now have a trailer tent. Spare wheel removed, all looked ok. I refitted the refurbished frame etc and all looked good. Ok on the nearside it was rusty around a box section but nothing too excessive (after all it had passed 4 previous MOT's with the same and the off side was pretty much great looking.)
I took the trailer tent out a couple of months ago, not issues at all and that's that.
Ok, the MOT today has revealed one hell of a cover up, was going to say 'bodge' but a bodge is a temporary repair not this!
Both sides have blown for a better word, there is so much rust and little metal left, all covered in filler and paint! Please see the pictures.
To say I am really not happy is an understatement, I mean, I missed this for 4 years of ownership and so did all the MOT places!
Please check out the pictures and maybe have a look at your van and yes it is a known problem but really, covering in filler is so dangerous!
I will be stripping the rear end, bumper, liners, tow bar etc to see how far this rust has gone, if it stops at a reasonable structure, I will be fabricating a full repair (if so I will try and document what I do) nothing is irreparable but geez glad the MOT was today and not next spring after taking the trailer tent out for another run!
Hope this is useful
#6 Re: Maintenance » Rear number plate lights - how to change the bulb? » 2021-10-12 00:27:55
Hi, Mmmm mine has the third brake light too in the door, mine is an 02 plate if thats the difference?
#7 Re: Maintenance » Rear number plate lights - how to change the bulb? » 2021-10-12 00:22:57
Update: It appears on the mk1 that all you have to do to remove the plastic housing is, move it to the right horizontally (quite firmly) and then pull gently down on the left side of it releasing it from the cut-out in the door. The reverse to re-install. (PS, there are two holes underneath that give the impression that there maybe screws holding these to the bodywork, don't let it fool you!)
Hope this helps someone out, and I fitted two LED bulbs from Halfords which was about £4
#8 Re: Maintenance » Rear number plate lights - how to change the bulb? » 2021-09-21 15:31:11
Thanks vaz, I will take all that onboard with the LED's, a little job for the weekend.
#9 Re: Maintenance » Rear number plate lights - how to change the bulb? » 2021-09-19 12:58:12
Excellent Ken, thanks for that
#10 Maintenance » Rear number plate lights - how to change the bulb? » 2021-09-18 21:09:35
- Zippypilot
- Replies: 10
Hi all, probably a really dumb question but...
I need to change both rear number plate lamps (ones blown and picked up on the MOT) and can't see an obvious way to get the plastic covers off without being damaged, secondly, can I change the bulbs to LED's so won't need to worry next time?
Any help welcome sarcastic or not lol
Zip
#11 Re: General Discussion » Tools - Halfords Advanced » 2021-08-29 23:50:49
I do have a rattle gun funnily enough but no compressor, so make do was the nature of the day
#12 Re: General Discussion » Tools - Halfords Advanced » 2021-08-29 00:20:07
Wow! To every one who has posted in this topic, great response and all taken in. I have used my new Halfords Advanced tools doing the front struts and yep, strong as F! Fit well and not stripped a bolt head (will still be buying the impact socket set as did feel they were just on the limit on some rusted bolts)
I too love llidl's tools, got a few bits and pieces there and quality is not to shabby!
Have to admit a proper breaker bar would have been handy instead of a length of tubing on the 1/2" ratchet....Hmmmm yep not good practice
#13 Re: General Discussion » Tools - Halfords Advanced » 2021-07-10 15:53:20
Thanks Ruston, think I will have a word with my mechanic mate about that!
#14 Re: General Discussion » Tools - Halfords Advanced » 2021-07-06 14:58:09
That's interesting Pieceofstring. I have a few Parkside tools and they have been really good quality, recent purchase there was a self ranging multimeter which is a great bit of kit diagnosing the awful electrics on my van!
I hopefully won't have to use the tools too often on the van but makes sense to buy something like the Halfords tools with the warranty, besides the van I am an ex aircraft engineer and like to 'tinker' with machines etc in my spare time, so they will be used for more than once
#15 Re: General Discussion » Tools - Halfords Advanced » 2021-06-27 20:09:16
Hi kenbw2, well that funnily enough is all the review I needed. Just bought a couple of spanner sets and a set of half inch sockets and ratchet. Unboxing them it is clear that they are well made, far better than my old crap in the shed!
Thankfully my van is pretty much rust free, but then I will find out what the bolts are like to remove without rounding off.
The next buy is a good spring compressor, any thoughts?
#16 Re: General Discussion » Tools - Halfords Advanced » 2021-06-26 15:50:25
Hi Vaz,
Yeah, I looked at my tools in the shed the other day, and most are a real mess of who knows what makes and sizes of socket, spanners and all types of crappy quality stuff I bought 30 years ago!
I think just buying new stuff at Halfords and their Advanced range may be a better idea than trying to figure out what tools are of any use in my old toolbox. let alone try them out and round off every nut!
#17 General Discussion » Tools - Halfords Advanced » 2021-06-25 23:51:53
- Zippypilot
- Replies: 23
Hi all once again
My good old 02 plate 2.0 HDi has given me more to spend out on (see https://dispatchexpertscudo.org.uk/foru … hp?id=1312 'Van self destruct mode).
This time it's the front left shock leaking (with added 'knocking from probably the ball joints somewhere) and the right front on its way by the look at it. Ok this van was so damn cheap and really worth keeping on the road. to have the work done to it. it's obvious the previous owner did nothing in maintenance so just picking up on the results I guess, wear and tear as normal for any vehicle.
Right! Here is the main reason for the post. The quote from several garages just in labour was all around the £250 to £300 mark (to fit the pair). The parts weren't cheap either, so I thought about just doing it myself. This will mean I will need some good tools to do the job.
The offset of paying a garage to do it or having a good set of tools instead to do it myself makes perfect sense to my small mind. Looking at Halfords Advanced tool sets/modular trays, it seems I can buy a really good set of sockets, spanners etc for the labour cost. But.....
Are Halfords Advanced tools any good (they do have a lifetime warrantee so that's one thing, and I am sure the little bastard will show me more maintenance needs in it future!)
#18 Re: General Discussion » Recognising one another... » 2021-06-25 22:24:05
My sticker is on the vent blank next to glove box, not sure it's the best place to be recognised from another van!
#19 Re: Maintenance » Van self destruct mode » 2021-04-26 19:50:31
Update 4, heater fan failure due to...... yup, the relay. All good again, waiting for the next thing!
#20 Re: Maintenance » Van self destruct mode » 2021-04-06 22:59:07
Update 3: indicator relay and heater fan failure. This little van is a.... ok indicator relay £25 and now works fine, heater fan is another issue, fuses are fine however, when testing out the the fuse connection under the glove box, zero volts. Is this fuse after the slider control?
#21 Repair Manuals, Publications and other Downloads » Fuse Box Locations and Fuse detail Video » 2021-04-05 16:43:38
- Zippypilot
- Replies: 0
https://www.youtube.com/watch?v=NAHkmhNMVSM
Hi all, found this great little vid on YouTube, handy for fuse identification as can't find a manual anywhere for the 2002 2.0HDI
Hope it helps some of you out.
#22 Re: General Discussion » LED strip lighting - What is it and what's needed to install it » 2021-04-01 00:39:41
Good vid Tee_Cee, think I can do the hard wire. Yeah I know what you mean about the cigar lighter units, had rubbish ones before. but will find a quality one as it's purely for ready made things that need that, a hoover/tyre inflator/ inspection lamp etc. the USB socket I need to research.
PS buying another set of poundland lights just so I can have two remotes (one in the cab also)
I will have to be practical as this a working van as much as I would love it to be a camper too lol
#23 Re: General Discussion » LED strip lighting - What is it and what's needed to install it » 2021-03-30 22:24:40
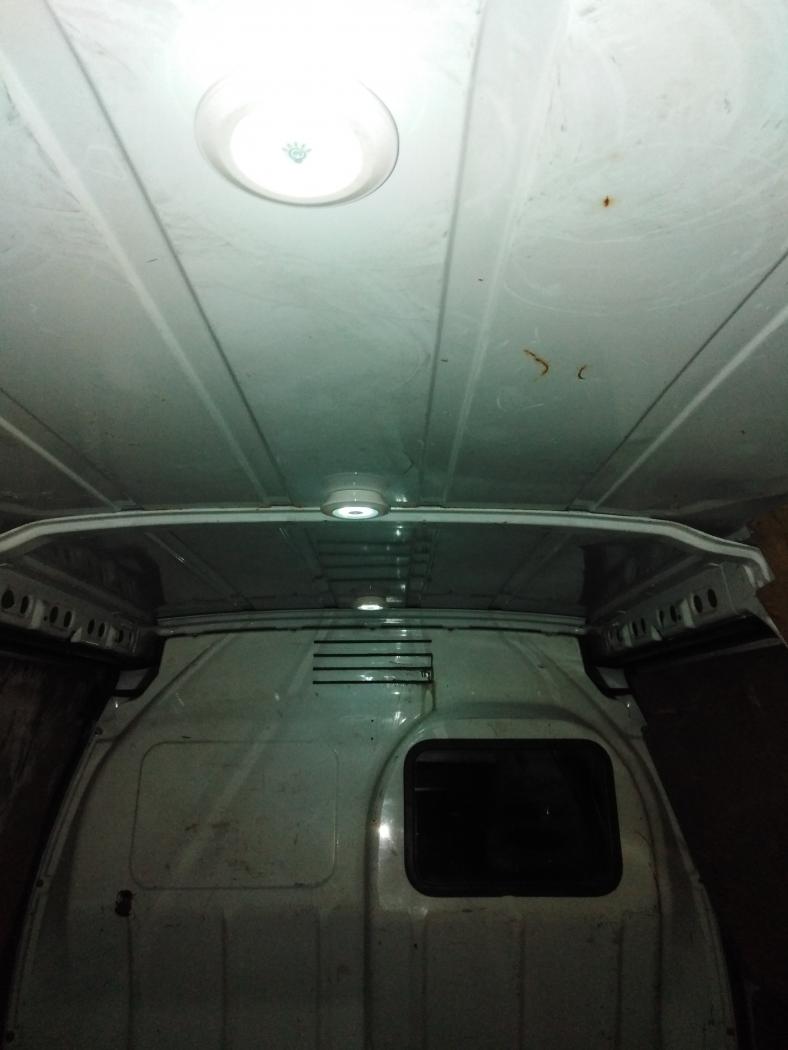
 Total cop out I know, I had to have lights in the back so a good stop gap cheapy fix for now...
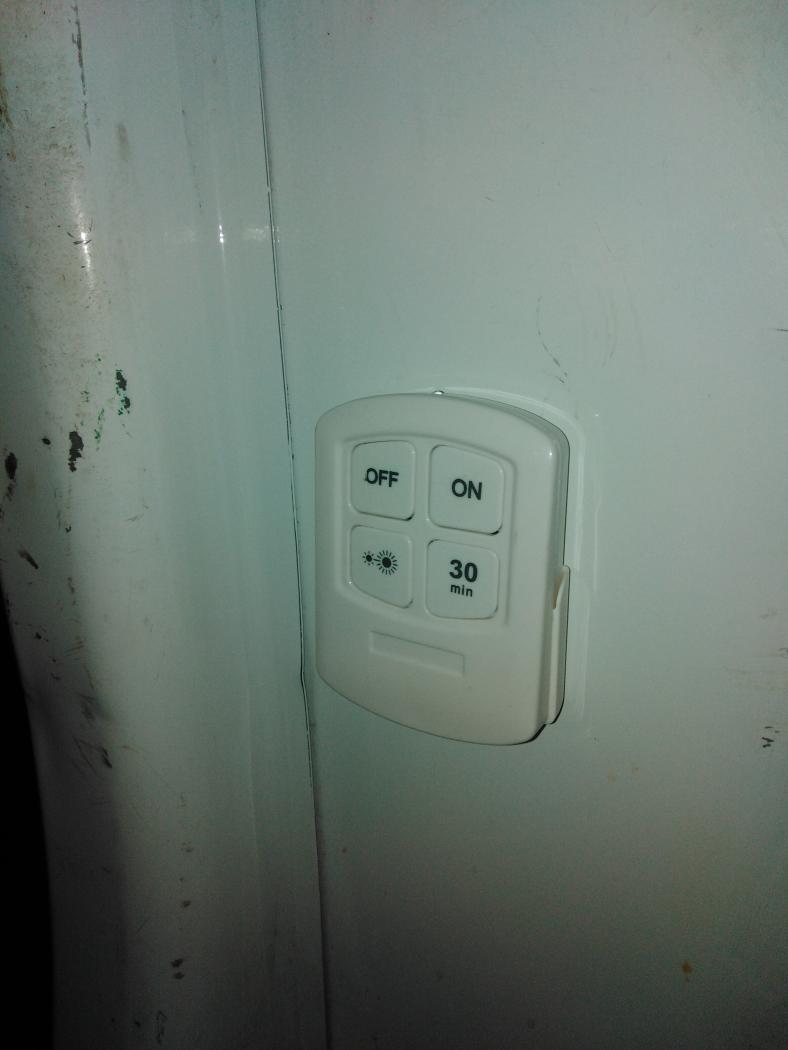
Poundland, yep and guess how much? (nope £5) and they take exactly 147 AA batteries (11 really). Got to say I am quite impressed with the result!
For £7 for the set of 3 lights and batteries, the back lights up like daylight. There is also a dim setting and a 30min button for forgetting to turn them off when just needing light for a while.
Added bonus is it came with a little remote control keypad that I have stuck to the left rear door, this is in a holder so you can take the remote with
you to any door (or shine it through the window in the bulkhead from the cab to see what you have destroyed by not driving like a sensible person)
Might just take out the battery side of things and hard wire them from a regulated 4.5 v dc supply source from my planned hot batt bus. Oh yeah, you can switch them on individually if you like with the buttons on them.
https://dispatchexpertscudo.org.uk/forum/img/members/895/IMG_20210330_215613.jpeg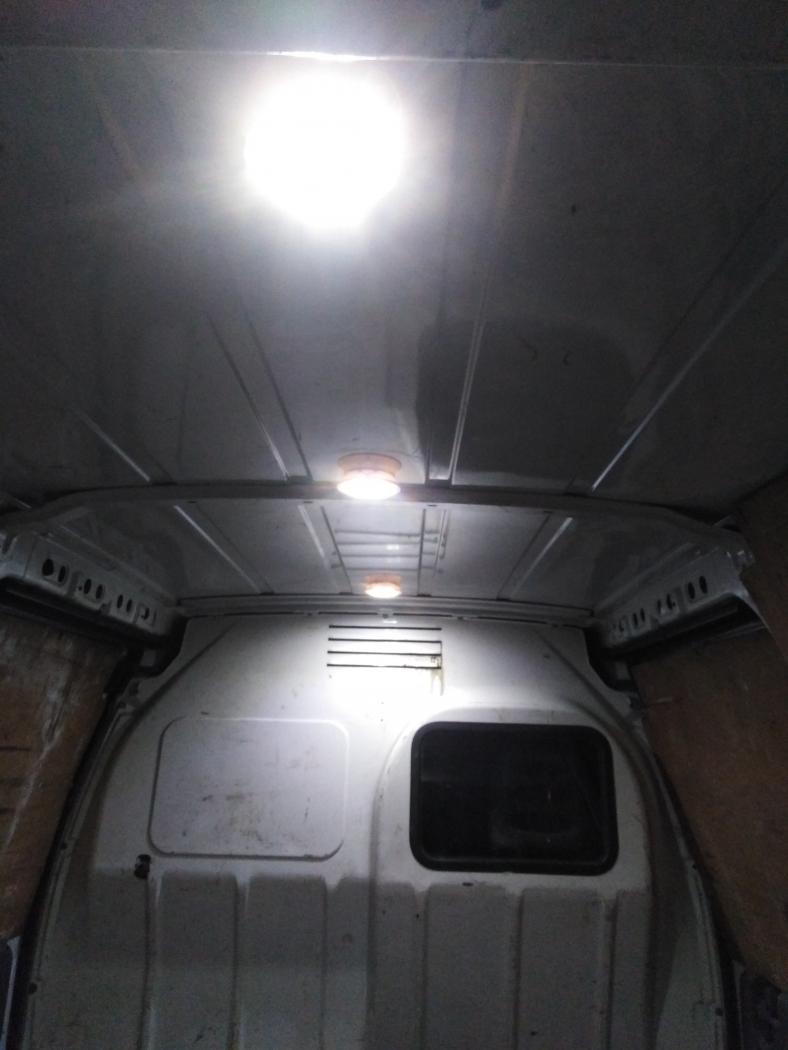

#24 Re: Maintenance » Gear Linkage Cables » 2021-03-26 00:49:24
I have a new cable replacement too, it would have been fitted by now if it wasn't for the van deciding it wants other things fixed first. I did have a problem with the gear selection, it would go into reverse when selecting first easily, then it failed leaving only 2nd and 4th gears, this transpired to be one of the cable ends on the gearbox side, jumping off the retaining bracket, this was fixed with a replacement metal 'clip' that holds the round cable end to the bracket mount on the gearbox. I will find out what part the clip is if anyone needs them for the cable change as they don't come with them.
#25 Re: General Discussion » LED strip lighting - What is it and what's needed to install it » 2021-03-24 00:03:57
Hi Casper,
Yes I have been known to use every inch of the back, I transport furniture mainly and do cram sometimes, putting drawers on top of units to the celling.
I checked out the link you posted, I think these might be a practical option to the tape stuff, the look low enough profile not to risk knocking them. Dimmer isn't much of a worry, thanks for posting, I will be ordering a set as at that price worth a shot!!