The Dispatch | Expert | Scudo Hub
Get help & share your Citroen Dispatch (Jumpy) | Peugeot Expert | Fiat Scudo tips
You are not logged in.
- Topics: Active | Unanswered
#426 Re: General Discussion » Air Conditioning! retro fitting, questions, and tips » 2020-07-04 23:07:06
just to note here I have absolutely no qualifications or "specialities" in HVAC and refrigeration. it is purely a hobby
ok first question..
Yeah the garage will be fine to get your ac system working again. though his method is not correct in terms of professional large scale HVAC industry, it will be perfectly fine to do on a car and system you know the history of like yours.
q2,
yeah I would vacuum down and add a dye and recharge with r134a. The dye will not affect how the system works. always nice to have in. I will be adding a UV dye to mine when I top up with new oil.
q3,
the compressor is designed to be totally sealed. however there is a drain plug on it, though on the one I had it was at the top. because the compressor was installed upside down so it got the correct mounting holes. they can be used any way around so long as they remain horizontal.
depending on your compressor brand and model they will take different types of oil and capacity. mine is a Sanden SD7V16 variable displacement compressor which uses SP-10 or PAG46 oil and takes 135ml. I just bought 250ml from eBay for under £10.
if you really want to change the oil here's what you need to do:
you have to slacken the aux belt then take the compressor off the van which is not so hard. it requires a 16mm spanner/socket for the front bolts and an 8mm Allen key for the rear bolts and to take the hoses off the back of the compressor. The fill/drain plug is 17mm. leave it to drain for a few mins upside down on top of a jam jar or something.
mine had a green coloured oil which was quite manky. looked very water saturated.
you can refil through the drain plug or through the suction line. both lead to the crank case of the compressor.
hope this answers your questions 
(have some pictures to upload but will do that when I am on my computer, still working on my van at 11pm lmao)
the goal moves ever closer...


#427 Re: Maintenance » Oil pump » 2020-07-04 02:14:20
from what i remember, not much. i did an engine swap on a 1990 citroen BX (1.7 TD) and used a 2002 XUD (1.9 TD) engine. the original engine was very low miles so i swapped over everything i could including oil pump.
the only thing i remember is that one needed a steel gasket when it was bolted in place and one did not.
given the DW8 uses the same oil pump as the XUD that is! they all seem to be pretty similar.
the original cause of the engine swap was a almost 30 year old cam belt failing. i did buy the car with the snapped belt.
#428 Re: Maintenance » Who Should I Get To Replace Timing Belt. » 2020-07-04 01:59:08
its up to you i guess (sorry for the late reply, i never got the notification that this had been replied to!)
if its only covered 12k miles its not that many really so i guess you would be ok to just change the belt only. though it is better safe than sorry.
like i say, its up to you. when a whole kit including everything is only £50, and the belt on its own is what £25? £30? myself i think i would just replace everything and be happy knowing its all good.
#429 Re: Maintenance » Heater Blower works when engine off » 2020-07-04 01:36:17
to add to this, mine has a dealer fitted tow bar with twin sockets. i bought the van cheap as it had "electrical faults" (if only it was just electrical!). i ended up fixing the constant flat battery the every night i bought it as it was the auto voltage charge relay on the grey/white towing socket going crazy after the van had been parked up for a while. the relay even though it had no load somehow melted its self away and consumed the amps and drained the battery.
worthy of checking
#430 Re: Maintenance » front right shock absorber removal » 2020-07-04 01:22:37
though i guess this is fixed now, ill just say that if you undergo taking the strut off, i suggest painting all inside where the strut goes. mine was pretty corroded:

the strut tops were also rather corroded:

to drop the strut youll need to unbolt it at the wheel hub while jacked up on axle stands. then right up in the wheel arch theres 2x rather rusted 13mm bolts. though rusty mine seemed to come out easy after hammering a socket on the bolt head. you'll need a real good pair of spring compressors to compress the spring enough to get it out. compress it enough so it can physically move when the dampener is fully extended. it uses a 22mm nyloc nut on top and inside the nut theres a rare 7mm Allen key slot to stop the dampener from just spinning while undoing the 22mm nyloc nut. the nyloc was not tight and came undone easy.
i recommend chipping all the loose rust off using a large screw driver and maybe a small hammer, then using a wire brush/wheel on a angle grinder to clean it up more, and finally painting it with a paint that has a built in rust converter. once its dry i then recommend painting over it with a thick underseal to protect it from stone chips.

this is what i am doing on mine. plan to keep it as long as i am able.
**** rust! 
#431 Re: General Discussion » Air Conditioning! retro fitting, questions, and tips » 2020-07-03 22:38:39
as it goes the dryer is all I would replace.
The compressor should be fine once it gets it's oil thrown around everywhere and pumped through the system.
compressed air is pretty shun worthy if he is a dedicated HVAC technition but would give the same results I guess. seen horror stories where people have done that on a system which uses a flammable refrigerant. The result has cost people their lives. thankfully vehicles do not use flammable refrigerant so nothing to worry about. unless it's been topped up with butane or propane in the past which is something I have seen done before. [shock]
thankfully it's a pretty small refrigerant circuit so a leak will be easy to spot!
#432 Re: General Discussion » Air Conditioning! retro fitting, questions, and tips » 2020-07-02 10:24:37
When it comes to vacuuming a system, the longer the better. So basically as long as you are willing.
The location of the filter dryer is just under/in front of the battery tray. One 10mm bolt and nut holds it in to the bracket. Undo that and the filter dryer will slide upwards an out.
2x 10mm nuts hold the bracket on if you want to take it off, clean it up and repaint it.
#433 Re: General Discussion » FEB 2020 NEW BATCH AVAILABLE! Forum Bumper Stickers! » 2020-07-01 12:54:11
I've sent you two - just in case
ahh well may as well live in the moment, eh? ha ha!
#434 Re: General Discussion » FEB 2020 NEW BATCH AVAILABLE! Forum Bumper Stickers! » 2020-07-01 01:38:28
yes, its really nice to be fair. if you guys have not guessed, i moderate in the Panda Classic section on FiatForum. i have to admit, in 2013 i was made a moderator and the only things i ever have to do is move the odd post about the more modern (2003 on) Panda models into the correct section. its a very pleasant forum, and just so happens to be about a car i have always wanted right from a kid (aim low never be disappointed, eh?)
it is also a place that regularly goes off topic but you know, we just let it. once a question has been answered, why not.
ahh but look at me living up to the off topic ways.
i look forward to the sticker! it shall be worn with pride (on the van that is, i may be eccentric but not excessively eccentric.)
#435 Re: General Discussion » Air Conditioning! retro fitting, questions, and tips » 2020-06-30 23:21:29
if you have absolutely nothing in the system its possible it has got a leak, you can get a top up and have dye added to it to see where it is leaking out of.
i would always recommend replacing the filter dryer. however i have a big caution if you do. the short pipe between the AC radiator and the dryer can become corroded and stuck on the filter dryer.. this pipe is pretty hard to find a replacement for (i recommend a place that breaks taxis) however if you go second hand you may find that is also stuck on the filter dryer. i recommend spraying it with loads of WD40 and rocking the 19mm nut back and forth rather than just undoing it by force.
if you vacuum a system out for long enough you can suck all of the stuck moisture from a dryer. i have seen systems that saturated with moisture that when you vacuum it out and leave it over night, the pressure gauge reads slightly less vacuum the next day. not because of a leak, but because the moisture has turned into a vapour and made its own atmosphere inside the system. you can just keep pumping the vacuum down and eventually it will stop loosing vacuum as the moisture content runs out.
if your compressor still turns over by hand it will still be in perfect working condition. remember to turn over the inner part of the pulley.
if you know someone with a vacuum pump, ask them to pump out your system given it has nothing in it. if it holds a vacuum then just top it up with refrigerant.
as i said, an AC system will loose refrigerant due to it not being used. this has been so much of a problem that some cars were made with a system where if you were coasting for a long time (say down a hill) it would kick the
AC compressor on just to lubricate the seals to prevent leaks.
some Eco modders have even made it so the AC compressor comes on with the brake lights to aid in engine breaking. interesting way of looking at it.
#436 Re: General Discussion » FEB 2020 NEW BATCH AVAILABLE! Forum Bumper Stickers! » 2020-06-30 01:22:01
JohnDragonMan wrote:i would not mind a sticker if possible guys? got a feeling that this van and me will be together for a while, and thats pretty fine by me!
im just looking forward to when i can join the first meetup!Absolutely John! Been really enjoying your extraordinary journey so far!
Sling me over your postal details to chris@dispatchexpertscudo.org.uk and I'll get a sticker or two over to you!
Cheers and welcome!
Thank you!i have to admit, this is one of the more pleasant vehicle forums i have joined over the years
#437 Re: General Discussion » Air Conditioning! retro fitting, questions, and tips » 2020-06-29 23:22:23
Wonder how difficult it would be to re-commission my a/c now? Suppose the compressor will need replacing for a start?
not at all! usually the gas leaks because the seals dry out. get it re-charged and you will be pleasantly surprised. that 4 pin pressure switch will be detecting that the refrigerant charge has dropped below its normal running pressure so it stops the compressor from kicking in. just a top up should be all you need given the front radiator is good. f you find that theres no pressure in the system any more i recommend getting it nitrogen pressure tested first but you can just get it vacuumed out and see if it holds the vacuum before being charged back with R134A refrigerant.
there's a naughty way of checking if there's a bit of pressure in the system still and that is to press one of the valves in with a small screw driver, like like a tyre valve. if it hisses then you still have something in it so you can just go strait for a top up. see, if theres still pressure in it, it means no moisture has gotten in.
the AC system that i have came from a taxi, the belt skipped the AC compressor pulley as taxis never use the AC and the system had no pressure in it what so ever so it had not been used for probibly 10 years.
the only reason why i am changing all of the seals in mine is because i have taken the joints apart. if a seal is never moved they stay good for years.
i had a early 80s Citroen BX estate a few years back running the old R12 refrigerant. that still had good AC seals on it despite its age!
just updated this again.. added another video.
#438 Re: General Discussion » FEB 2020 NEW BATCH AVAILABLE! Forum Bumper Stickers! » 2020-06-29 18:41:00
i would not mind a sticker if possible guys? got a feeling that this van and me will be together for a while, and thats pretty fine by me!
im just looking forward to when i can join the first meetup!
#439 Re: Camper Conversions » JohnDragonMan's Dispatch Camper Conversion » 2020-06-27 03:19:49
well things have happened.
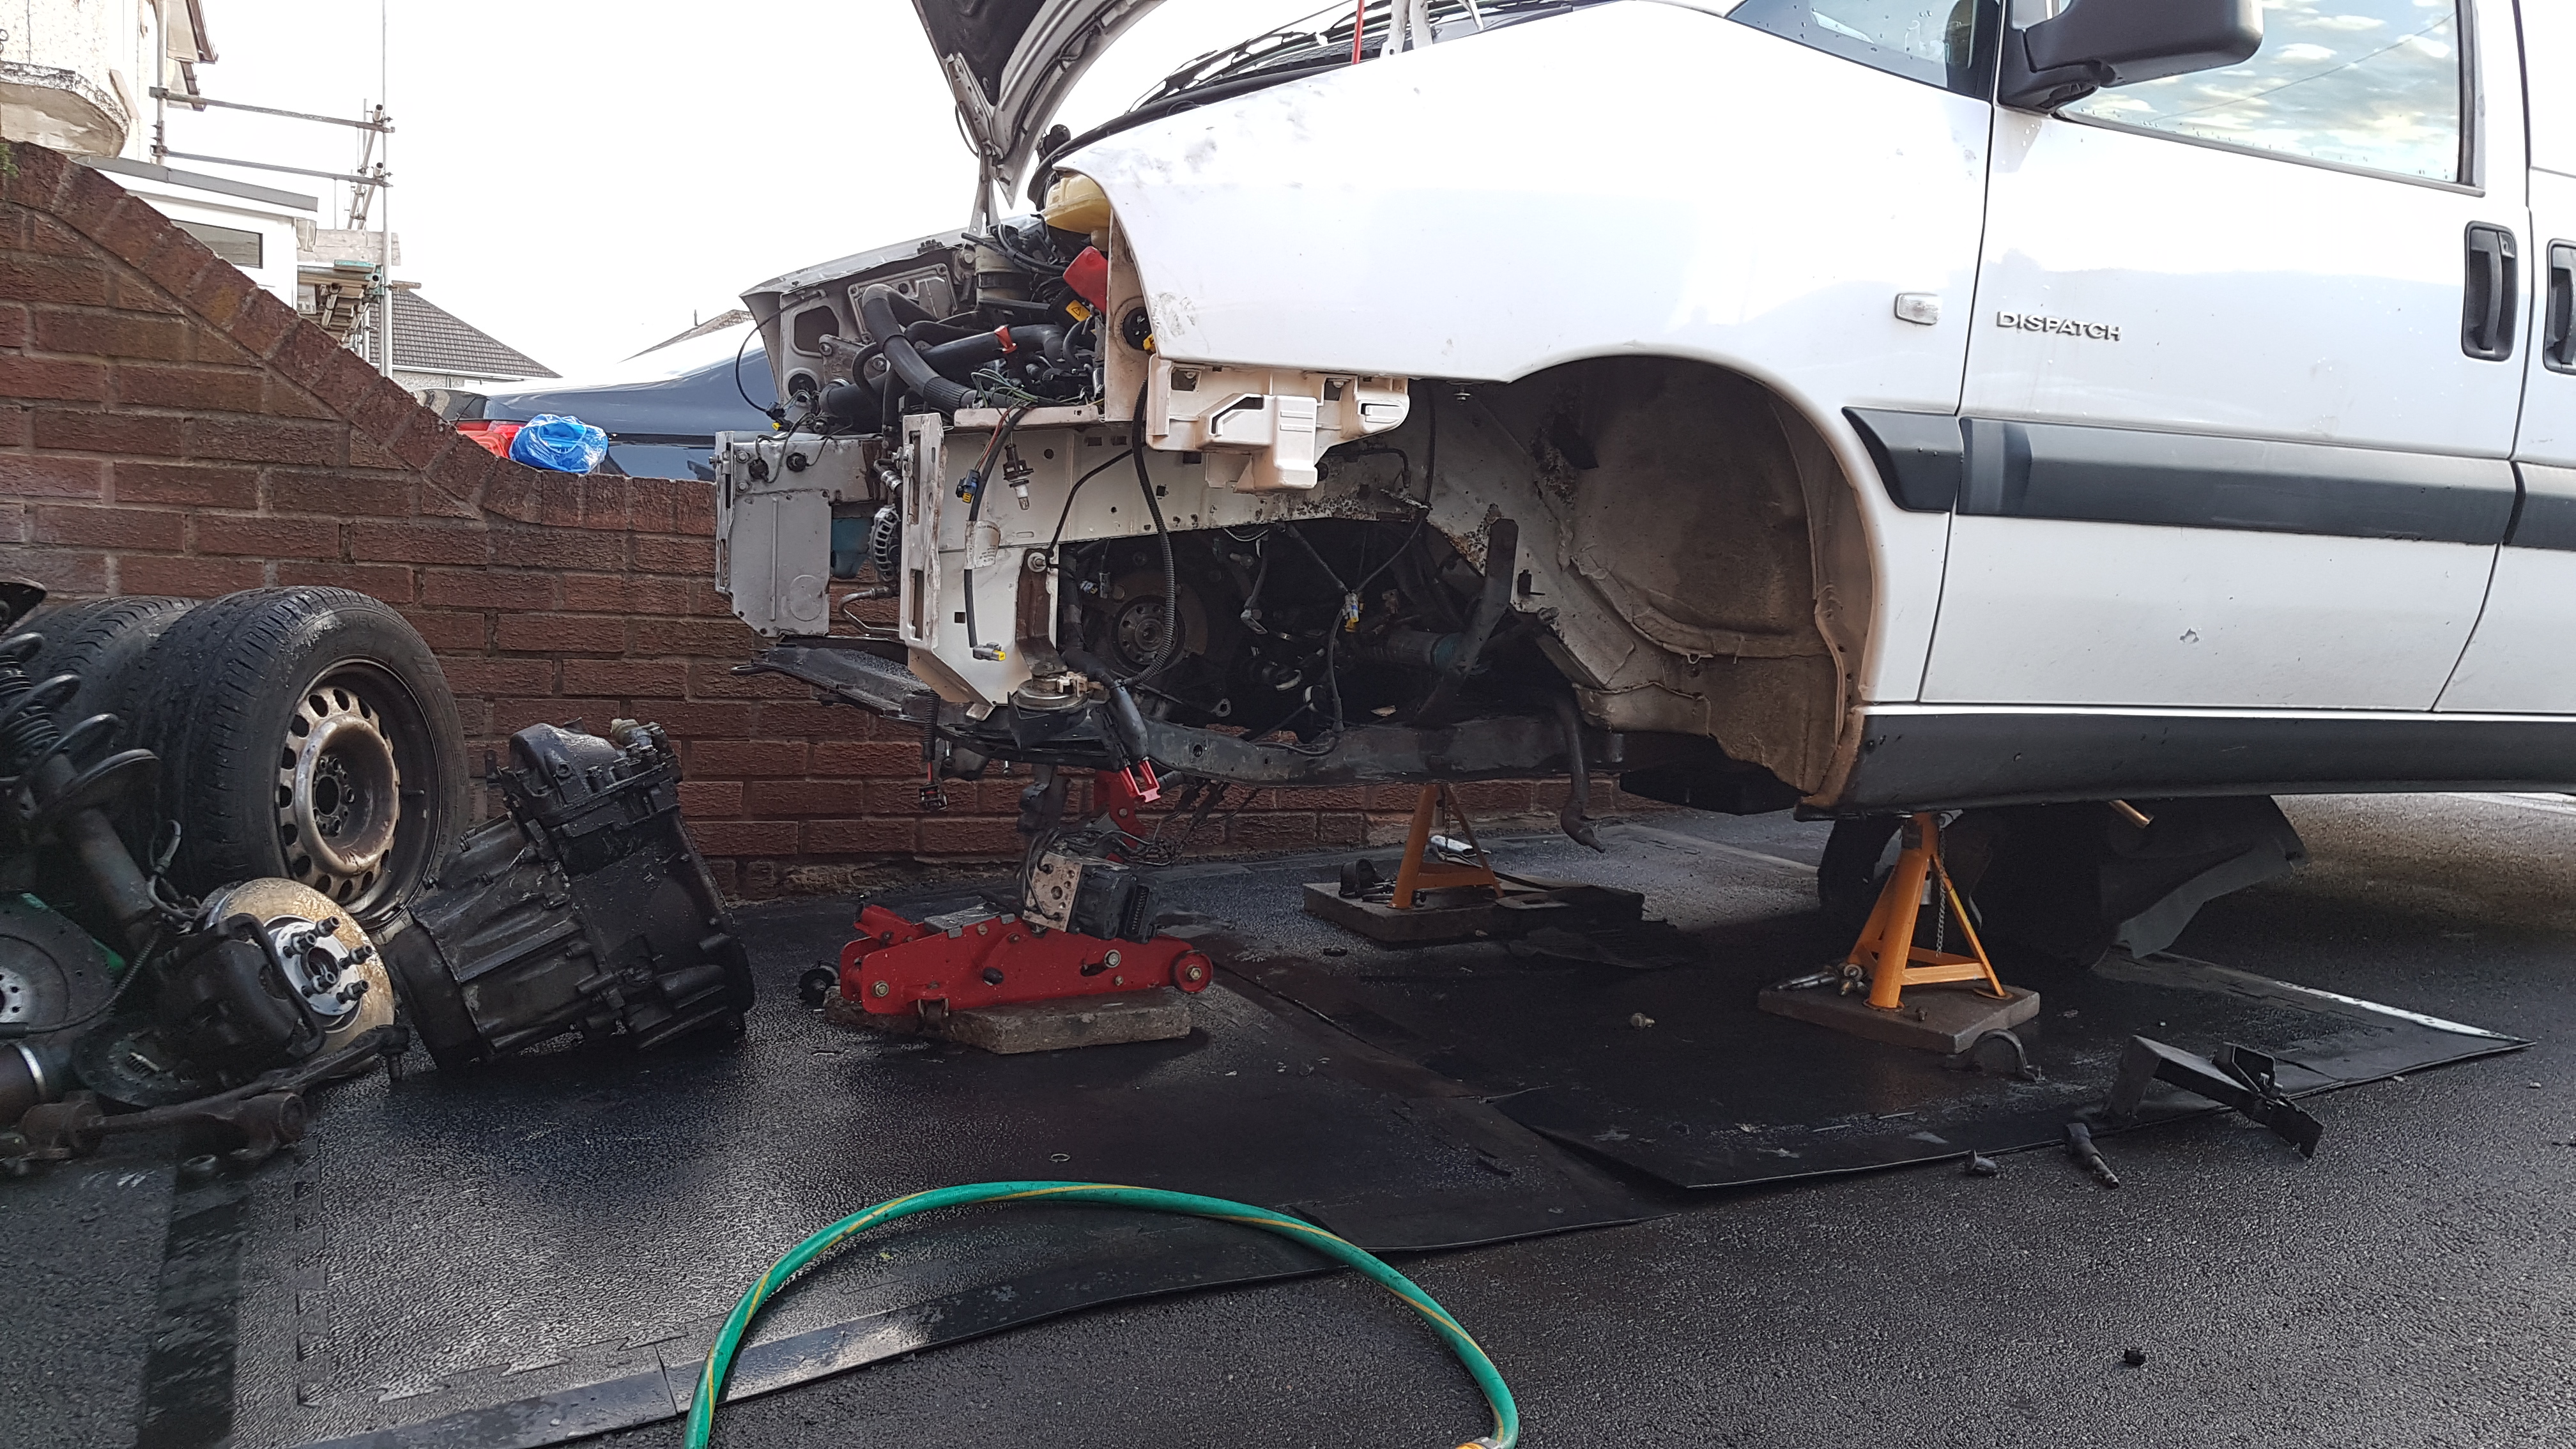
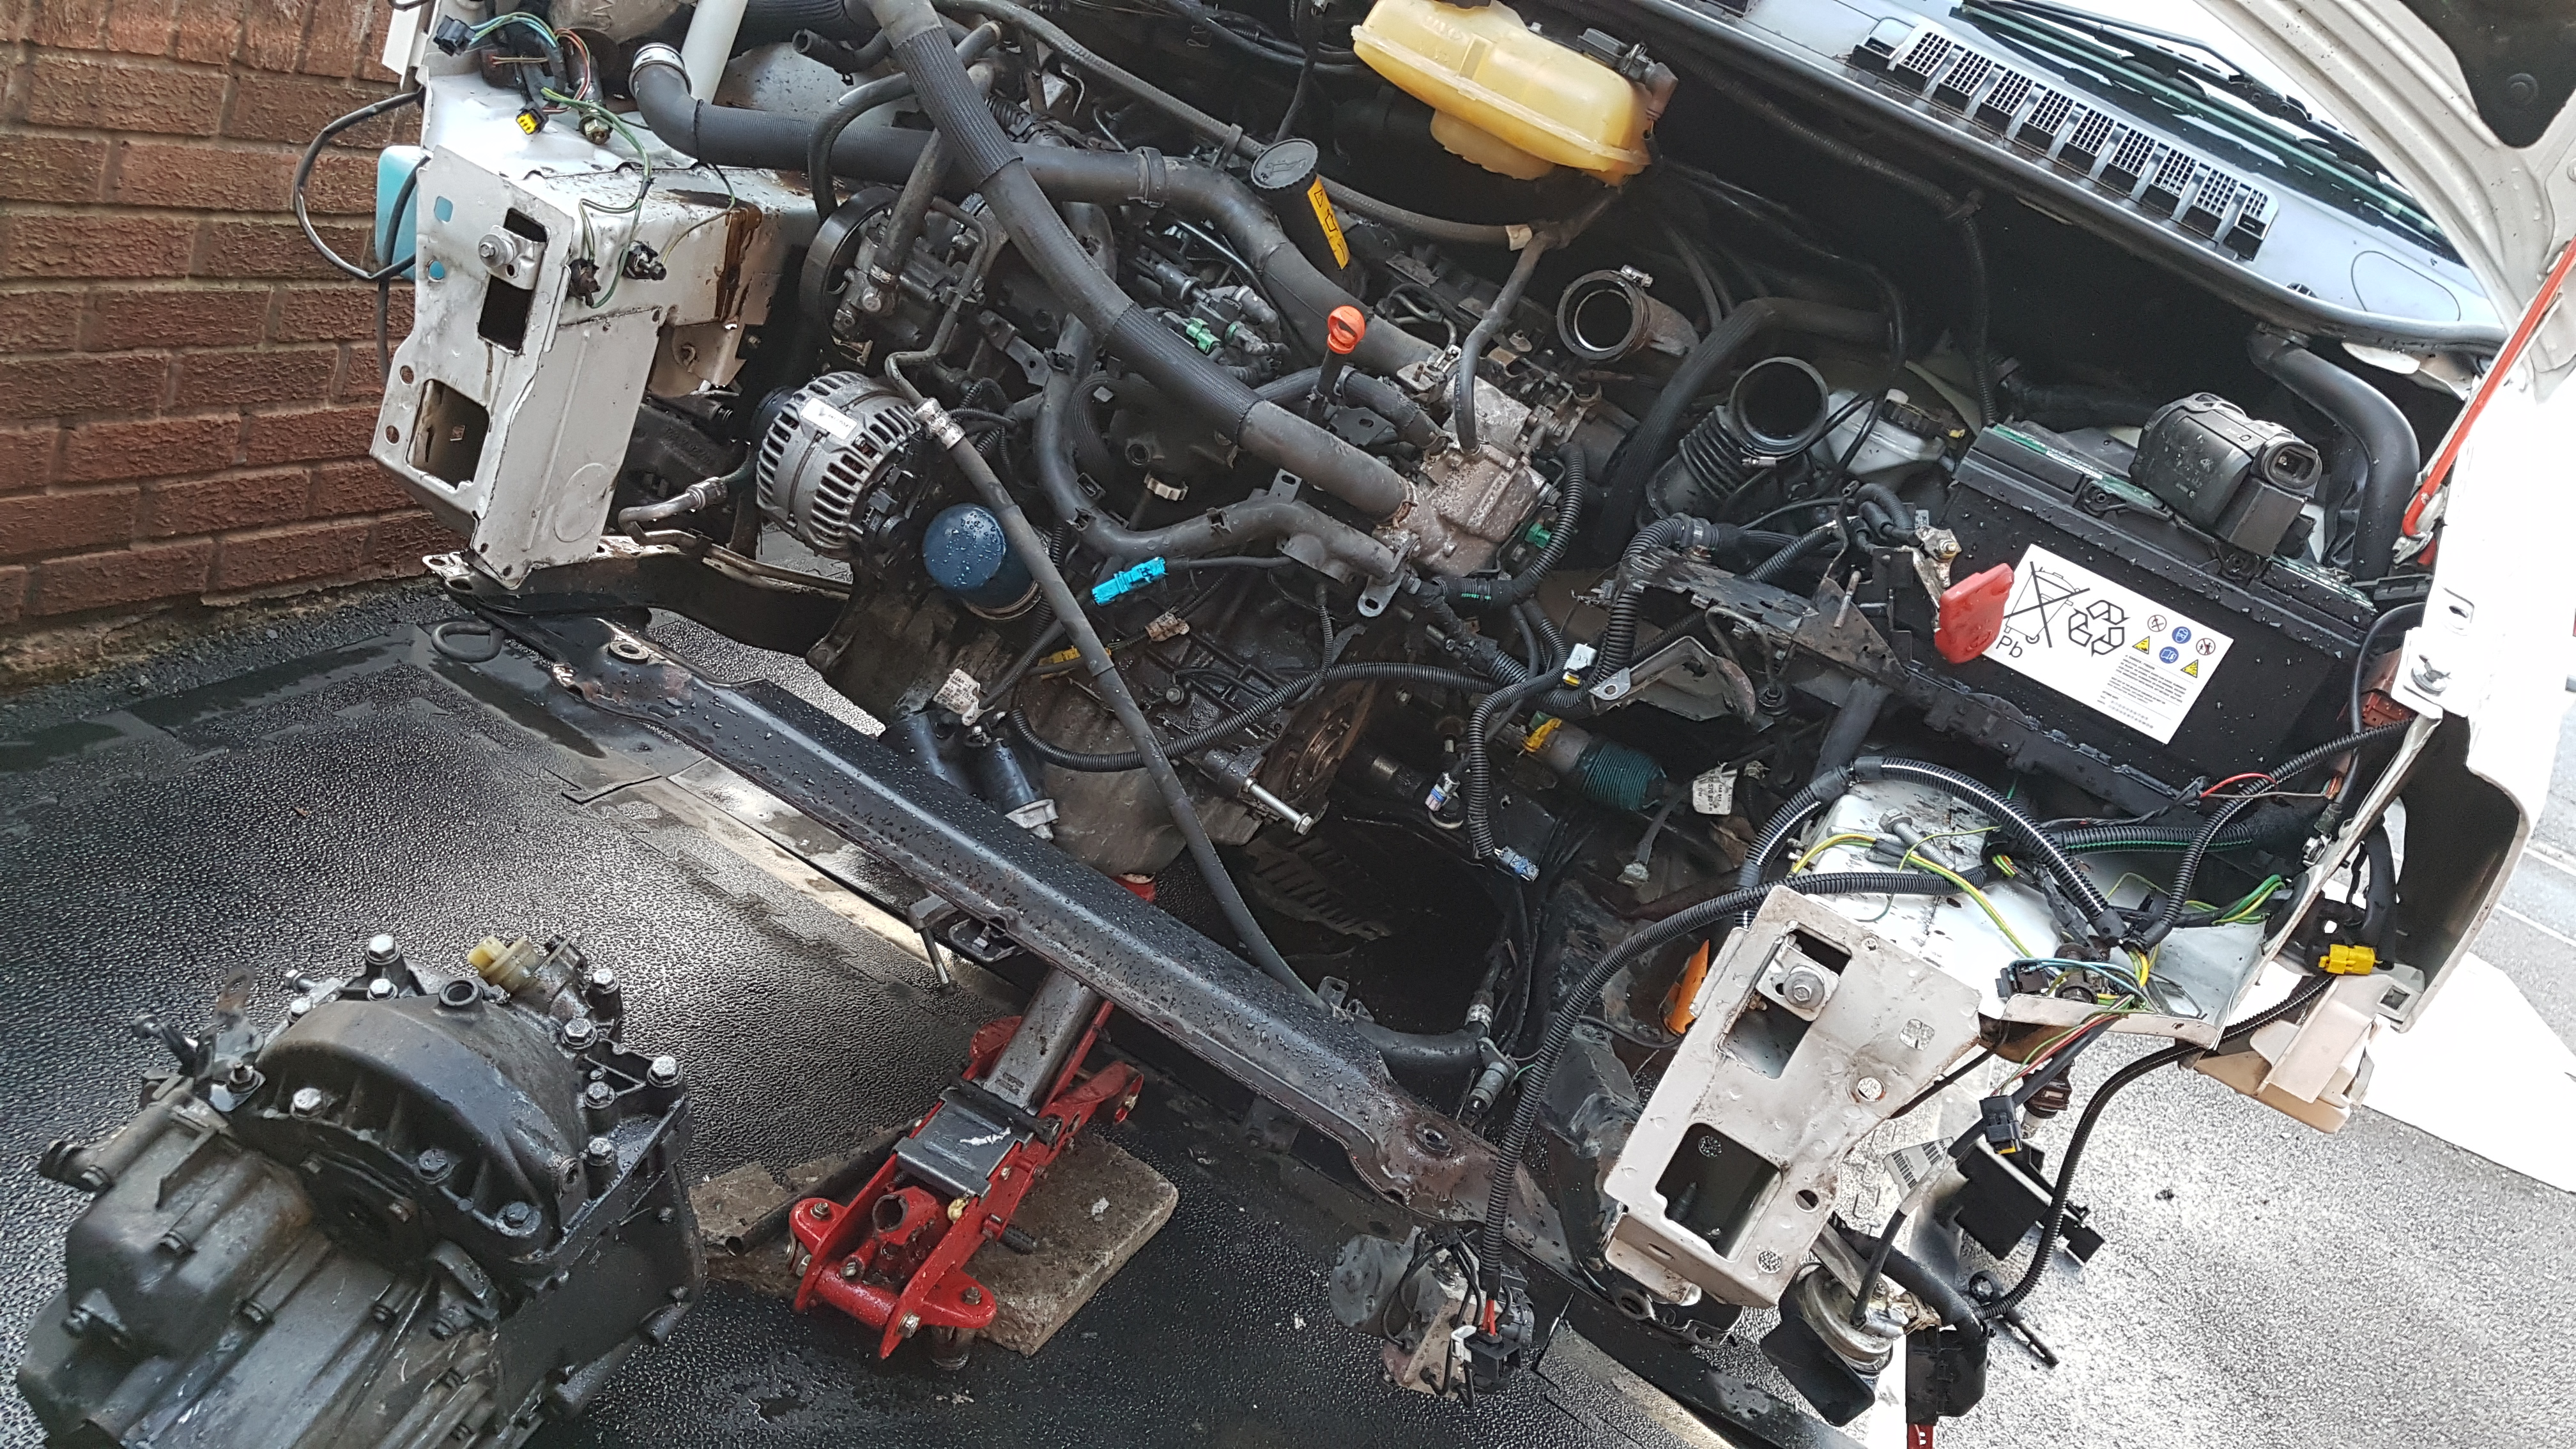
the gearbox somehow fell out. ... ... actually it took quite some getting out. one of the more harder vehicles to remove a gearbox on sadly.
after moving the ABS pump and a few strengthening bars it did come out.
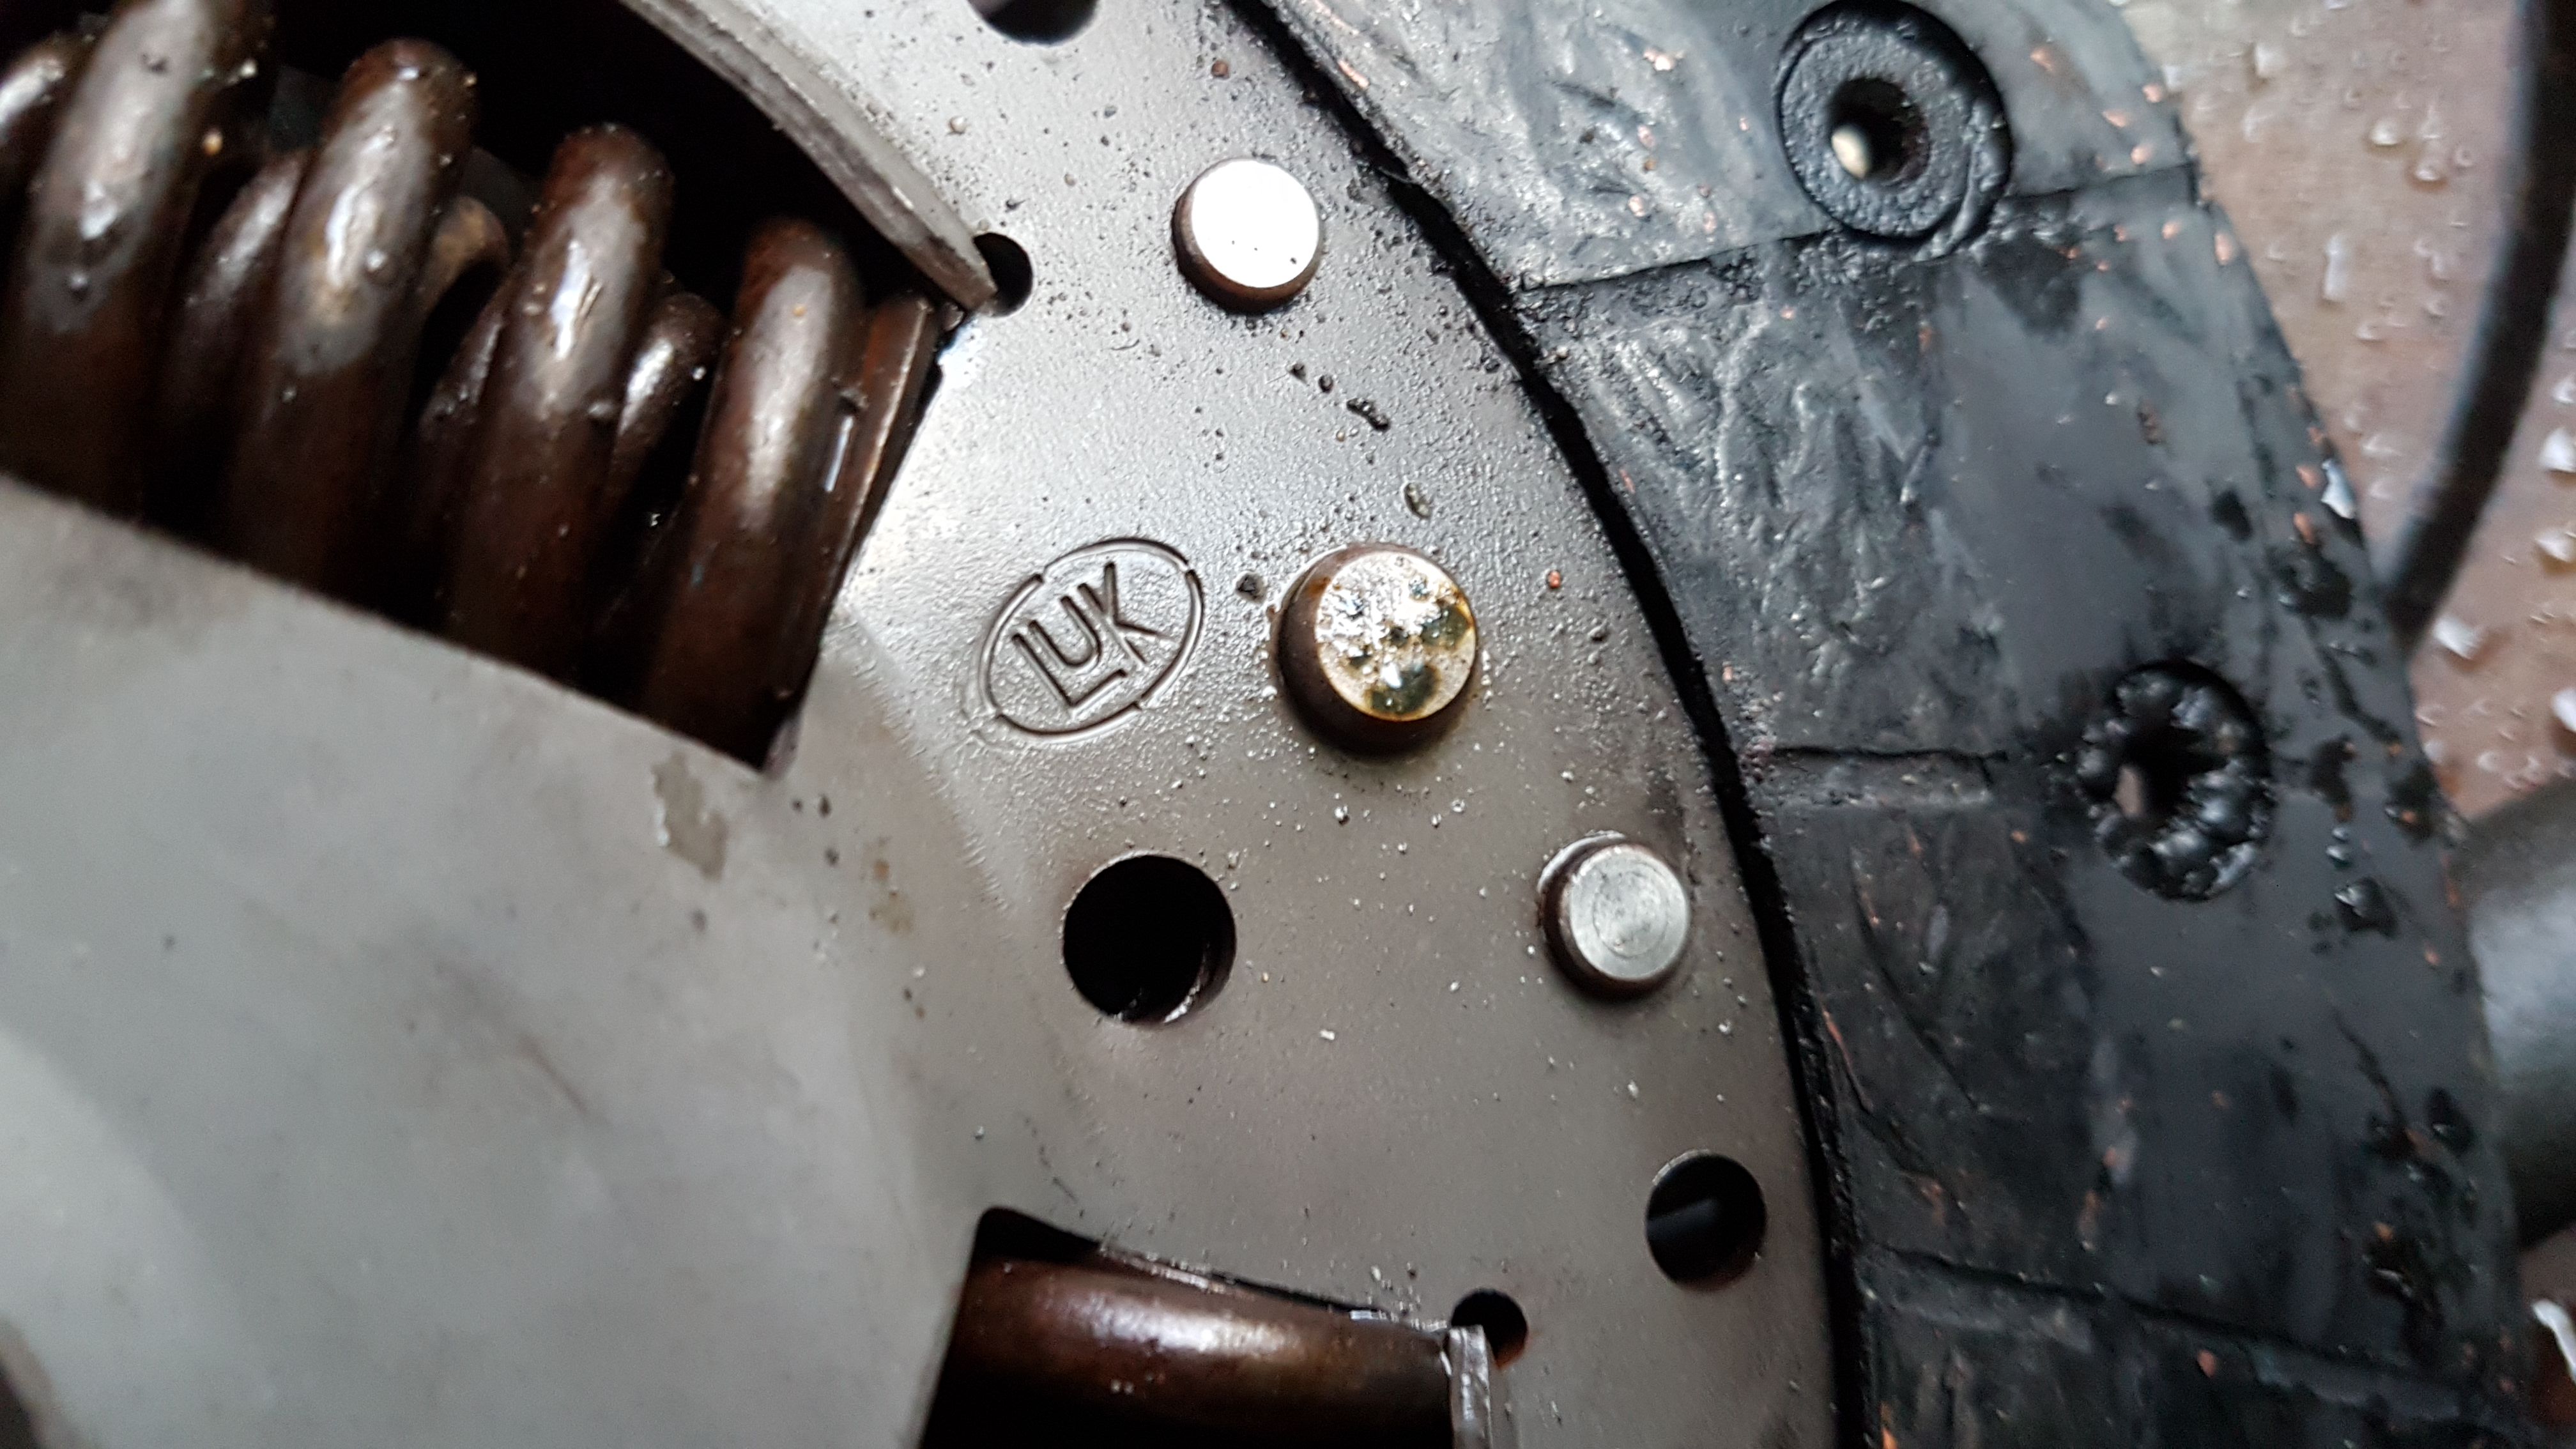
anyhoo the flywheel ended up being a solid flywheel so i had to return my clutch kit and get a different one.
also the crank shaft seal was weeping so i replaced that too. on the HDI the crank shaft oil seal size is : 90-7-110 with a Left-hand twist.
well used...
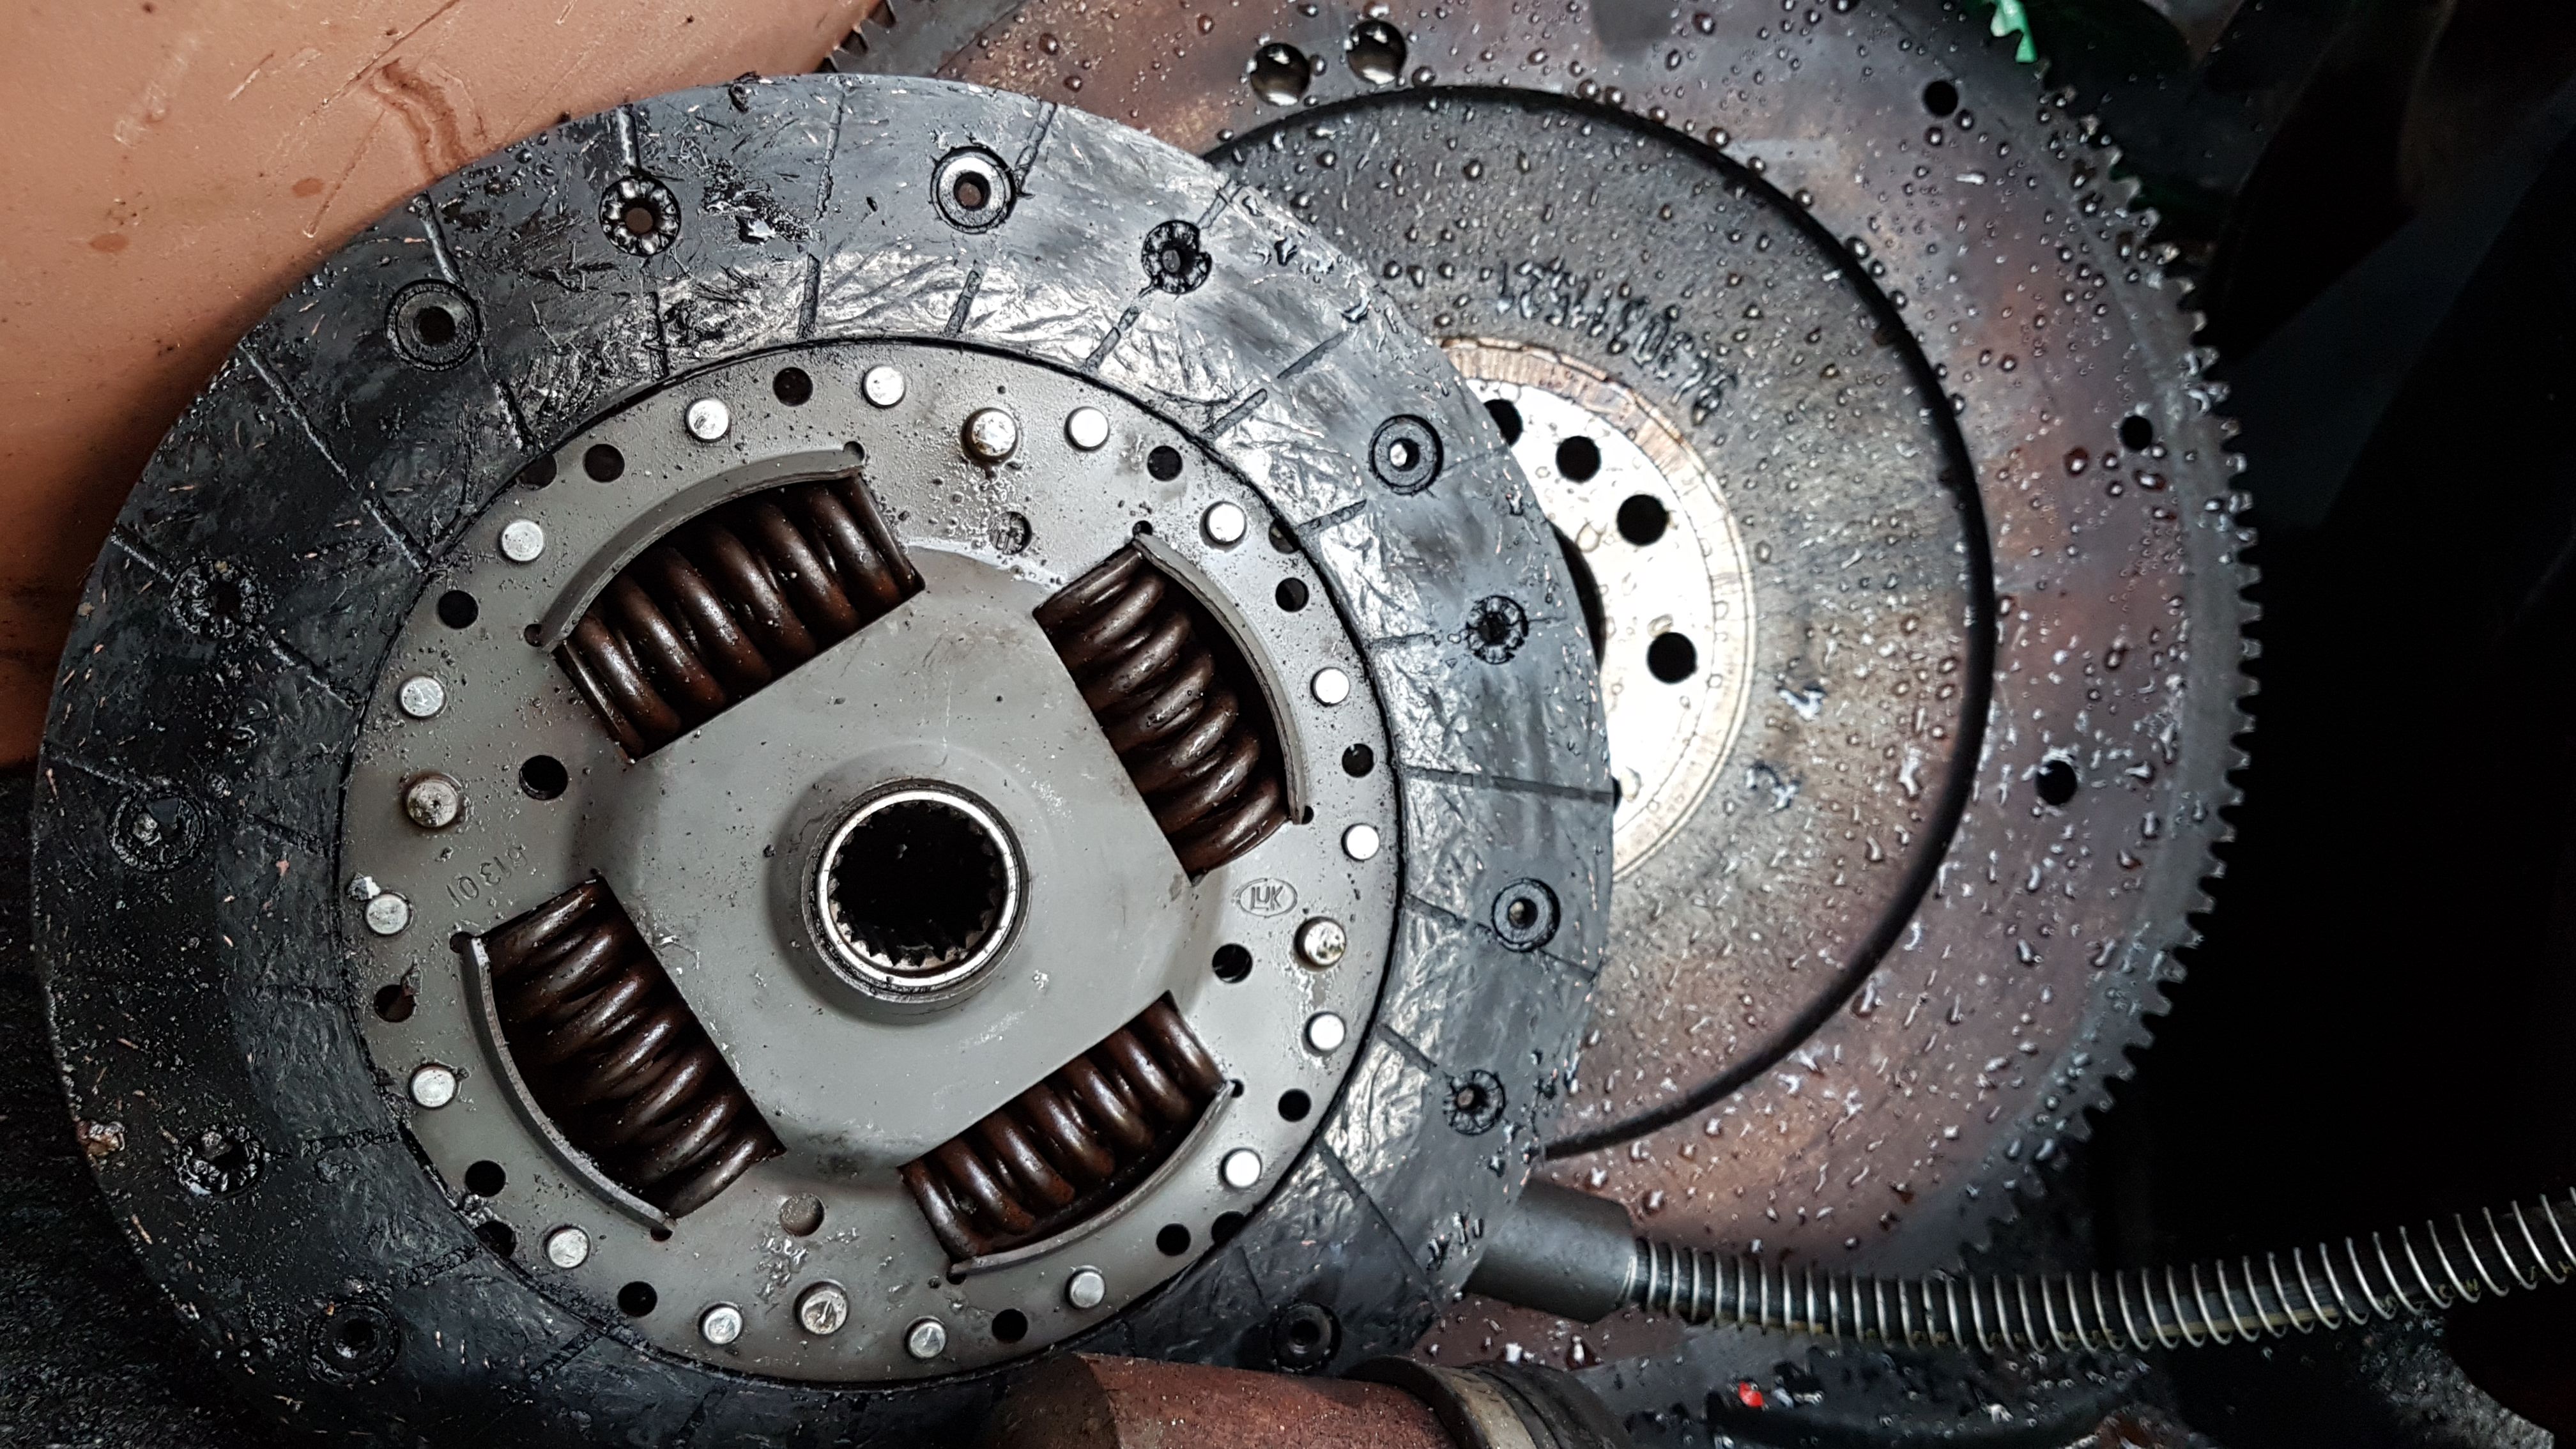
still life in it, but the spring plate had gotten very hot and warped the spring tips.
while i was waiting for the parts to come through the post i decided to do some cleaning up. de-rusting and painting.
after a jet wash i was left with this.. nice
and when i removed the strut i found this.. nasty!
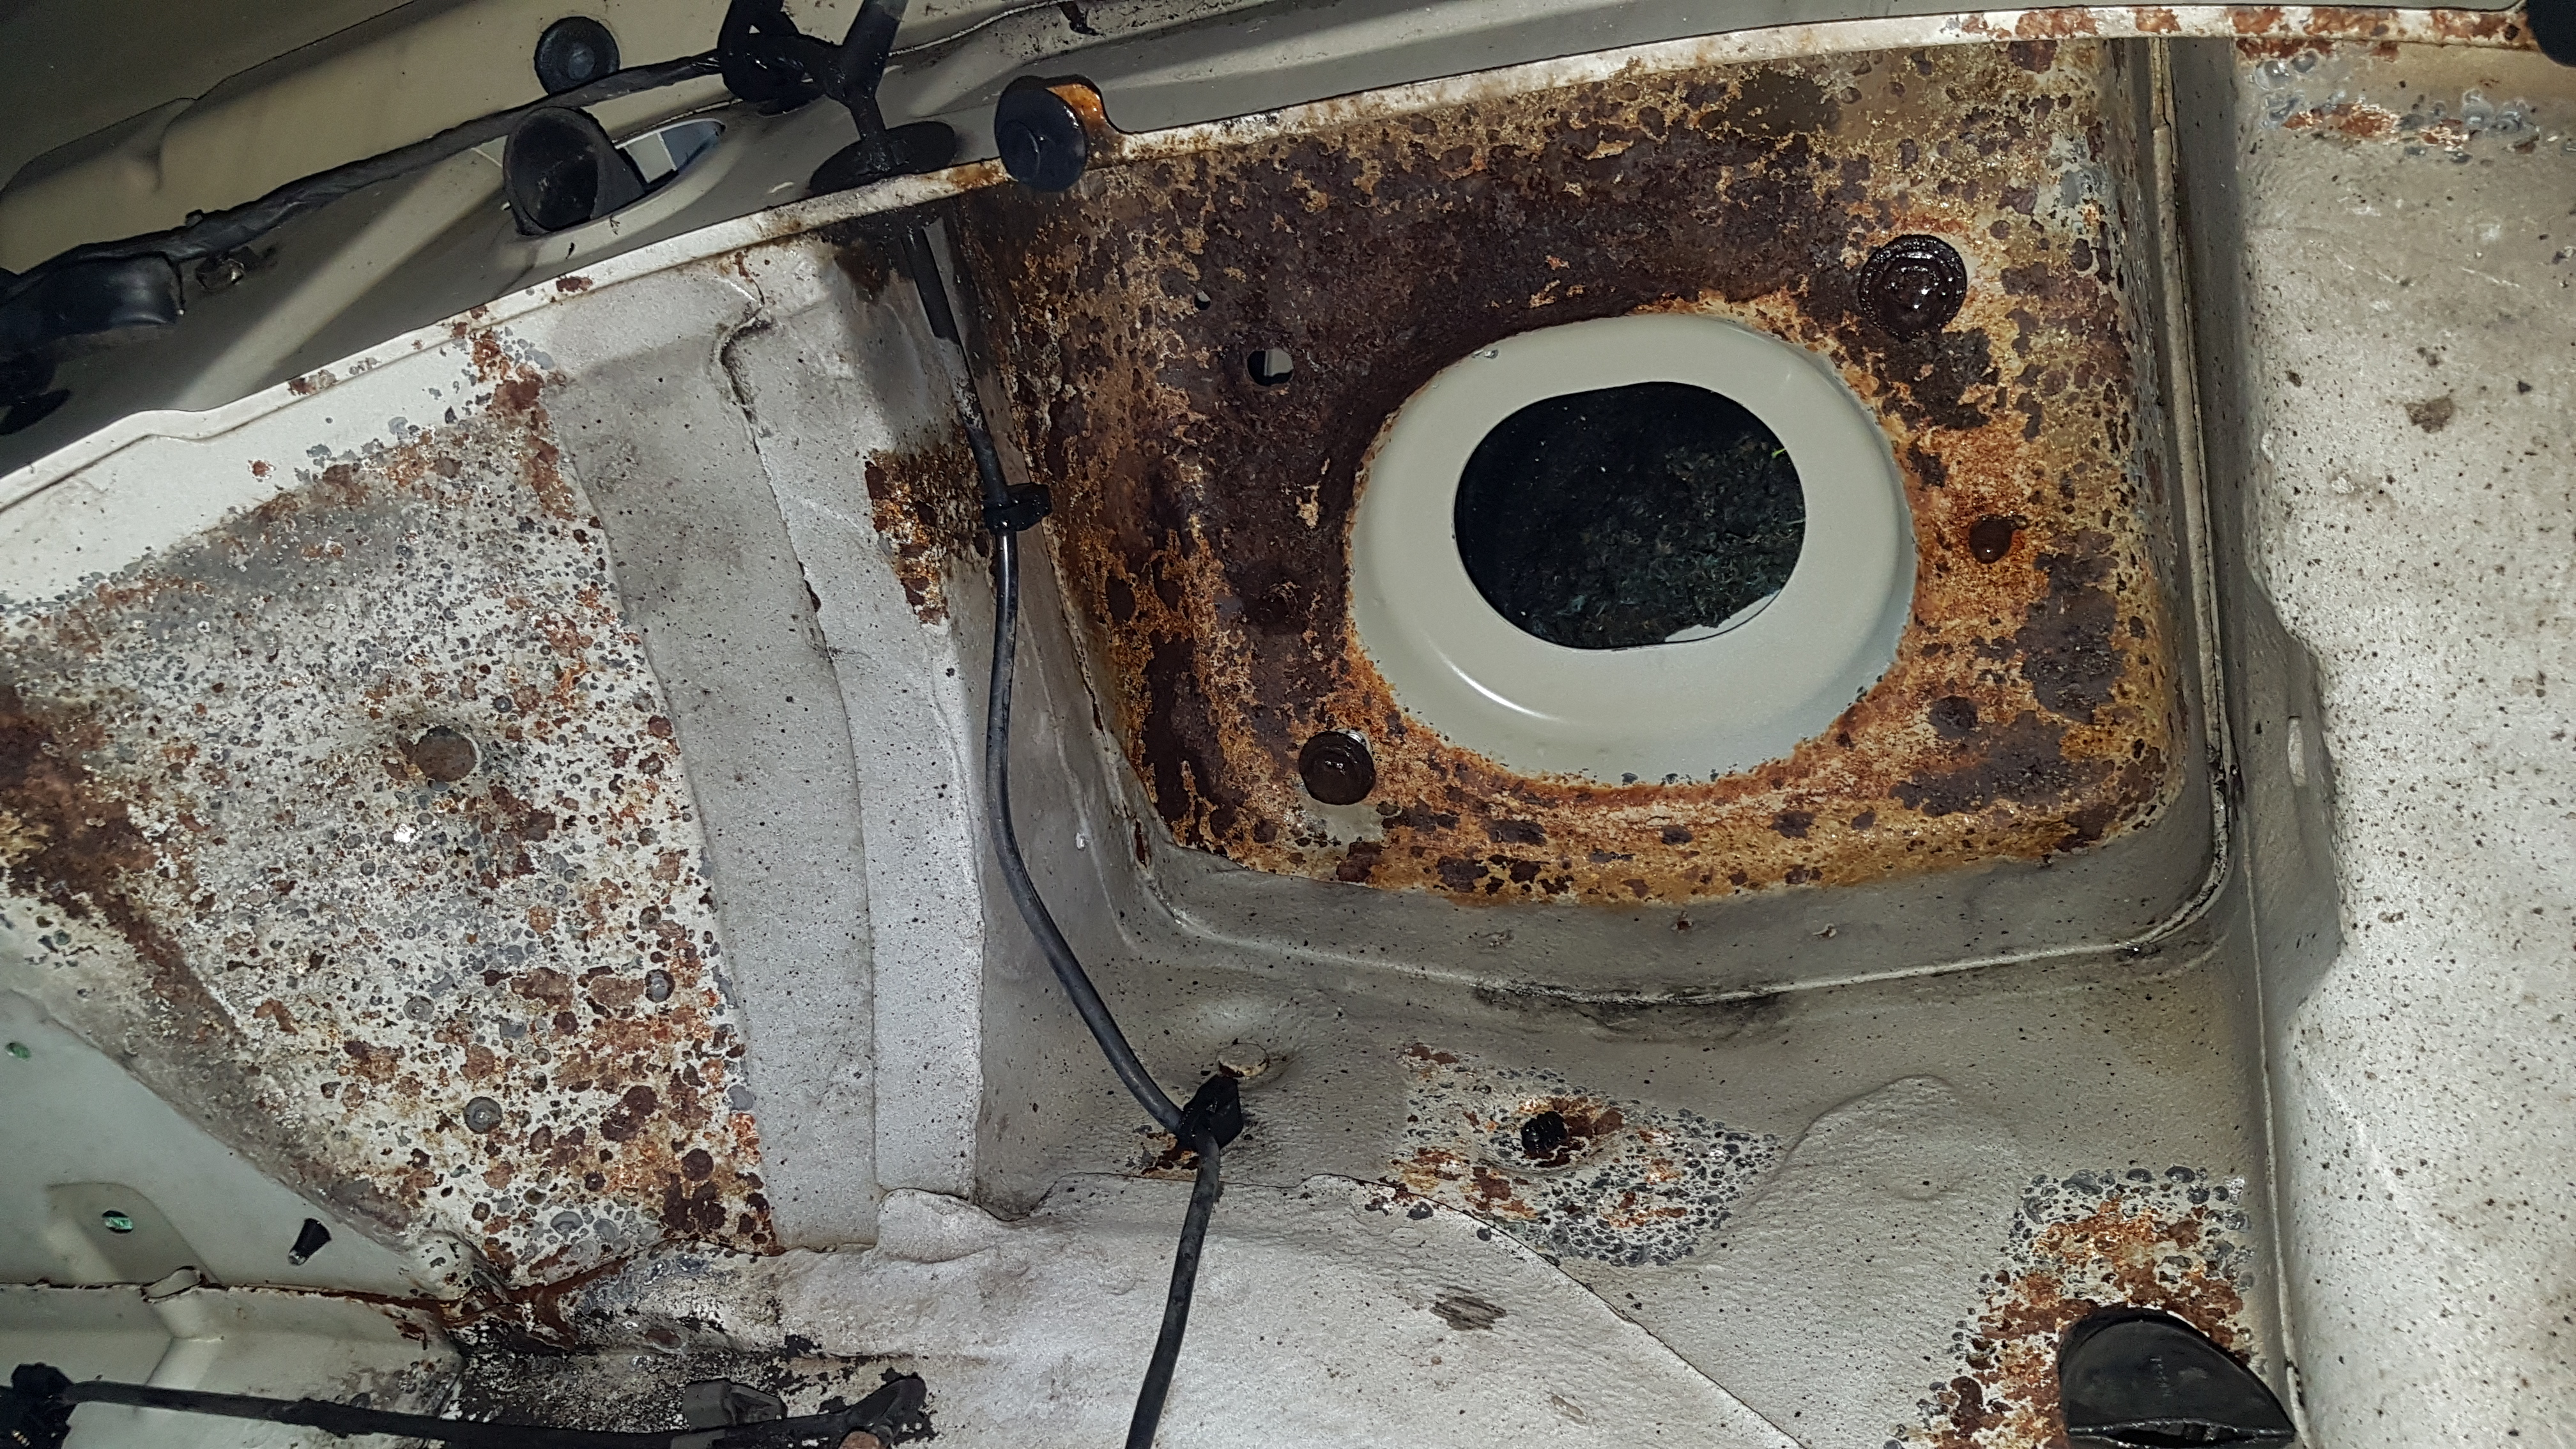
thankfully not eaten through!
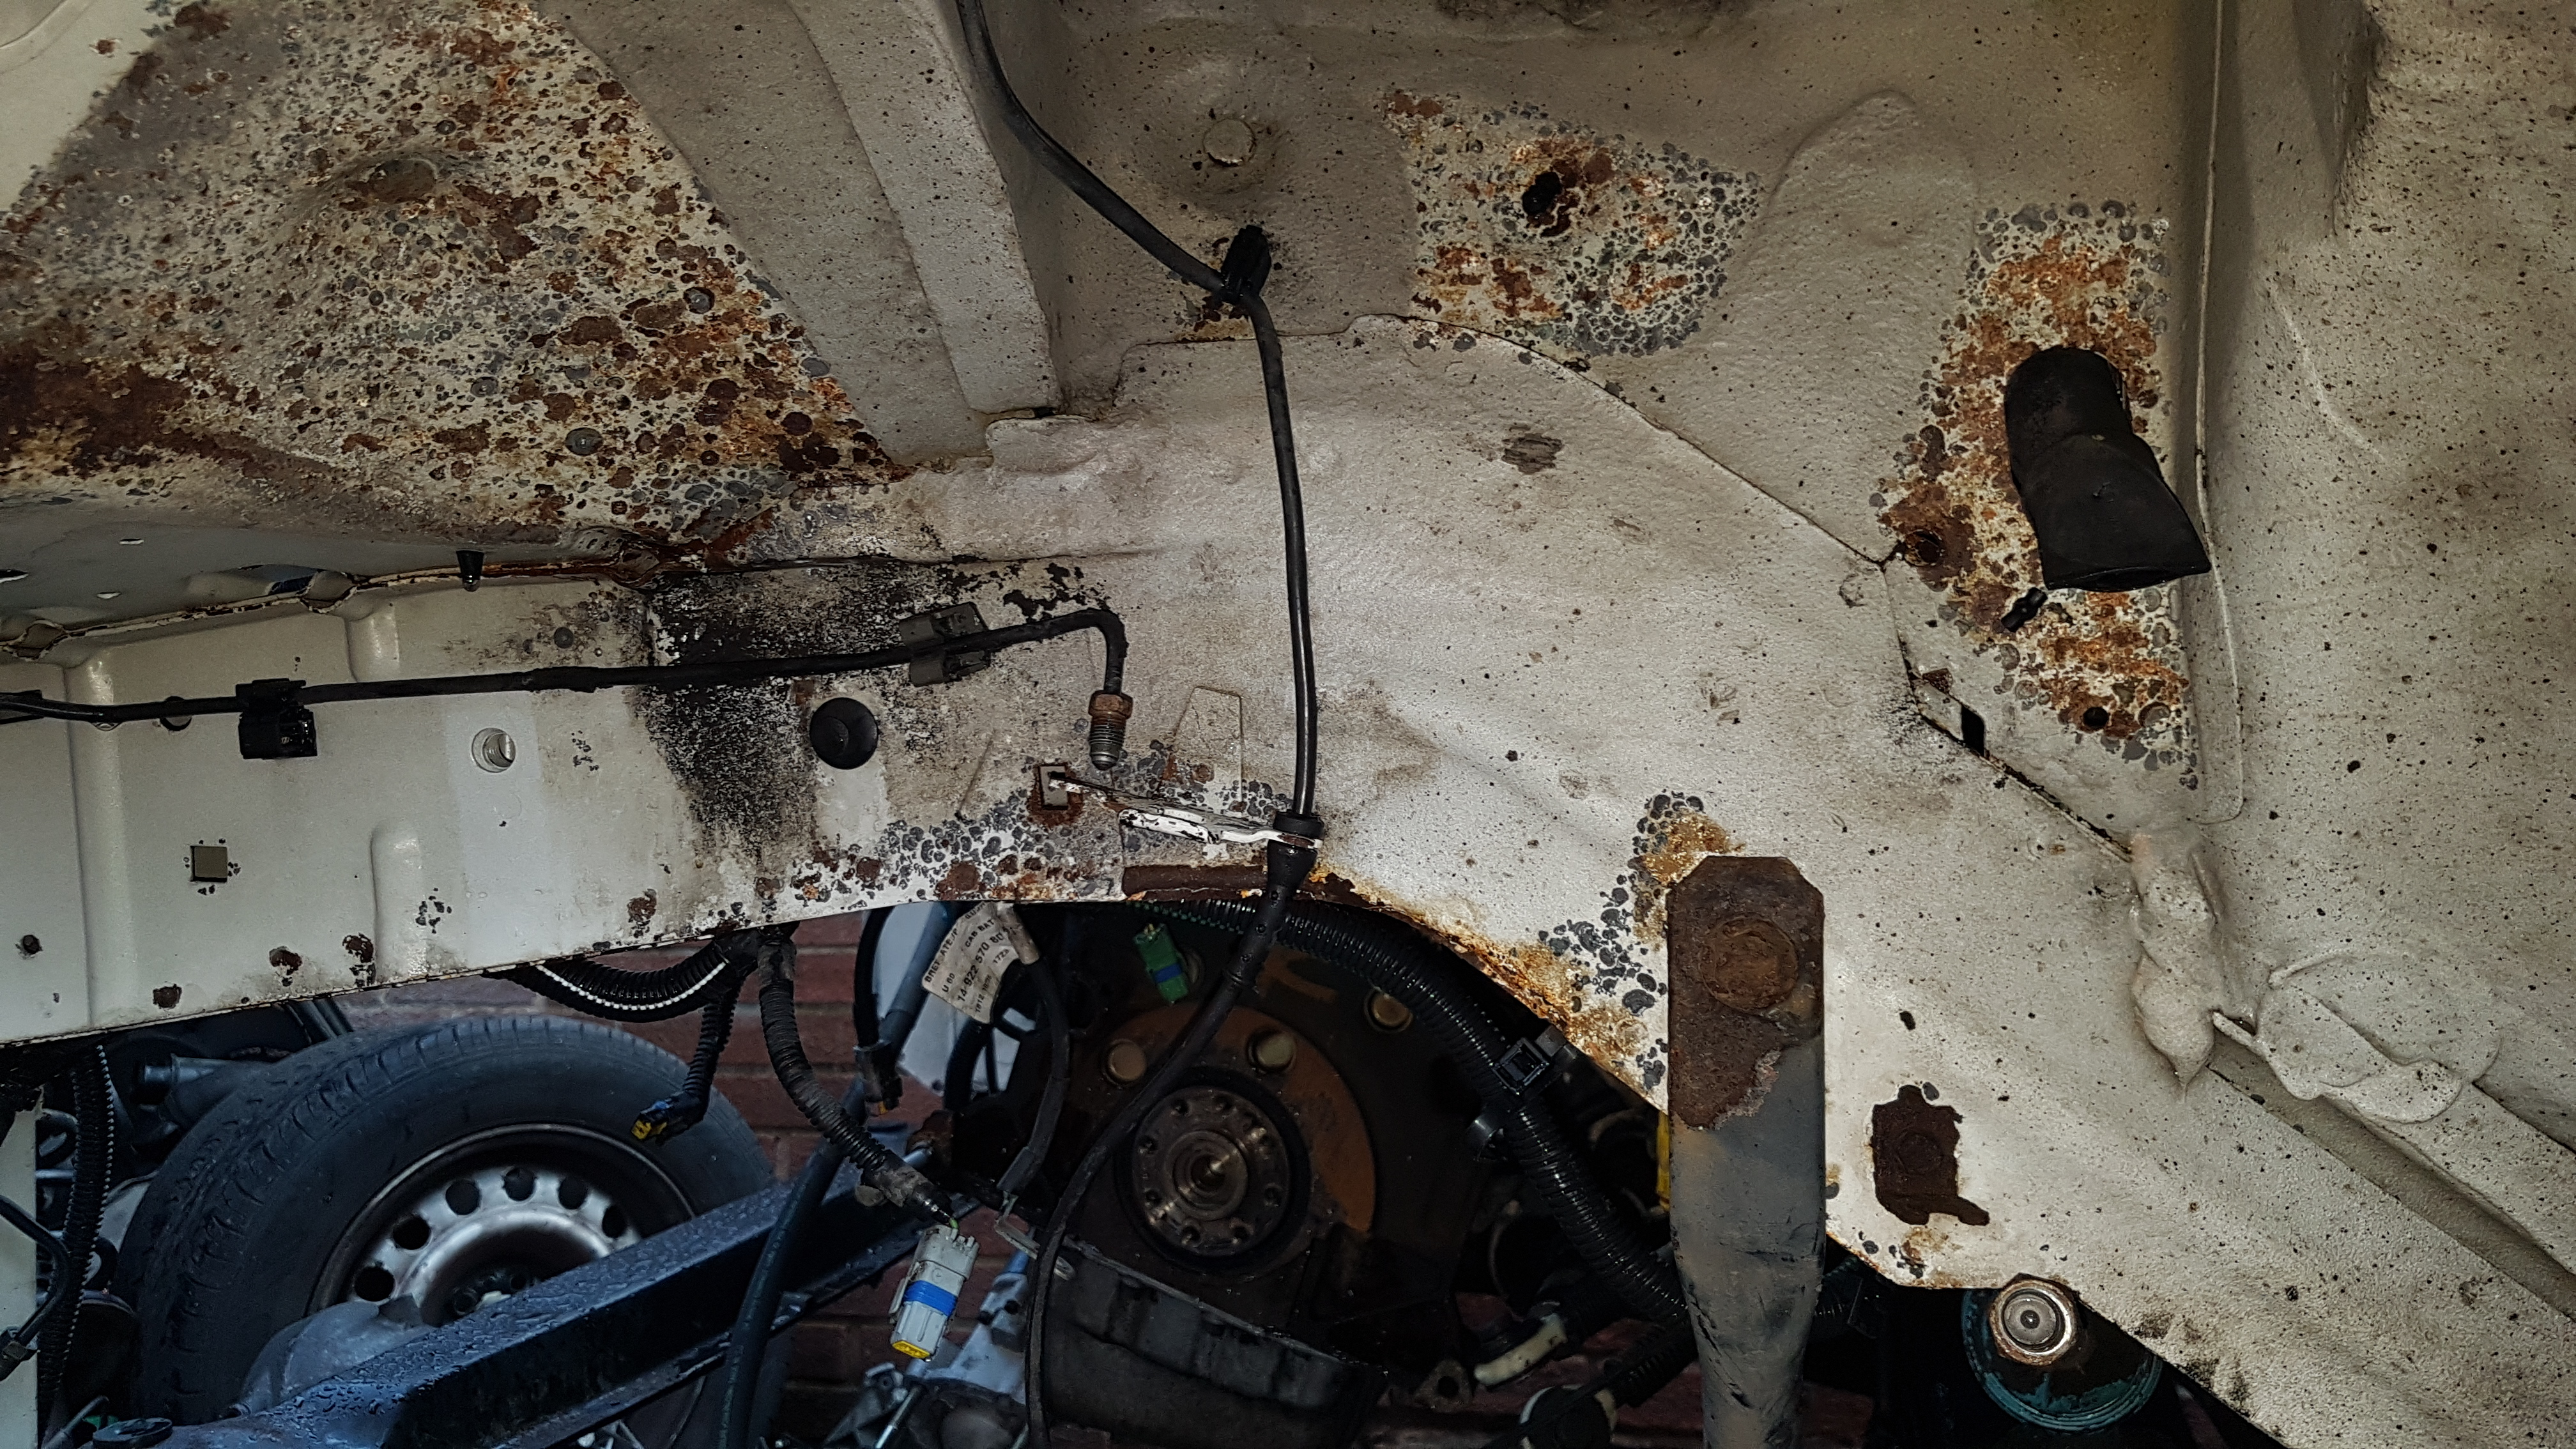
and if you look here, this is on the inside of the engine bay on the back of the suspension strut location.

just reclaiming sheared off bolts in the best way ever.. Fire!
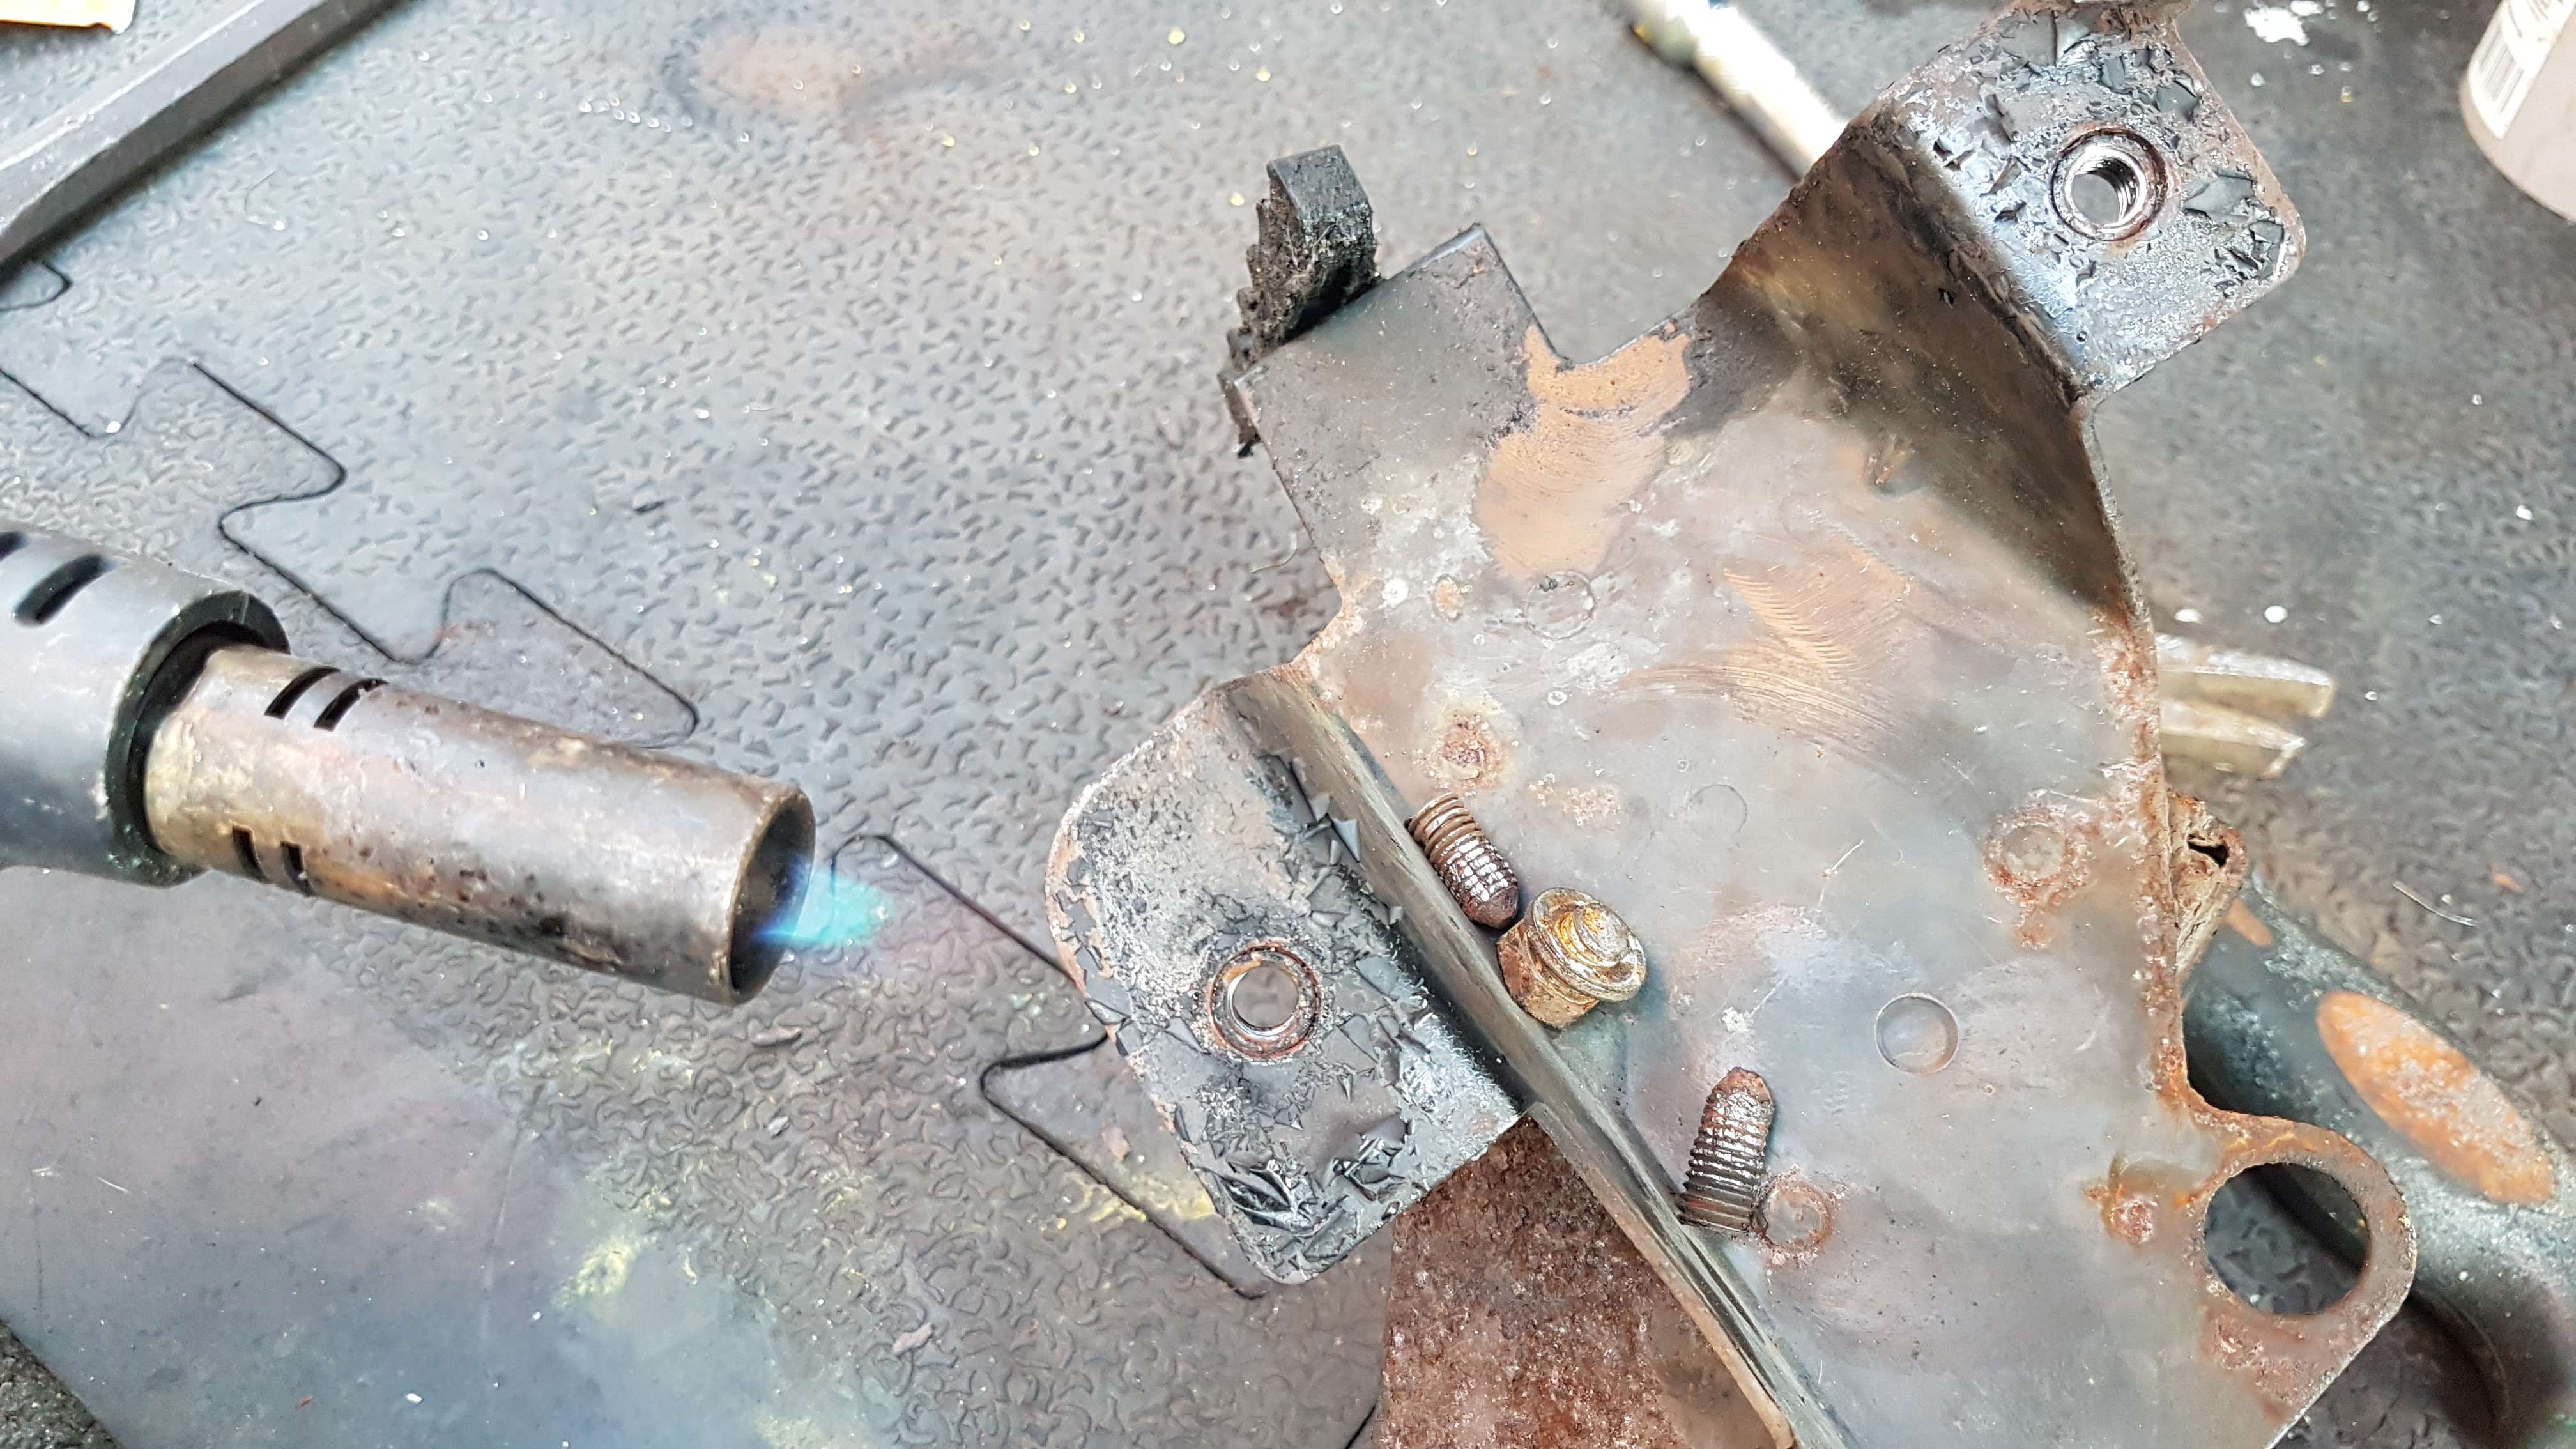
seen these things in the scrap yard with more left on them.. geez..
just uploading a video now.. all 4K stuff so rendering and uploading takes a while!
Edit: heres the video!
#440 Re: General Discussion » Mystery Connector » 2020-06-24 00:38:42
Hmm, it's only two wires - yellow and white
hmm mine is 4. i do however have the mk2 (facelift) van.
#441 Re: Camper Conversions » JohnDragonMan's Dispatch Camper Conversion » 2020-06-22 02:11:00
clutch change time!
yes thats me!

so had to drain the gearbox oil, surprisingly clean looking! magnetic drain plug also is rather clean for 100k miles. wonder if its been changed before?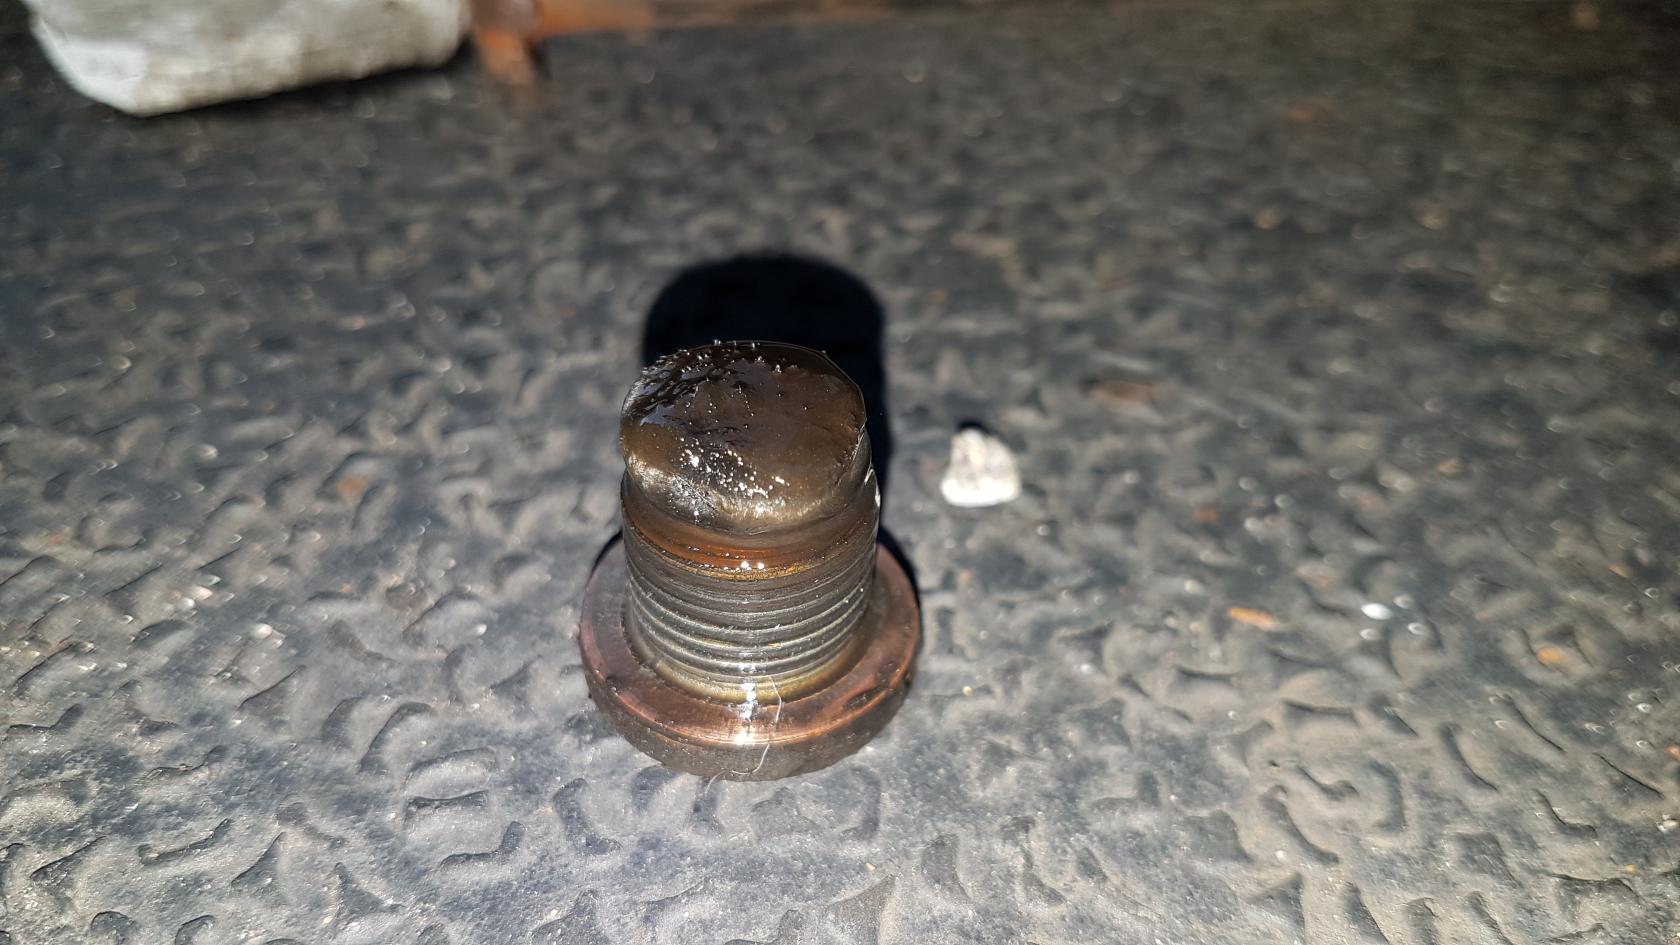

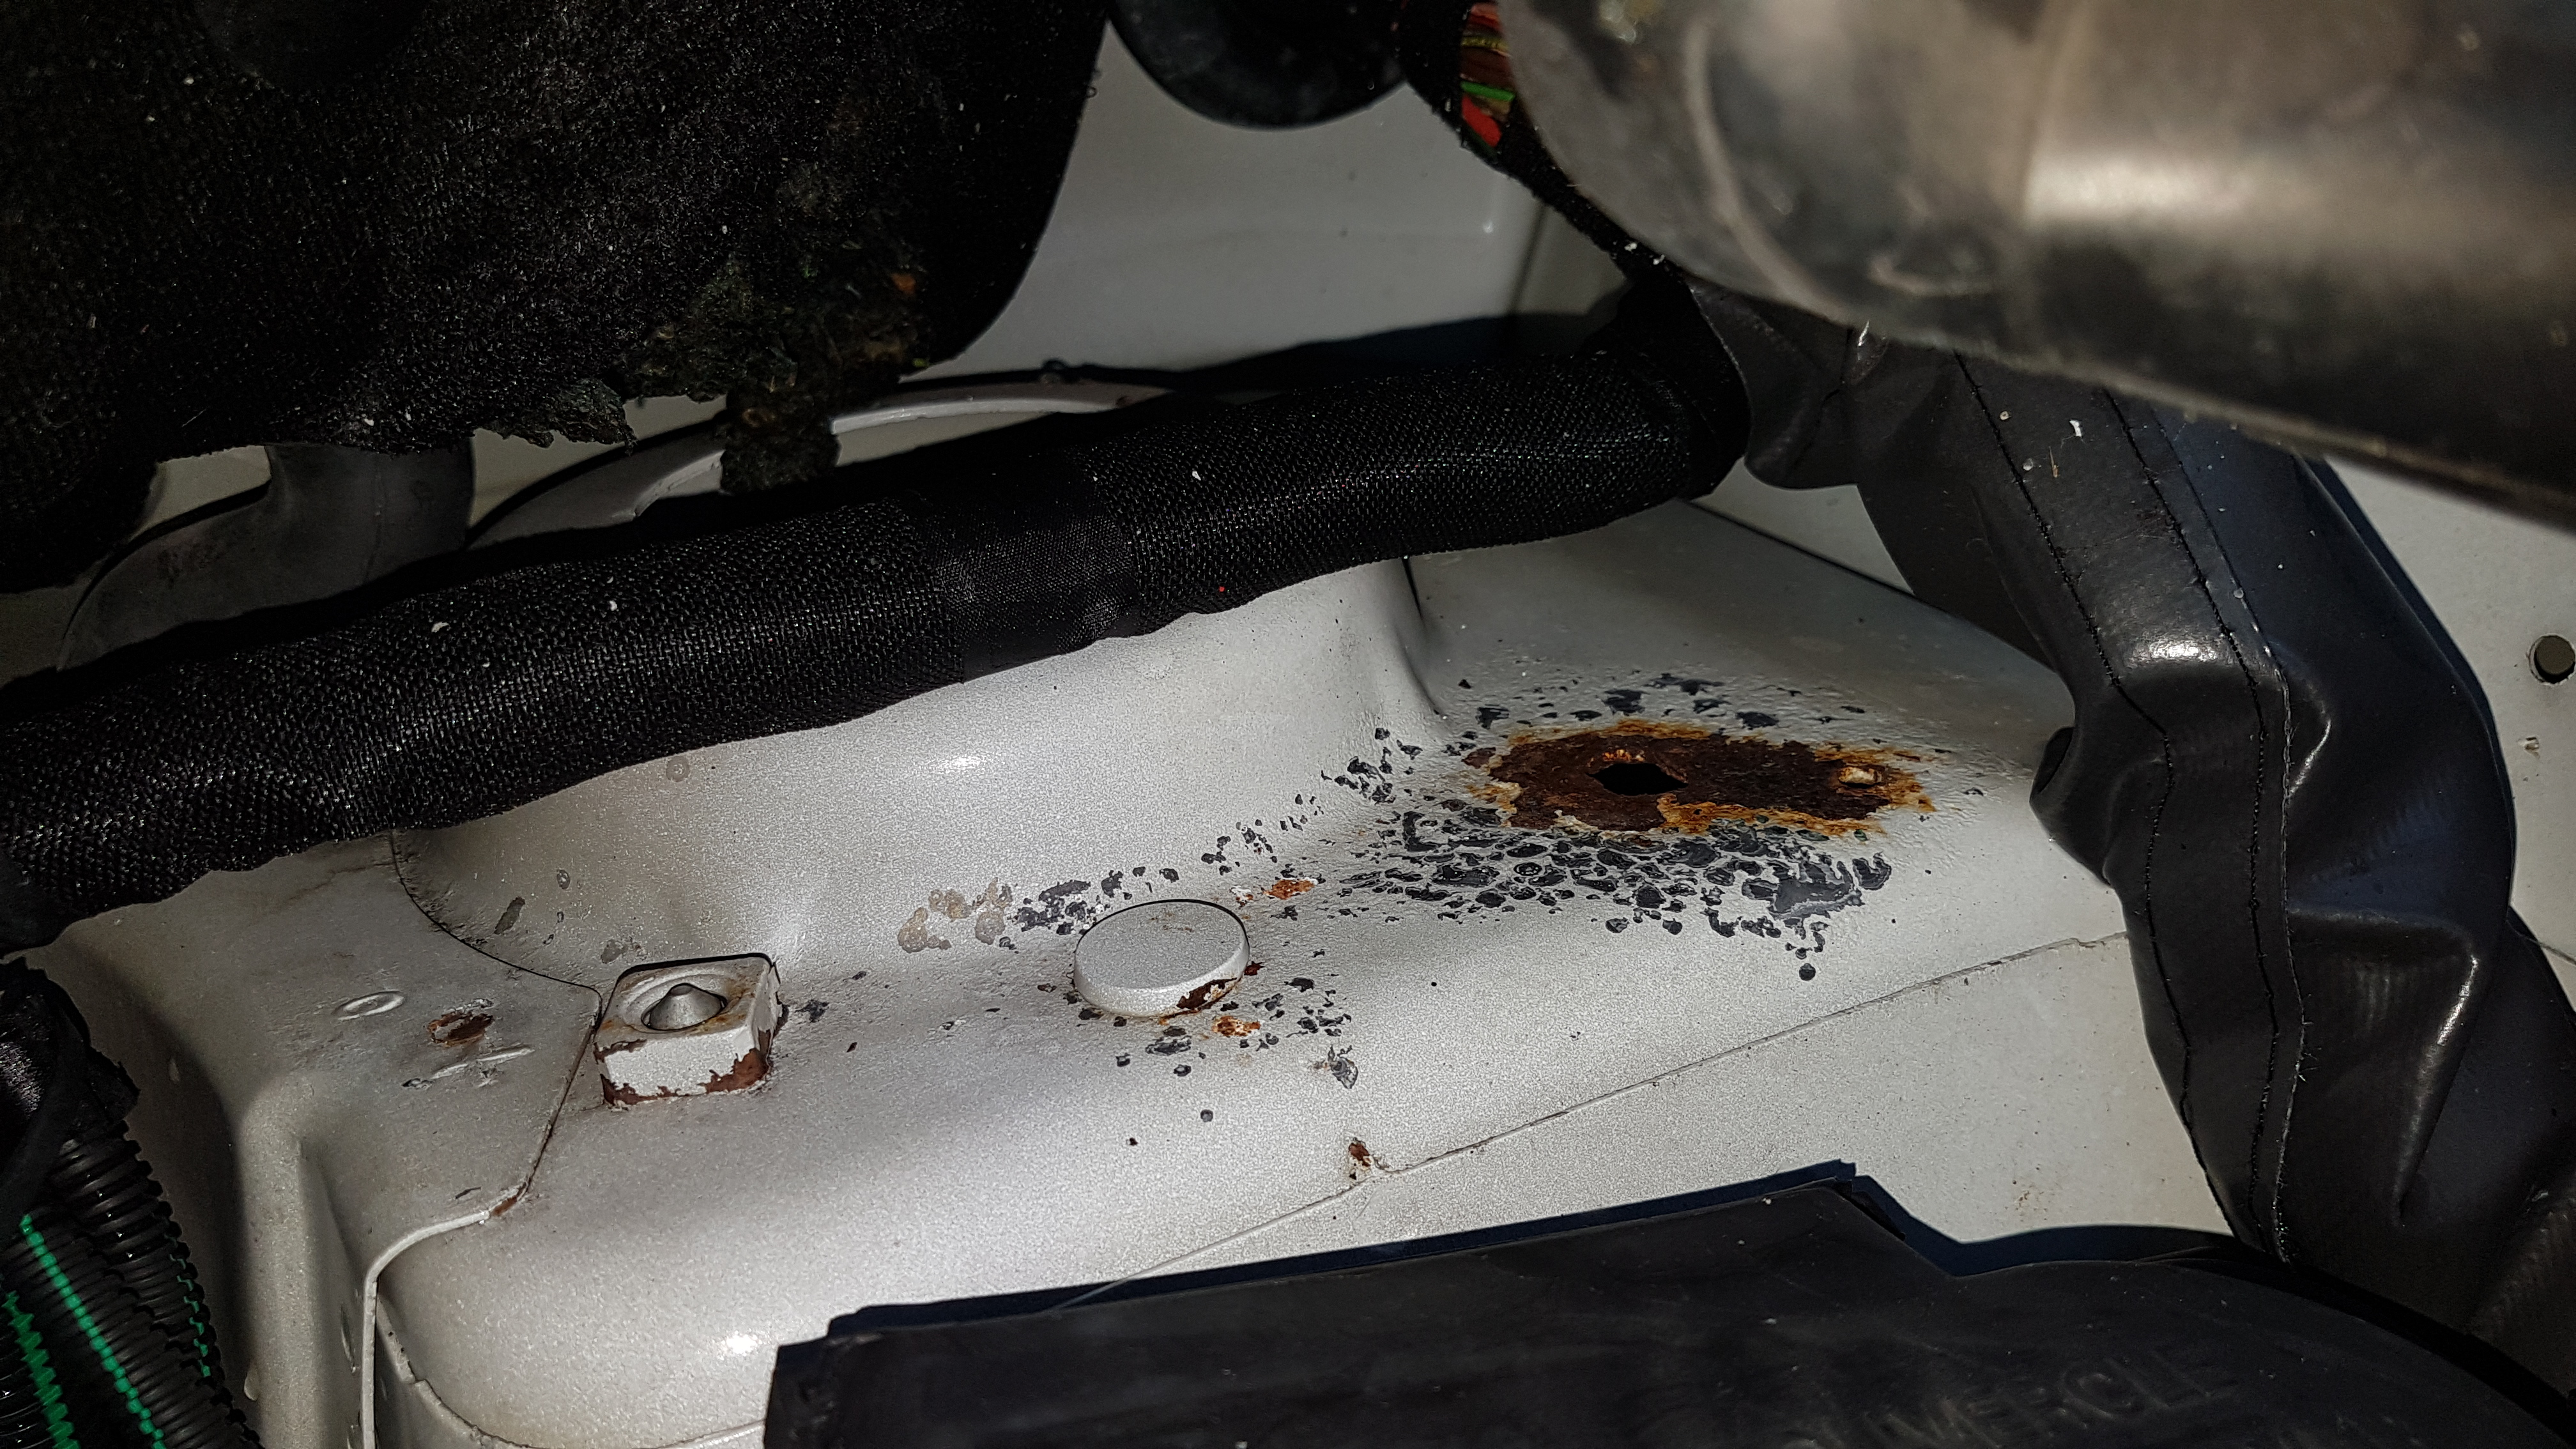
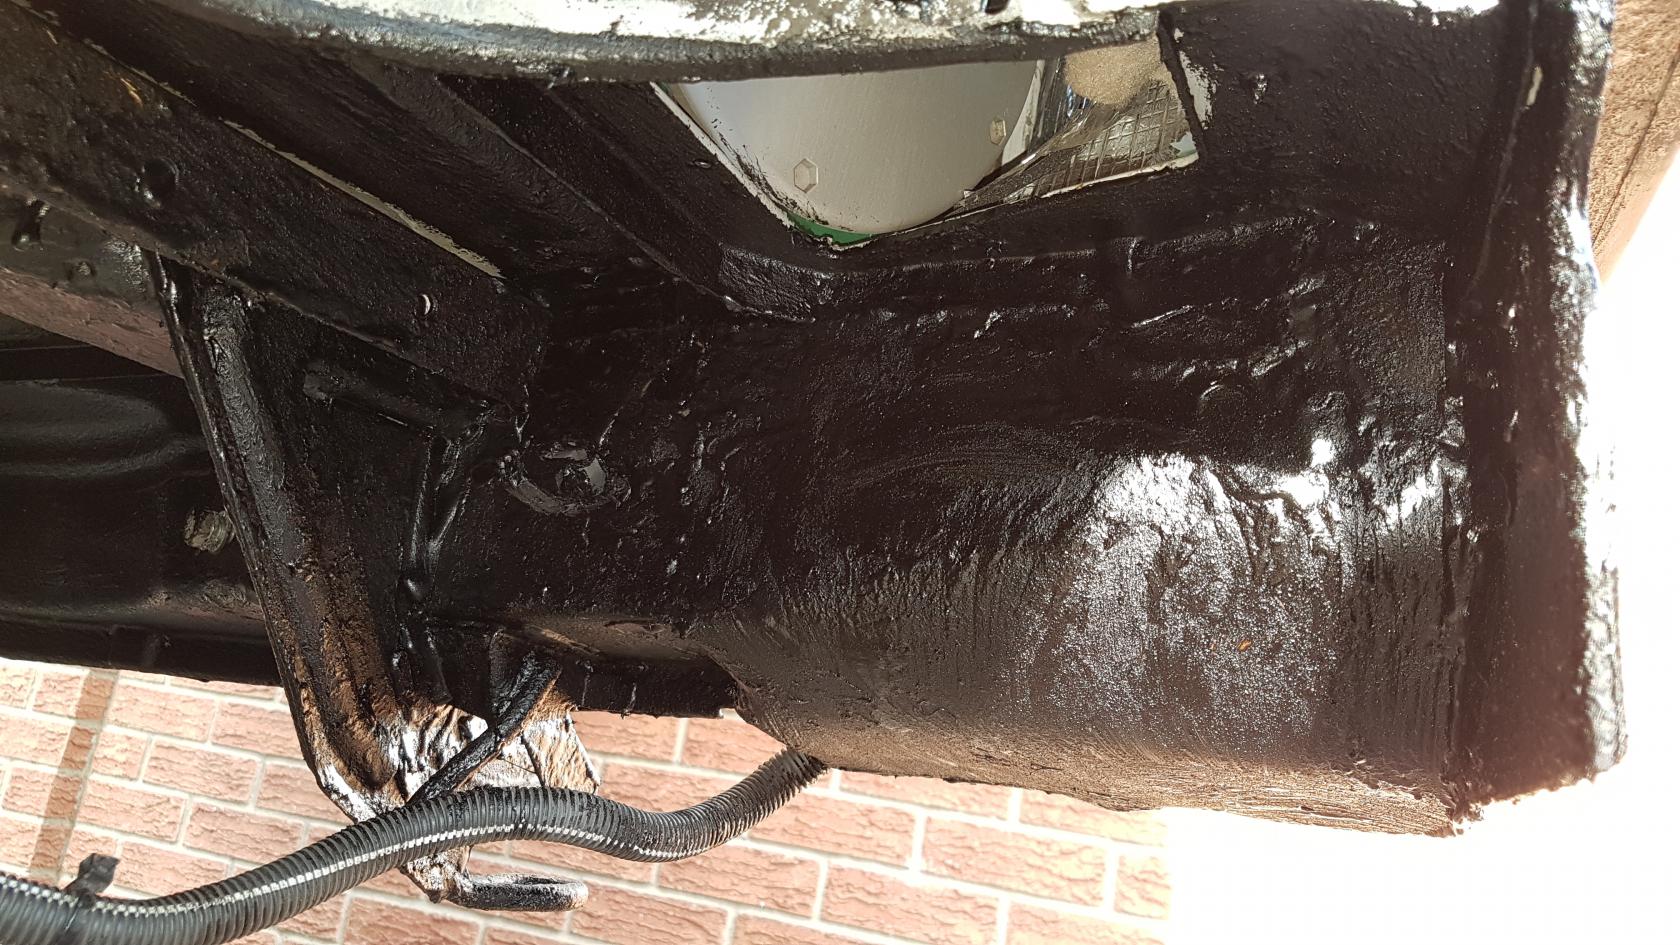
while taking the bumper off i found this.. well worth addressing as i bet everyones is like this!

and ill also be cleaning up, up here too!
still tempted to take off the sub frame completely so i can clean it up and repaint it. from what i have seen it is pretty rust free, just the bit s where its starting to get under the paint and rust out. wire wheel time! ill also fill it with dynax when i am done. protect the inside of it.
thats all for now!
#442 Re: General Discussion » Mystery Connector » 2020-06-21 13:45:05
its for cruse control. should be a 4 wire plug. 2 for the switch and 2 to light an LED. near the brake pedal you will find another plug, this is for an extra switch that sits next tot he other switch on the brake pedal. also somewhere under the steering wheel plastics you will find another plug that is for the cruse control stalk.
acquire all 3 things and fit them, you will then have cruse control
i am trying to find the bits myself.
#443 Re: Camper Conversions » JohnDragonMan's Dispatch Camper Conversion » 2020-06-21 01:17:44
all of the rust has been cut out and new steel welded in.
the welding is complete.
before and after shot? you got it.

now this little set back has been dealt with, i can now focus on more "pressing" matters. or should i say lack of it given the clutch spring plate has failed.. get the van turned around.. and oh my favourite thing to do with vehicles.. rip its heart out.
i work in a scrap yard because i enjoy my work. its nice to bring it home. i have far better tools here to undertake such an operation. though my frankenforklift is duly missed. boss would not assign me a forklift so i pretty much built my own. when i eventually leave the company its coming home with me. it came in for scrap and i spent my days off fixing it with scrap. looks like hell but keeps passing yearly inspection. can build anything if you have a machine shop (that all came out of the scrap pile!)
looking forward to what is to come. its been too long since i've had an engine out of something. (i've got issues.. or withdrawal or something)
#444 Re: Maintenance » Who Should I Get To Replace Timing Belt. » 2020-06-19 01:47:59
i mostly use Ebay, always go with sellers with really high feedback. no mention of fake belts in the feedback score.
i bought this kit for my van:
https://www.ebay.co.uk/itm/153826650244
yes i mean the cam and crank seal 
honestly its not that hard of a job to do. a mechanic should have no problem doing a belt change on this. you want a hard one, try doing it on a 306. you have only a few millimetres of space to slide the belt in. these vans are so nice you have a good 5/6 cm gap. get your arm right in.
#445 Re: Maintenance » Who Should I Get To Replace Timing Belt. » 2020-06-18 15:21:13
there's no limit to how often you can change one, just like changing engine oil its just cost that makes it uneconomical to do often. the book says 100,000 miles if not driven hard or every 10 years. though myself i would change mine every 6 or 7 years and every 60,000 miles.
the main thing is getting the belt tension correct. the fitting is pretty easy. plenty of space but the plastic cover can be a bit difficult to to get off. one of the 10mm bolts on the back can be hard to get at.
garages should have the special belt tension tool needed to get the right tension. i was a bit naughty and measured the belts deflection on another van that had it recently changed and copied the amount on my van.
ive done a few cam belt changes on XUDs and HDIs before and its never been an issue. ive done it that many time i never use locking pins now, though i highly recommend you do. after your 30th belt change you pick up a few tricks.
i highly recommend the Gates kits. if you have a high mileage van, i also recommend replacing the shaft seals under the pulleys for the few pence they cost to replace. i did all mine though not high mileage they are now 15 years old. they just require the cam pulley removing the old seal pulling out and the new seal pressing in. no special tools need just use your fingers to press the seal in, then maybe a socket over the cam shaft and tap it with a hammer to get it flush. when i do the clutch and flywheel change i will also be replacing the crank seal under the flywheel, just as a precaution.
#446 Re: Camper Conversions » JohnDragonMan's Dispatch Camper Conversion » 2020-06-17 23:56:31
well bar the things i have already bought and replaced on my van, i have racked up quite the Ebay shopping basket.
i want to replace all things that could potentially cause issues in the future. lets face it, it is 15 years old now.
so, any other recommendations?
most drive train and braking system has been already replaced.
things like shocks and springs i will replace when they fail as well i can still move the van.
i'm going all in with this.
#447 Re: Camper Conversions » JohnDragonMan's Dispatch Camper Conversion » 2020-06-17 03:18:17
oh we do love ourselves some pictures, dont we.
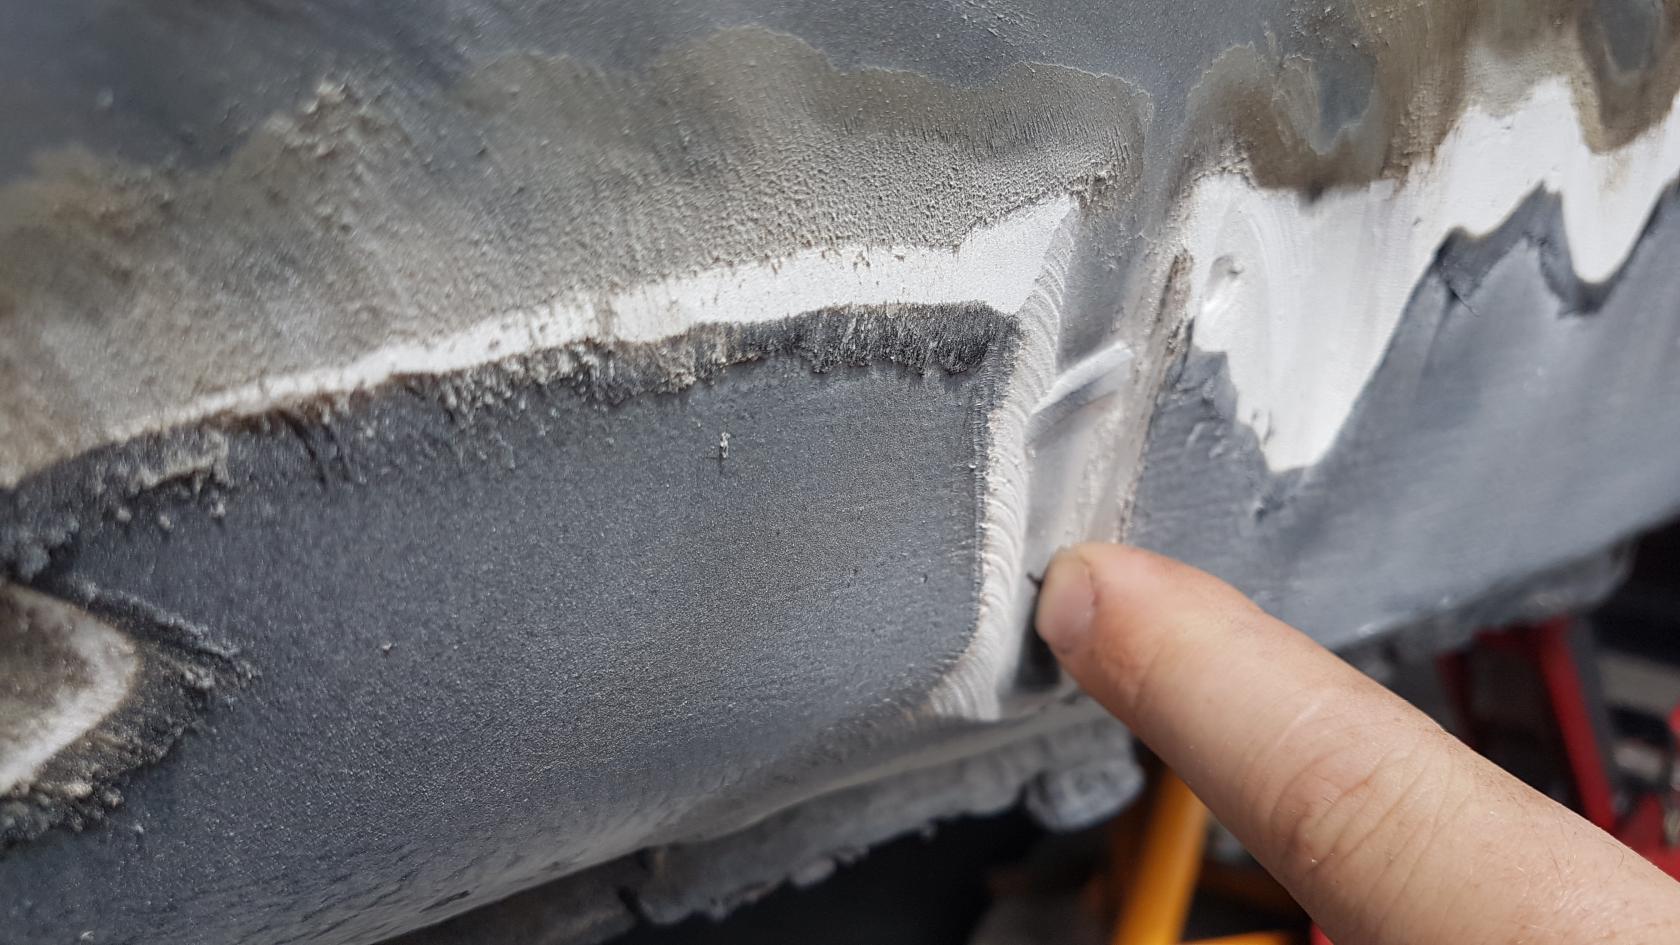
so i cut the outer skin off the sill, and i was greeted with this. what a pleasant sight indeed. time to get happy with the grinder

so that was fun time to start making new metal, yes some bits still looks rough but believe me, the magic of Dynax S50 will prevent future rust for many years.

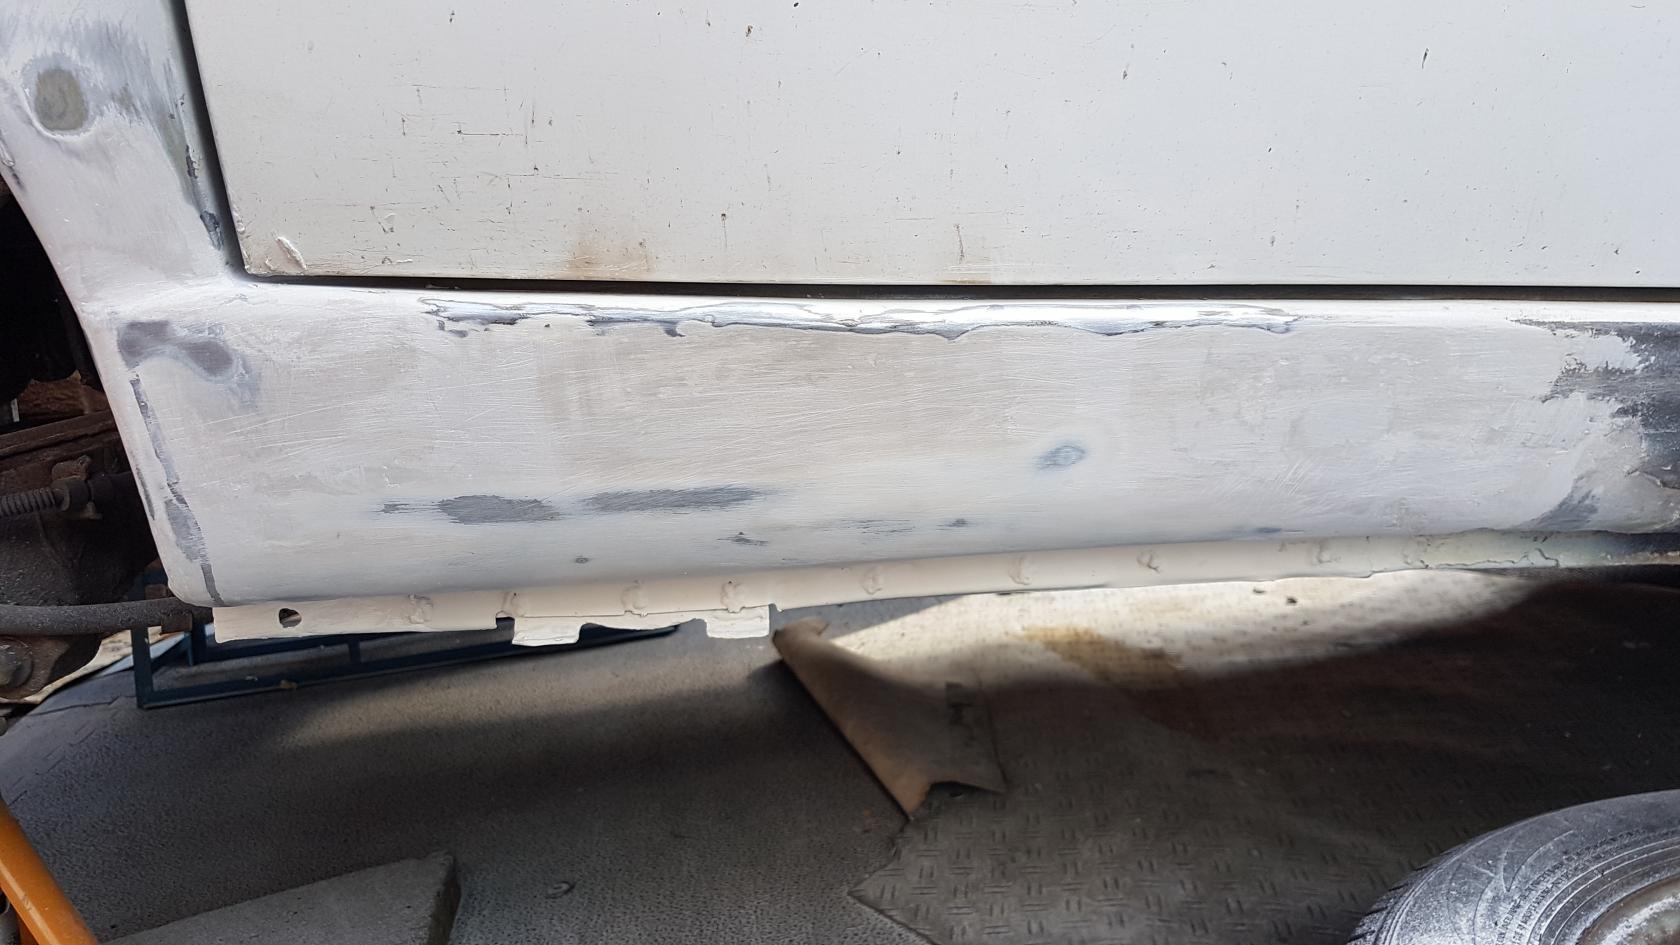
anyway, cut a long story short and we have this result. silky smooth. not bad for saying i have no experience with using filler. i usually just grind my welds totally smooth. (my welds are just THAT flat to start with)
-----------------------------------------------------------------------------------------------------------------
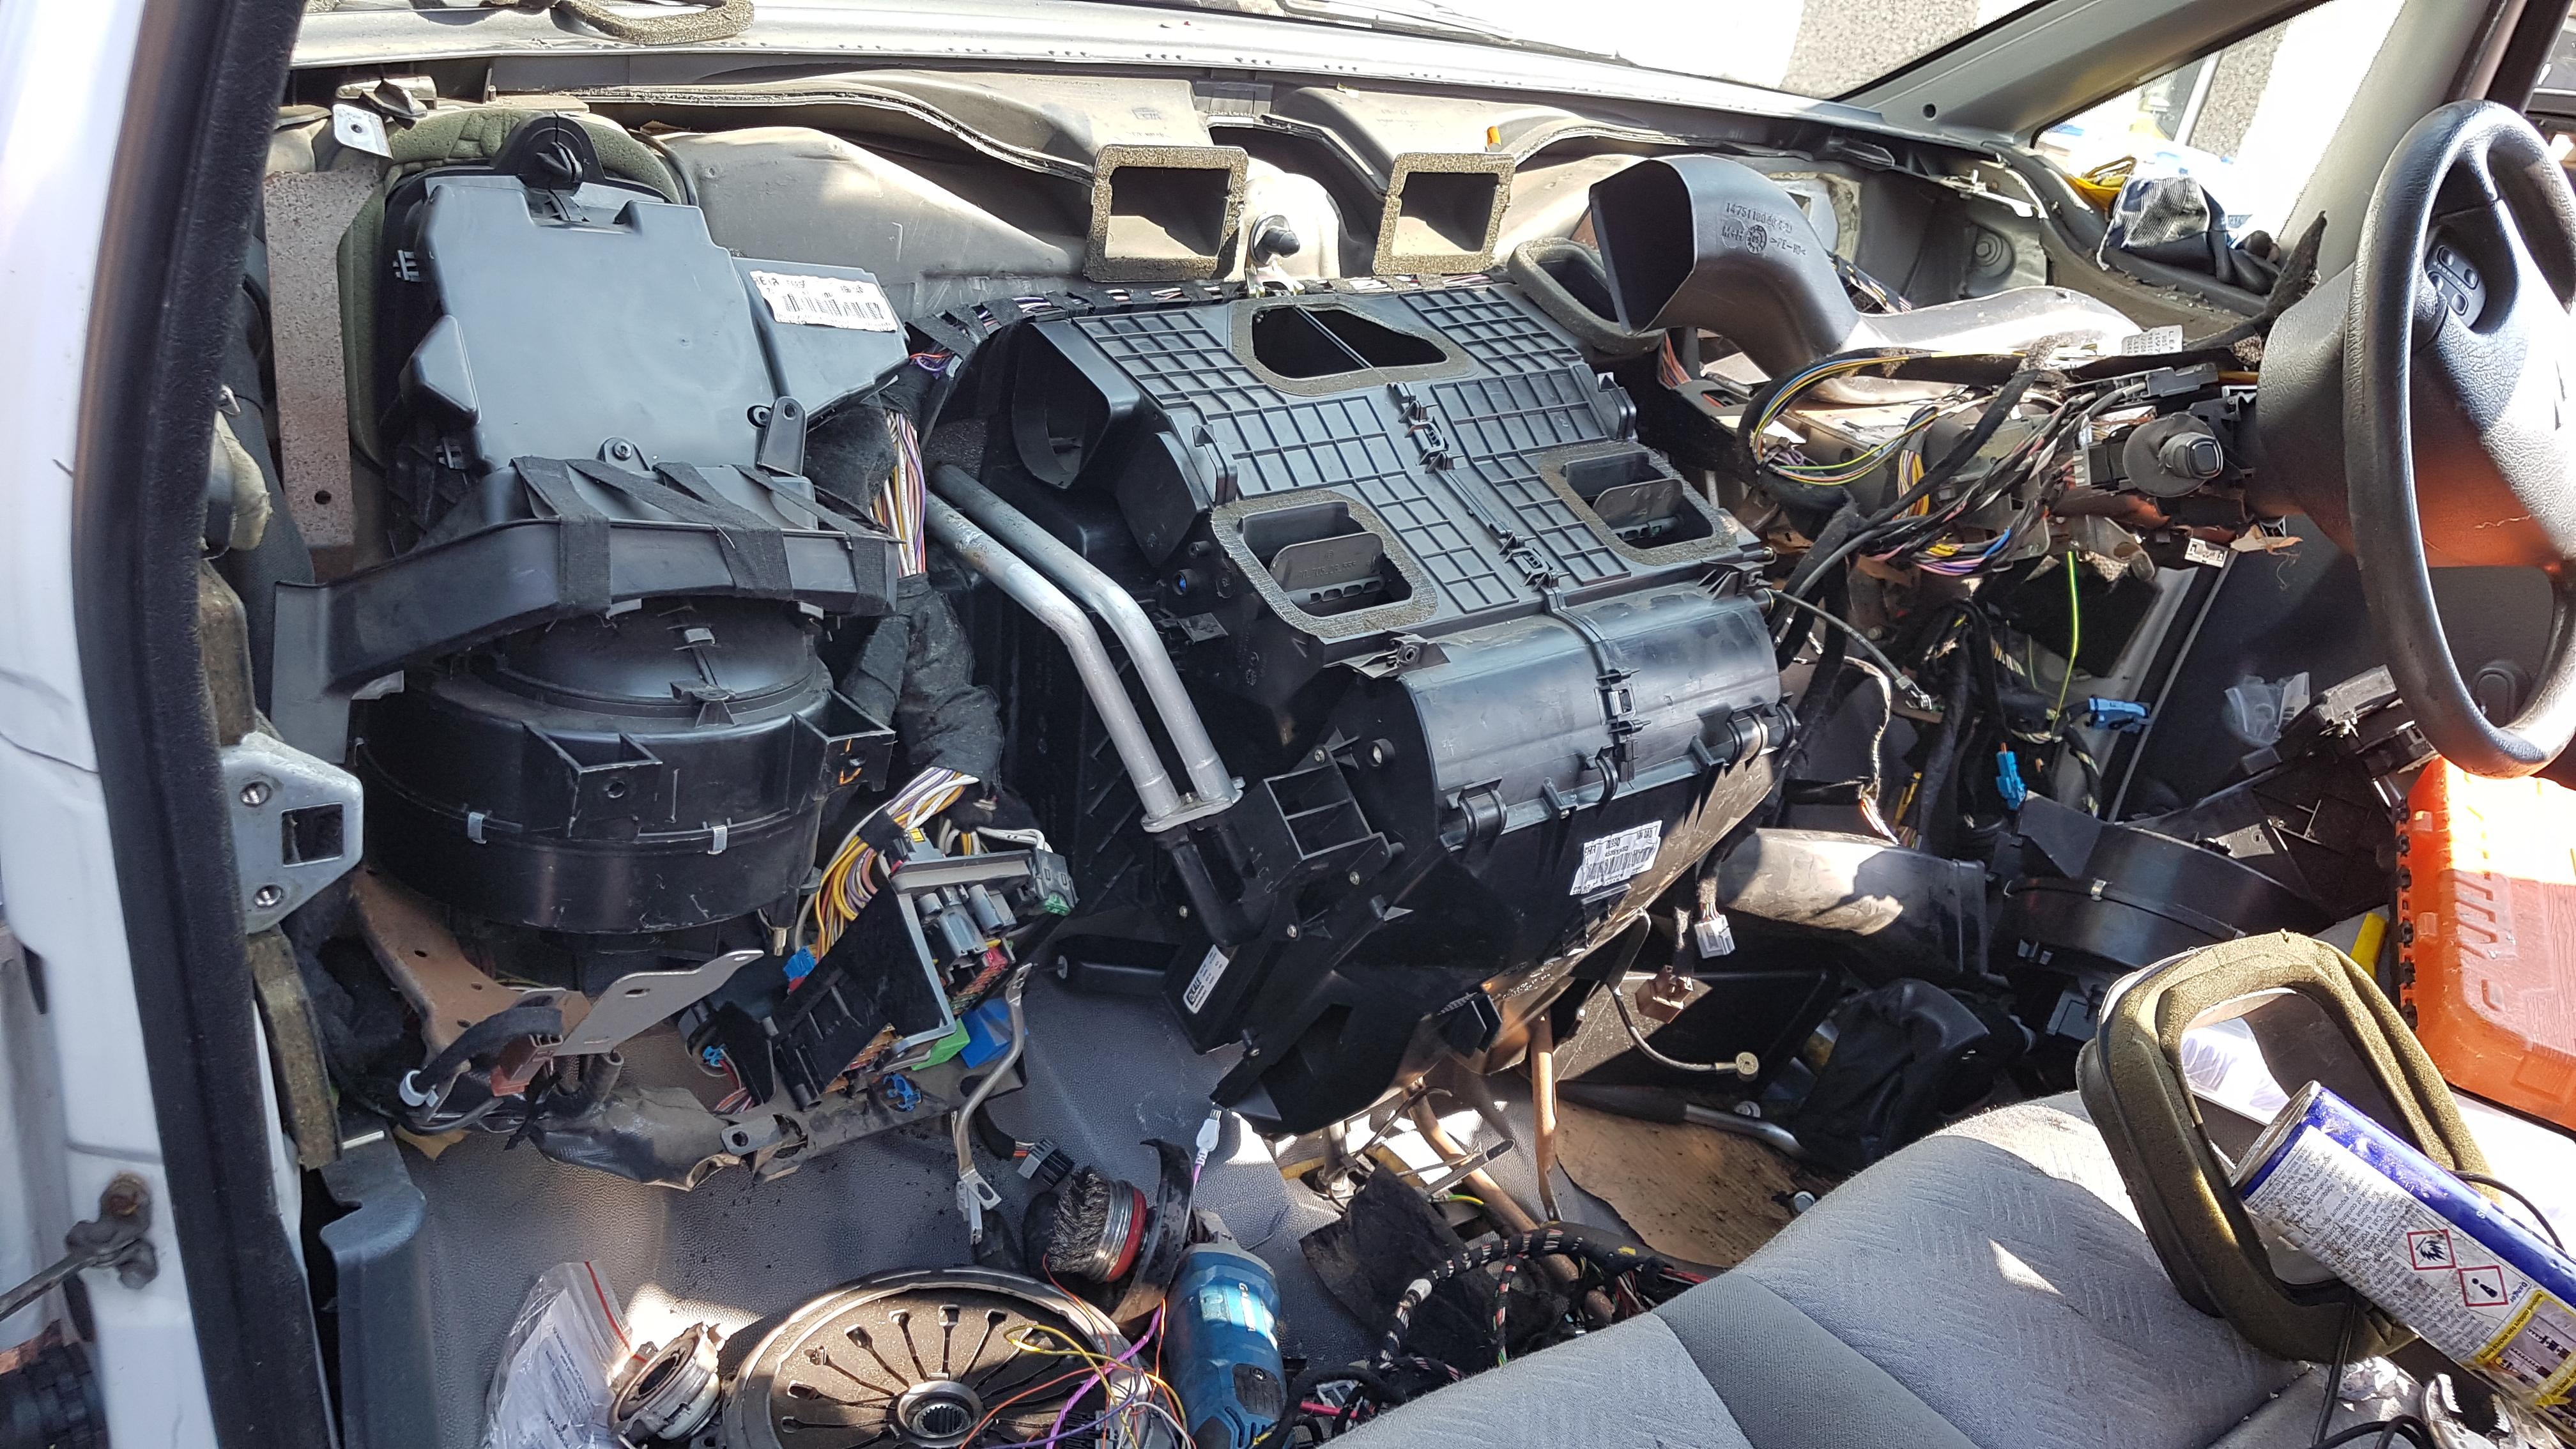
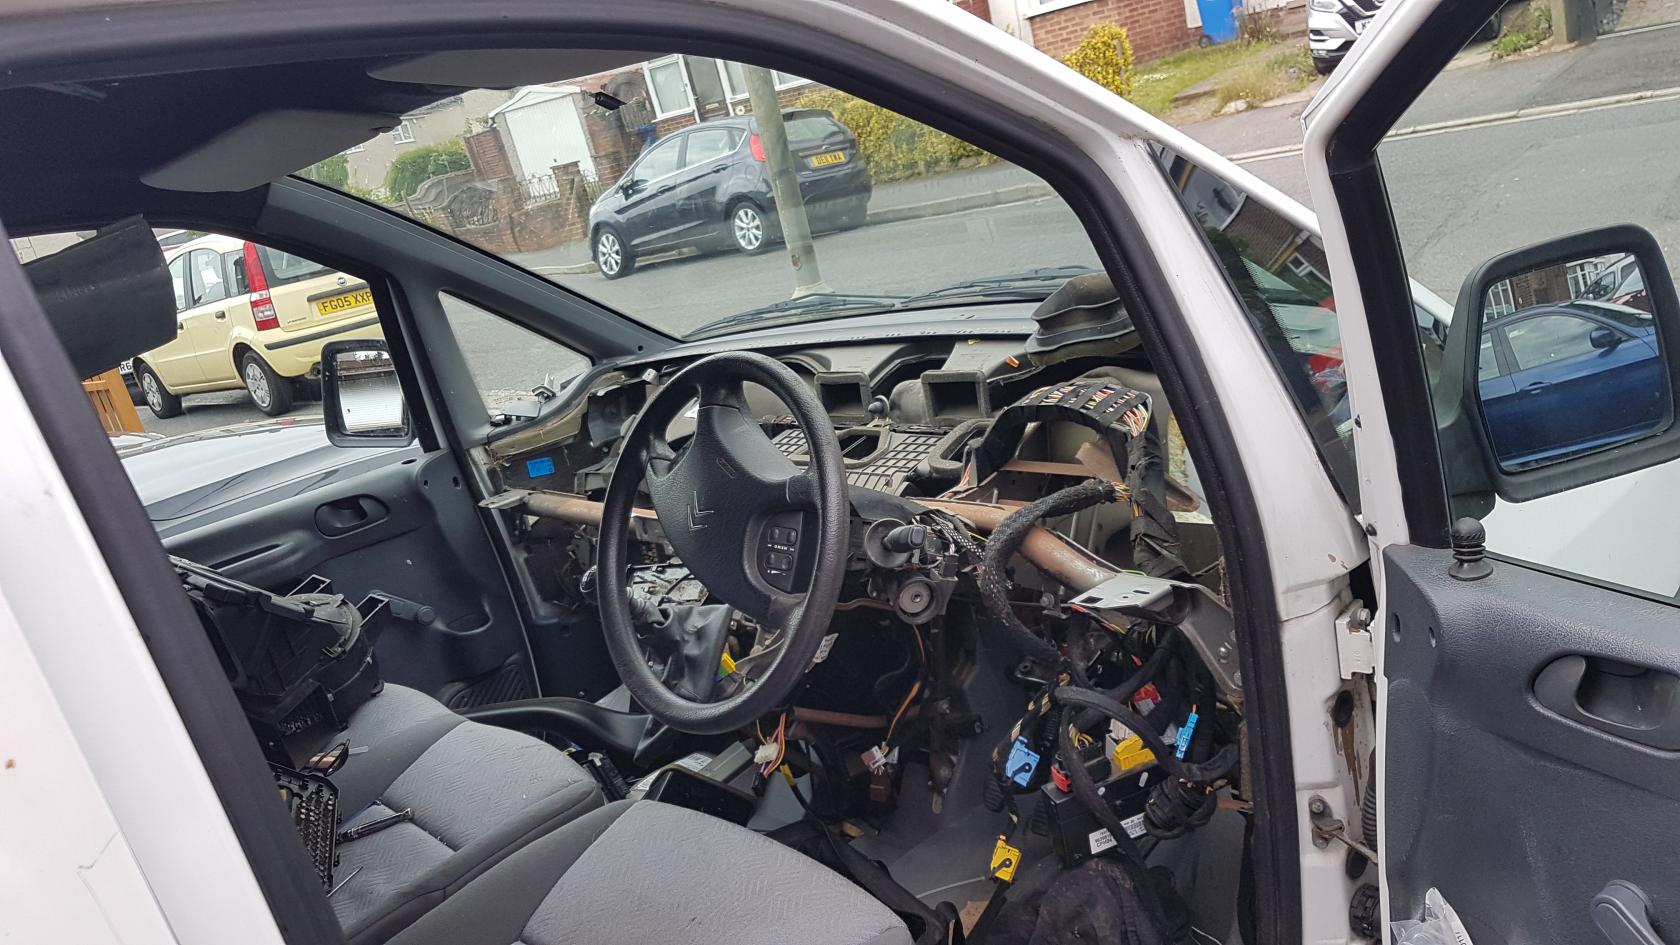
oh OHHHHHHHHH What is this?! "Youve not!!" i hear you say, well yes. YES i have done the unthinkable. i have painstakingly undergone the tedious task (it was actually quite easy) of removing the air conditioning system from another vehicle (Peugeot E7 Eurocab).

some disassembly required... again not as bad as it looks.. by far the most easy vehicle to remove the dash from (excluding my old Fiat Panda 4x4, 5x "normal" screws )
really a T20 torques bit and a 10mm ratchet.. no problem this. 10 mins work! (and it still starts, runs, and drives like this!)
now i "could" just attach this to my original air box system as it just happily sits on the back with 2 clips and a simple switch that turns the radiator cooling fan and compressor on (thats it!) but wheres the fun in that. you folks should know by now that its not the way I do things.
i need to get in with the wiring, become one with it (you will if you undo that loom!). i am just going to do the lazy thing and run new wiring alongside it. thankfully you get a nice wiring harness that just "plugs in" to your original vehicles wiring loom. that.. does seem... to be missing a few wires..... well im SURE it will be ok... i mean theres Already SO MANY.. i'm sure it wont mind a few not being there... ahem.
Moving right along..

now i do have to do some cutting out. remember i said that vans with aircon have 2 blower motors.. well turns out its a somewhat solid panel it mounts to. i was kinda hoping there was a plug i could just take out and to some extent there was.. but its too small. so Mr happy grinder time again.
this is how it should look...

and this is mine.

ahh but enough of that for now. check out this impressive filler work on the other sill the other side of the van. thats a good few mill thick that.

hmm nice.. wonder whats inside..

its like ive been here before! just everything is backwards now!
ahh and the bit i cut off? lets have a look and see the thickness of that filler work.. top job!

ahh but now it is time that i come to the end of my post..
remember, insanity and creativity is a close friend. or is that insanity and genius.. well whatever.
(must remember to not show these guys my old car)
#448 Re: Camper Conversions » JohnDragonMan's Dispatch Camper Conversion » 2020-06-13 05:47:10
ok i dont know if i told you guys but i took my van in to get some welding quotes. in excess of £1700. hot damn.
so i just started doing it all myself. so far i have one sill done. completely rebuilt with all serious rust chopped out and new steel cut to shape and welded in. no "cover it over with a patch" here. i did a video on it:
be sure to skip to the end of my part 2 video on it here to see the end result as i never took pictures.. guhh
i am now working on the back corner where the rear wheel sprays all the water and grit up.. have it all cleaned up, spot welds drilled, cut out and ready to make new steel parts and weld them in.
my plan is to make this a completely sealed cavity with just a little drain hole in it should water ever get in which it should not.
also i have bought almost everything needed to retrofit air conditioning into this van.
i made a topic >>Here<< for anyone foolish brave insane enough to follow me in the quest for perfection.
yes i have been up till now researching things on this van. its consuming me. finally something all the voices in my head can agree on.
... what?
#449 General Discussion » Air Conditioning! retro fitting, questions, and tips » 2020-06-13 05:05:50
- JohnDragonMan
- Replies: 52
So a few of you know that i am retro fitting air conditioning to my 05 Dispatch. i have taken the parts from scrap Peugeot E7 EuroCab taxis.
first off, if you are not afraid of taking your dash apart this is quite an easy job. i was impressed how easy the dash comes apart on these vans!
some specs:
the air conditioning system on these vans/MPVs/taxi's has a total R134A refrigerant capacity of 950 grams.
the belt size somehow changes if you are retrofitting air conditioning. my van needed a 6PK1640 sized belt.
the belt size for vans already with air conditioning is 6PK1740.
types of aircon:
so far i have found 3 kinds of "air conditioning" types that can go into our beloved vans. type 1 is the kind we have in our handbook. where it is a single button next to the hazard light switch that controls the AC on or off, the recirculation, air flow and heat controls are all cable controlled on the sliders the same as vehicles without AC. (unsure if this has an extra blower motor)
type 2 (the one i seem to have) is the next kind where it has 2 buttons located where the recirculate slider should be, one to turn the AC on and off and one to recirculate air. this is a bit of a hybrid system where it is mostly electronically controlled but you still have a cable slider to control what vents the air is blown out of. this type also uses an extra blower motor on the drivers side.
then we have type 3. the full all singing all dancing climate control. i sadly do not know much about this other than it is fully electronically controlled. i would also assume that it has 2 blower motors as well. this is the kind i was more so after.
this is the type 2 panel and the non air con panel:
Hardware:
no matter what diesel engine, the compressor sits in the same location so the pipework from any other engine will still work with a different engine XUD or HDI
the good news is that they all take the same condenser (AC radiator that sits in the gap between the coolant radiator and intercooler).
it also appears that all of the pipework no matter what you take the aircon off will also be compatible with every other AC component from different "dispatch/jumpy" based vehicles like the Scudo, 806, Synergie, Ulysse, Evasion, E7 Eurocab, and Lancia Zeta.
here are how the pipes are ran:

and here is some other tech pictures of the filter dryer bracket and condenser radiator.

Pollen / cabin air filter:
Yes these do have them, though often never fitted!
a quick ebay will give you a few options but the ones you need to go for is the 3 piece type. this is where they fit:

however you may not have the "bit they go into" fitted to your van. mine sadly does not and so did the taxis i got all of the bits from. so sourcing these may be more hard. than actually fitting the whole aircon system!
(it took me a long time to find this information out)
Wiring:
you *Should* already have the required wiring in the dash for the new HVAC loom. it will be a 5 pin connector (pictured below)

your HVAC (heater/AC) wiring loom will have the same plug but 6 pins. thankfully the 6th pin (a twin thin brown wire) is not used. the thicker orange wire in the corner of this plug is the one that turns the AC compressor on. is in this part of the loom at this plug but it does loose this wire in the grey circular plug under the fuse box behind the glove box. so a new wire needs to be ran. thankfully in my loom i had 2x wires that go exactly where i needed them to go, exiting near where the wires branch out for the passenger side headlight. these 2 wires just so happen to be the correct colour wires for 2 of the 4 wires on a 4 pin pressure switch (see video 4). this leads me to believe that these 2x wires are left in for maybe a dealer fitted air conditioning upgrade (maybe). i will be using these 2x wires to connect the thicker corner orange wire exiting the HVAC plug to the pressure sensor.
the pressure sensor pinouts are as follows:
pin one switches to pin 2. pin 3 switches to pin 4. pins 1 and 2 switch is the low pressure switch you connect the compressor clutch (through a relay to save burning out the pressure switch). pins 3 and 4 switch is the over temperature switch which will be used to make a relay turn the radiator fan on and off.
the HVAC controls sends 12v through a single wire (that orange one) that connects first to the 4 pin pressure switch (pin 1) on the filter dryer. if the system has an adequate refrigerant charge it allows power to turn on a (pink) relay in the fuse box. that then turns on the compressor clutch.
so it turns out that all fans no matter on mk1 or mk2, poverty spec or full bells and whistles, all will have a "2 speed radiator fan". the fan has 2 live wires and one earthing wire. when power is connected to any one of the two power cables, the fan will turn on to low speed. when power is connected to both power cables at the same time the fan will be on high speed. it is very rare that you hear the fan on high speed. as even the low speed seems pretty powerful!
the radiator fan is turned on using the other 2 pins on the 4 pin pressure switch. this needs to be connected to a separate relay that switches the fan on and off. sadly just manipulating one of the 2 relays the van has standard is not an option due to the way the relays are turned on by the ecu.
the 4 pin pressure switch will detect the pressure change based on how hot the refrigerant is inside the condenser (front AC radiator) is and say if the vehicle is in motion would automatically turn the fan off if enough airflow is already cooling the AC radiator down.
i will draw out a circuit diagram of how both the compressor clutch and radiator fan works. watch this space!
its not as hard as it looks. dont panic Mr Mainwaring!!
i am currently still acquiring knowledge on this and doing much research.
i will update as my knowledge expands.
here is some videos i have made as a kind of walk through. i am still in the process of making these videos so please stand by.
it starts off with removing the dash. you can do all of the inside work first before taking apart anything outside
then you need to prep and clean your replacement (if you want to) then start to take out your HVAC system.
in this video i show you where all of the plugs connect to on the HVAC's wiring loom. its pretty strait forward. i also use my old blower motor and just swap the electronics over from the high mileage taxi blower motor.
in this one i show the dash support bar, routing of the wires neatly, and talk about routing external pipes.
here i am on about the wiring again, and talk about the 4 way pressure control switch.
here i talk about the compressor. what oil and how much
a quick look at the radiator pack here and more on the wiring.
i am at the gassing up stage here. also a slight mishap with a faulty crank pulley.
to be continued..
if anyone has anything they want to add to this, please do so! i feel this is a topic that needs to be documented!
stay frosty... well you know, that is the aim of the game.
#450 Re: Camper Conversions » JohnDragonMan's Dispatch Camper Conversion » 2020-06-07 01:37:37
I have LDV Convoys so know rust
you cant beat the gas type.. ive been welding since i was 5. no exaggeration. for lazy reasons i use co2 fire extinguishers as they only cost £15 to refill and last ages. plus i have a few spare lying around as they are funnily enough good for putting out fires. heh. so when it comes to welding, handy for 2 reasons. who knows, i may end up enjoying it. who am i kidding. that £1700 sounds good.... if money was no object haha.
so i have a plan.
the clutch spring has gone. its about the mileage they do go at and i am pretty sure this was used for towing at some point. lots of ware on the tow bar ball..
so heres what i am going to do. i will do the welding on the arse end and sills of the van, paint them up and rust proof the living hell out of them. both internally and externally.
ill then flip the van around on the drive get the front end up on some ramps and start stripping it down. up on axle stands, wheels off, gearbox out, swap over to single/solid mass flywheel and replacement clutch, while the gearbox is off i will drop the sub frame, clean all of that up, repair if needed and repaint, change all of the bushes i can clean all of the chassis in and around the engine bay i can, then start refitting it. then it will be bumper off and replace the intercooler.
while i have the gearbox out i will also try to install all of the aircon components too. my dash is already half out so i am most of the way there.
if its not how i want it. i dont want it. im just looking forward to that clean pollen free air.
if anyone is local to Derby and has a van being scrapped with aircon, can i have a day with it so i can get all the aircon bits out of it? ill pay you for what i take! if you are worried about the gas escaping, i have got all the kit to reclaim it into a bottle. so no environmental hazard.
i have nothing but bad luck, so wish me the good luck stuff!