The Dispatch | Expert | Scudo Hub
Get help & share your Citroen Dispatch (Jumpy) | Peugeot Expert | Fiat Scudo tips
You are not logged in.
- Topics: Active | Unanswered
#26 Re: Camper Conversions » Split Charge Kit Recommendations? » 2021-03-15 23:14:35
Thanks for that piece of info Proline1504. I may have to look into that!
#27 Re: Camper Conversions » Split Charge Kit Recommendations? » 2021-03-14 19:17:08
Yup sure did.
#28 Re: Camper Conversions » Split Charge Kit Recommendations? » 2021-03-14 13:42:13
ok cheers for the information. I just hope the company can send out a replacement unit rather having me return all the item (half of which is installed in the van!).
#29 Re: Camper Conversions » Split Charge Kit Recommendations? » 2021-03-13 22:11:55
Ideally an reputable brand would give an idea of decent quality (like with all products) .... in this case, a simple relay that works at least.
#30 Re: Camper Conversions » Split Charge Kit Recommendations? » 2021-03-13 20:36:42
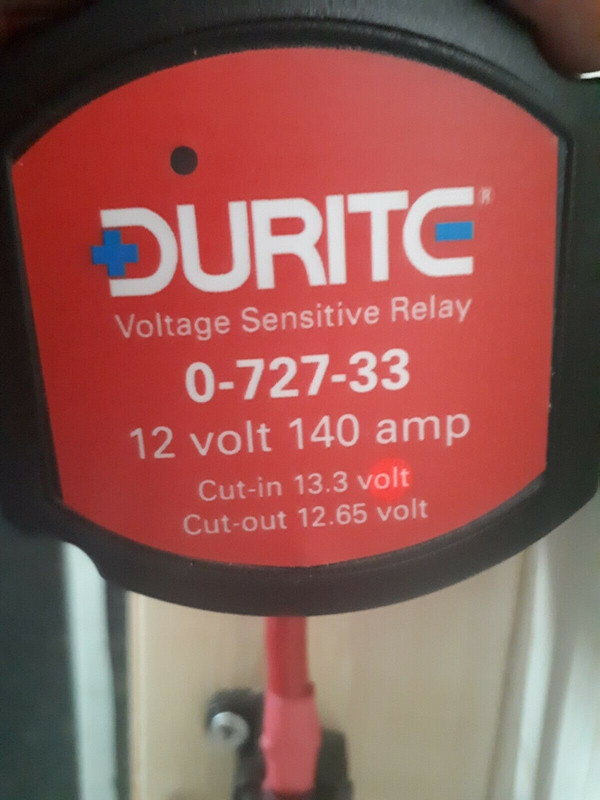
The red LED is situated in the wrong place and not where the LED display is. Also the unit does not click off when the engine is turned off (engine was at 12.4 - below 12.65 as stated). We have switched the cables around in the unit and still has the same result. Any suggestions on how to fix this?
Also any other decent split relay brands to consider?
Cheers
#31 Re: Camper Conversions » Citroen Dispatch best route through bulk head » 2021-03-12 13:47:36
Nice to read it's working like a charm for you.
My split relay may have a loose connection somewhere as I am not getting any led ight showing when engine is on or off.
I'll check tomorrow and hopefully get more work down on my conversion.
On a plus note I have managed to source a roll of carpet for free for my van ... can't beat that eh 
#32 Re: Camper Conversions » Citroen Dispatch best route through bulk head » 2021-03-07 20:57:00
Oh the wooden beams on the door way where already in place to allow the side panels to hang to. I may keep them as they can allow me to screw my future T&G cladding too. In addition this would give me space to have insulation and thermo fleece in between the panels.
#33 Re: Camper Conversions » Citroen Dispatch best route through bulk head » 2021-03-07 20:54:24
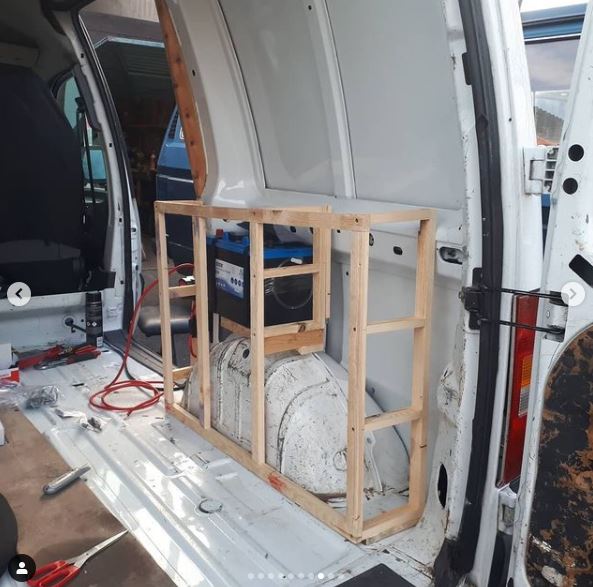
Luckily I dismantled the plywood prior to going ahead with placing the leisure battery and diesel heater in the middle of the metal bulk head floor- as the van revealed the secret ledge on the right for the leisure battery and a secrete left hand corner vent for my diesel heater...result!! I think the van designer placed all these things for such things
Shit... that slant may play havoc with sleeping...nothing worse than trying to sleep on a slope!
I am looking forward to next weekend to carry on the conversion. I think I will opt for the T&G cladding for the roof and sides. I'm not yet too sure what to go for for the floor and colour scheme too.
#34 Re: Camper Conversions » Citroen Dispatch best route through bulk head » 2021-03-07 20:45:50
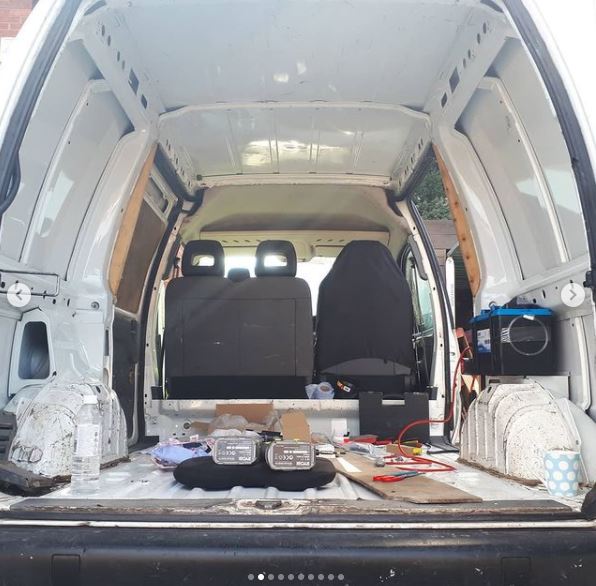
A work in progress.
#35 Re: Camper Conversions » Citroen Dispatch best route through bulk head » 2021-03-07 20:43:59
Great fun learning how to install a spilt relay.
We started building the wooden frame for cupboards but the only problem is that its wonky despite being equally measured at both ends...the van floor isn't 100% horizontal. I think I may have to follow the panel walls line. Anyone else noticed this?
#37 Re: Camper Conversions » My very basic Stealth Van » 2021-03-02 00:53:26
Ah so its slippy and possibly scratches easily ? (I intend to use my van for van stuff too). Is it heavy?
At least Altro vinyl is light, durable and non slip.
#38 Re: Camper Conversions » Citroen Dispatch best route through bulk head » 2021-03-02 00:32:39
Ah ok.. will remember that for future posts (crazy that you can't upload on here naturally).
Nice wheels man... now that would be ace if you burst out of the Daddy Tin Tent as an undercover cop and chased the bad guys ha ha
#39 Re: Camper Conversions » My very basic Stealth Van » 2021-03-02 00:26:33
Cheers bro.
I was toying with the idea of Altro flooring but perhaps laminate would be another alternative.
#40 Re: Camper Conversions » Citroen Dispatch best route through bulk head » 2021-03-01 23:34:46
Cheers Kenbw2
No instructons on how to use Postimages on the page what so ever. Not straight forward for someone who has never even heard of this thing Postimages.
Actually it may have worked eh...I was expecting to see the image uploaded without the need to click on the Postimage link. I don't know how you guys do it without pasting the URL.
#42 Re: Camper Conversions » My very basic Stealth Van » 2021-03-01 22:32:17
Never seen the point in trying to hide (Stealth) This was my last one

https://i.postimg.cc/Xqcw72wN/01.jpg
https://i.postimg.cc/8cBgBnJr/52.jpgWe did get the hang of it and managed to put that awning up straighter but the issue was the height. Awning tracking on the van needed to be higher.
BTW that little bulkhead on the floor will come out. If not bothered about three seats you can get a single and swivel plates. Having the extra seats open up the van space a lot more.https://i.postimg.cc/h4yMdLvD/20160527-125703.jpg
And if like me (Tight) make yer own thermal blinds. This is what i did in my convy
I like the look of that flooring you used. What is it please?
#43 Re: Camper Conversions » Citroen Dispatch best route through bulk head » 2021-03-01 22:23:59
Never straight forward is it lol. I'm sure I uploaded photos in the past without having to open another account. Not tha keen to have another account to memorise. Thanks for the info though.
Nice pics. Tin Tent big daddy looks mint mate. You still got both vehicles?
#44 Re: Camper Conversions » Citroen Dispatch best route through bulk head » 2021-03-01 21:58:25
Guys/Gals... how does one upload a photo in this post? (for the life of me I can not see an upload tab). I'll post some photo's of my conversion in future.
Ta
#45 Re: Camper Conversions » Citroen Dispatch best route through bulk head » 2021-03-01 21:41:09
Man... I ordered a 5 metre cable thinking that was ample for my Mark1 Dispatch. No way...after looping round the wing, through the bulk head and behind the seats... it didn't even reach beyond the sliding door! I would say run a piece of string prior to purchase on the exact route so that you are not short.
So today, I've just applied the Hammerite Kurust on the rust parts where the water pools on the rear floor from the sliding doors and gave them a coating of the Hammerite white spray - also resealed the existing rubber seals with clear sealant too. Hopefully that should help with preventing water from coming in (or it maybe condensation that is pooling on the slider rollers?).
#46 Re: Camper Conversions » Citroen Dispatch best route through bulk head » 2021-03-01 15:57:39
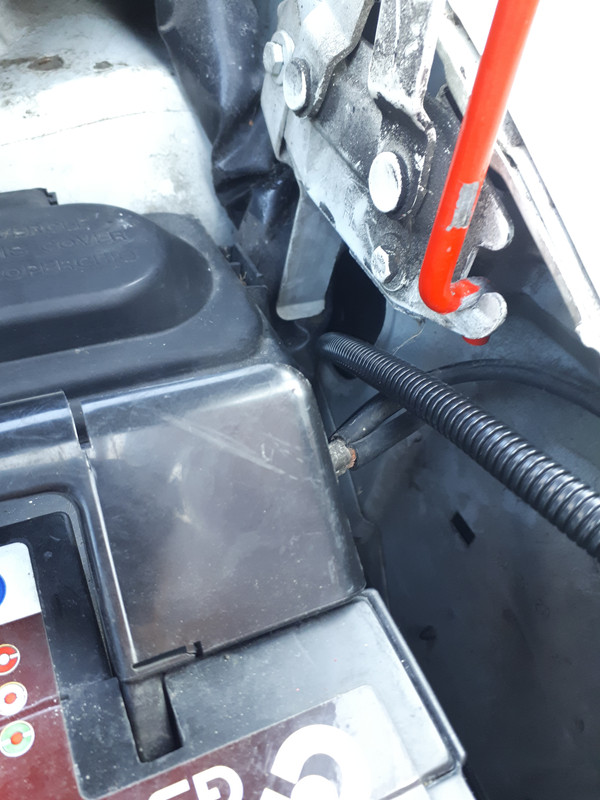
Yeah same here. It was great that I just took the cable via the drainage pipe hole in the inner wing. Another bonus was that it had it's own cable channel in the cab floor.
#47 Re: Camper Conversions » Citroen Dispatch best route through bulk head » 2021-02-28 18:27:33
Ah it was pretty straight forward really. I managed to remove the scuttle drain pipe and feed the cable through the drain pipe hole (enough room for both the cable and scuttle pipe). Then fed it down the inside of the wing and fed it into the passenger grommit. I would uplaod a photo showing this but there is no option to upload a photo!
#48 Re: Camper Conversions » Citroen Dispatch best route through bulk head » 2021-02-28 07:07:40
@kenbw2
Looking forward to it.
@Rocko
I had seen the existing grommet in passenger door hinge but was wondering about the route from inside engine bay to the inner wing. Not sure if there is an existing hole in place... but if not then tee_cee mentioned about possibly following the bonnet release cable.
I'm going to have a look later today.
#49 Re: Camper Conversions » Citroen Dispatch best route through bulk head » 2021-02-27 21:42:20
ok nice one TC.
#50 Re: Camper Conversions » Citroen Dispatch best route through bulk head » 2021-02-27 17:45:53
Pretty much the same as Casper for me, although I didn't need to cut into the drain pipe, I just fed it along the inside of the wing. Takes a bit of aiming and a firm cable, but I got it through
@kenbw2
Did you have to drill a hole into the inside wing or was there already a hole there?
Cheers