The Dispatch | Expert | Scudo Hub
Get help & share your Citroen Dispatch (Jumpy) | Peugeot Expert | Fiat Scudo tips
You are not logged in.
- Topics: Active | Unanswered
#51 2024-07-02 23:41:43
- RegW
- Member

- From: Bristol
- Registered: 2024-04-21
- Posts: 347
Re: My 'New' van
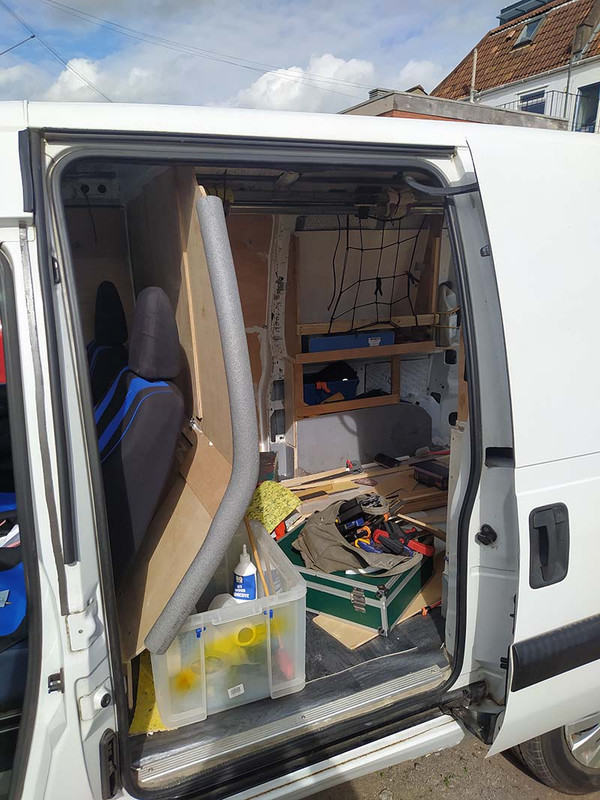
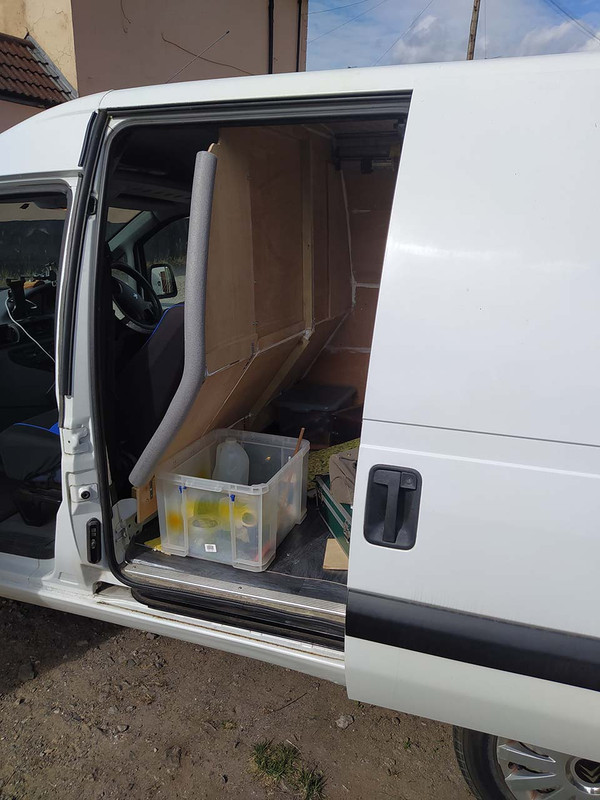
RH sliding door sealed up
deflectors fitted to doors
and partition done
Its so much quieter to drive now
Daily driving about the town it's very nice but it was at motorway speeds it got really unpleasant so I took it on my 'private test track' at speeds up to 90 and it was so much nicer to drive.
At 70 its not much different than my old Galaxy
that'll do me
Hopefully that's the last of the bigger jobs done and I can do all the tarting and tittivating and gadgets as and when
The roof rack has been disassembled and is now stowed up under the rh side roof/wall
and the fittings serviced and boxed up for when/if I need it.
Last edited by RegW (2024-07-02 23:48:49)
When all else fails, RTFM - 2006 Expert 2.0 HDI/110
Offline
#52 2024-10-14 14:44:26
- RegW
- Member
- From: Bristol
- Registered: 2024-04-21
- Posts: 347
Re: My 'New' van
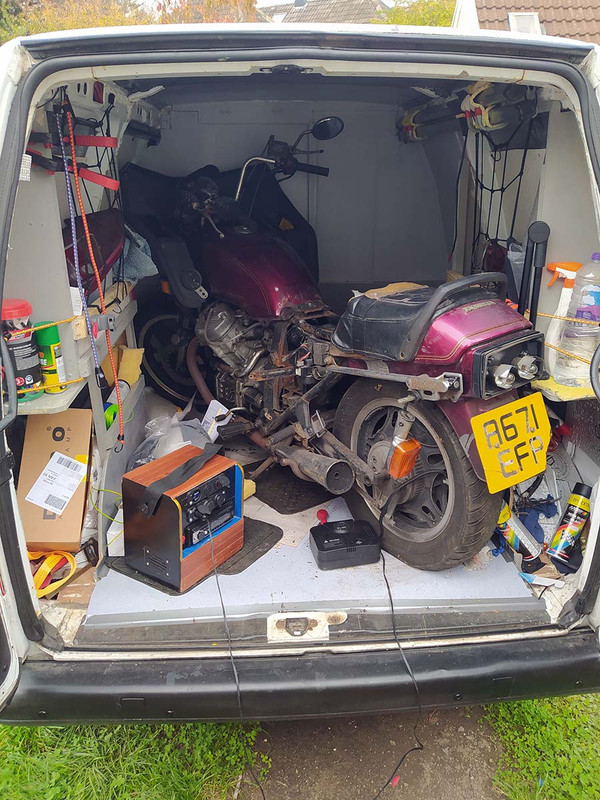
The wee scooter shown previously went in easily, the latest bigger bike was much bigger and more of a struggle.
After removing the bike I swept out the van and took some pics
so I can muse over mods to the ply partition.
Currently it makes the cab warmer and quieter especially at motorway speeds
and will stay as is.
In the warmer months or at certain times like wanting to stuff a big bike in,
I may want have it more open to make use of every inch of space.
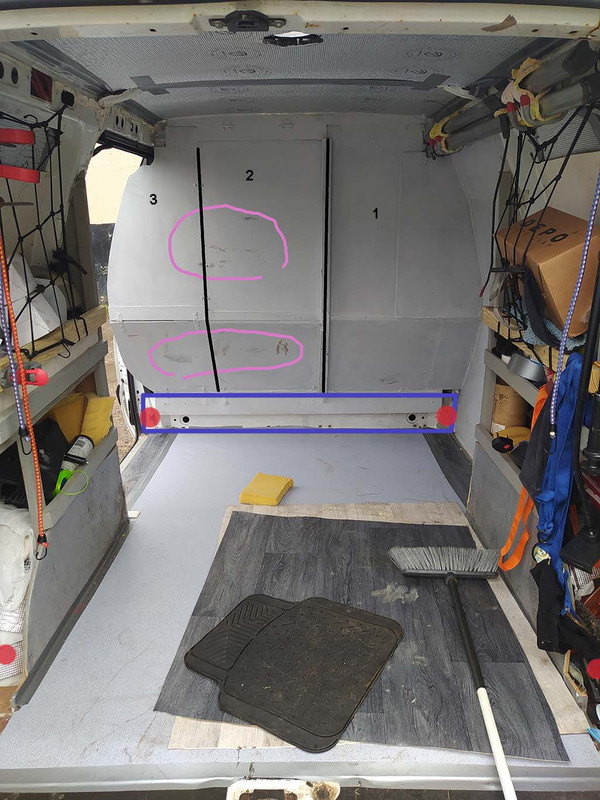
The pink lines show where the front wheel and fairing touched up against the partition
and the bike only just went far enough in to shut the back doors.
the small bulkhead is outlined in blue and the hold down points by red spots.
Section 1 could be removed but is pretty much permanent
as is the sealed up sliding door and I see no need to touch that.
Sections 2 and 3 wont be hard to remove, just few screws really and I'm mulling over options of putting hinges or clamps on them to make then even easier and quicker
to fit and remove

Last edited by RegW (2024-10-14 14:49:26)
When all else fails, RTFM - 2006 Expert 2.0 HDI/110
Offline
#53 2024-10-14 17:43:01
- Wingnut
- Member

- Registered: 2024-10-04
- Posts: 63
Re: My 'New' van
Tidy work on the insulation and skylight!
My van doesn't have that lower bulkhead panel but it does have blanks in the floor I wonder is it a bolt in/out affair? Failing that a wedge of wood bolted in the middle might be handy for rolling the front wheel up and between the front seats.
If section 1&3 were the same section 2 could be a lift out section held in with toggles or something easy for when you do need the extra space.
Just thinking out loud here sorry 
Last edited by Wingnut (2024-10-14 17:47:00)
Offline
#54 2024-10-14 17:58:23
- Wingnut
- Member
- Registered: 2024-10-04
- Posts: 63
Re: My 'New' van
I have one of those wheel chocks for a workbench I'm going to try make a baseplate for it that uses the front seat floor bolts and try to figure out a way that I can remove the chock easily when it's not in use. Perhaps some wingnuts would be the job!
Last edited by Wingnut (2024-10-14 18:08:56)
Offline
#55 2024-10-14 21:42:56
- kenbw2
- Administrator

- From: Preston
- Registered: 2017-11-26
- Posts: 1,612
Re: My 'New' van
Tidy work on the insulation and skylight!
My van doesn't have that lower bulkhead panel but it does have blanks in the floor I wonder is it a bolt in/out affair?
The one about 1ft high? Two bolts at the sides, the floor is just glue, it comes out with a bit of persuasion
2000 Citroen Dispatch 1.9TD XUD9 Camper Conversion
1999 Citroen Dispatch 1.9D DW8 Disassembled Camper Conversion
1996 Peugeot 806 1.9TD XUD9 Spare vehicle
1998 Citroen Synergie 1.9TD XUD9 Snapped timing belt
Offline