The Dispatch | Expert | Scudo Hub
Get help & share your Citroen Dispatch (Jumpy) | Peugeot Expert | Fiat Scudo tips
You are not logged in.
- Topics: Active | Unanswered
#1 2020-06-02 22:41:04
- JohnDragonMan
- Member

- From: Derby, East Midlands, UK
- Registered: 2020-06-02
- Posts: 456
- Website
JohnDragonMan's Dispatch Camper Conversion
Hey everyone.
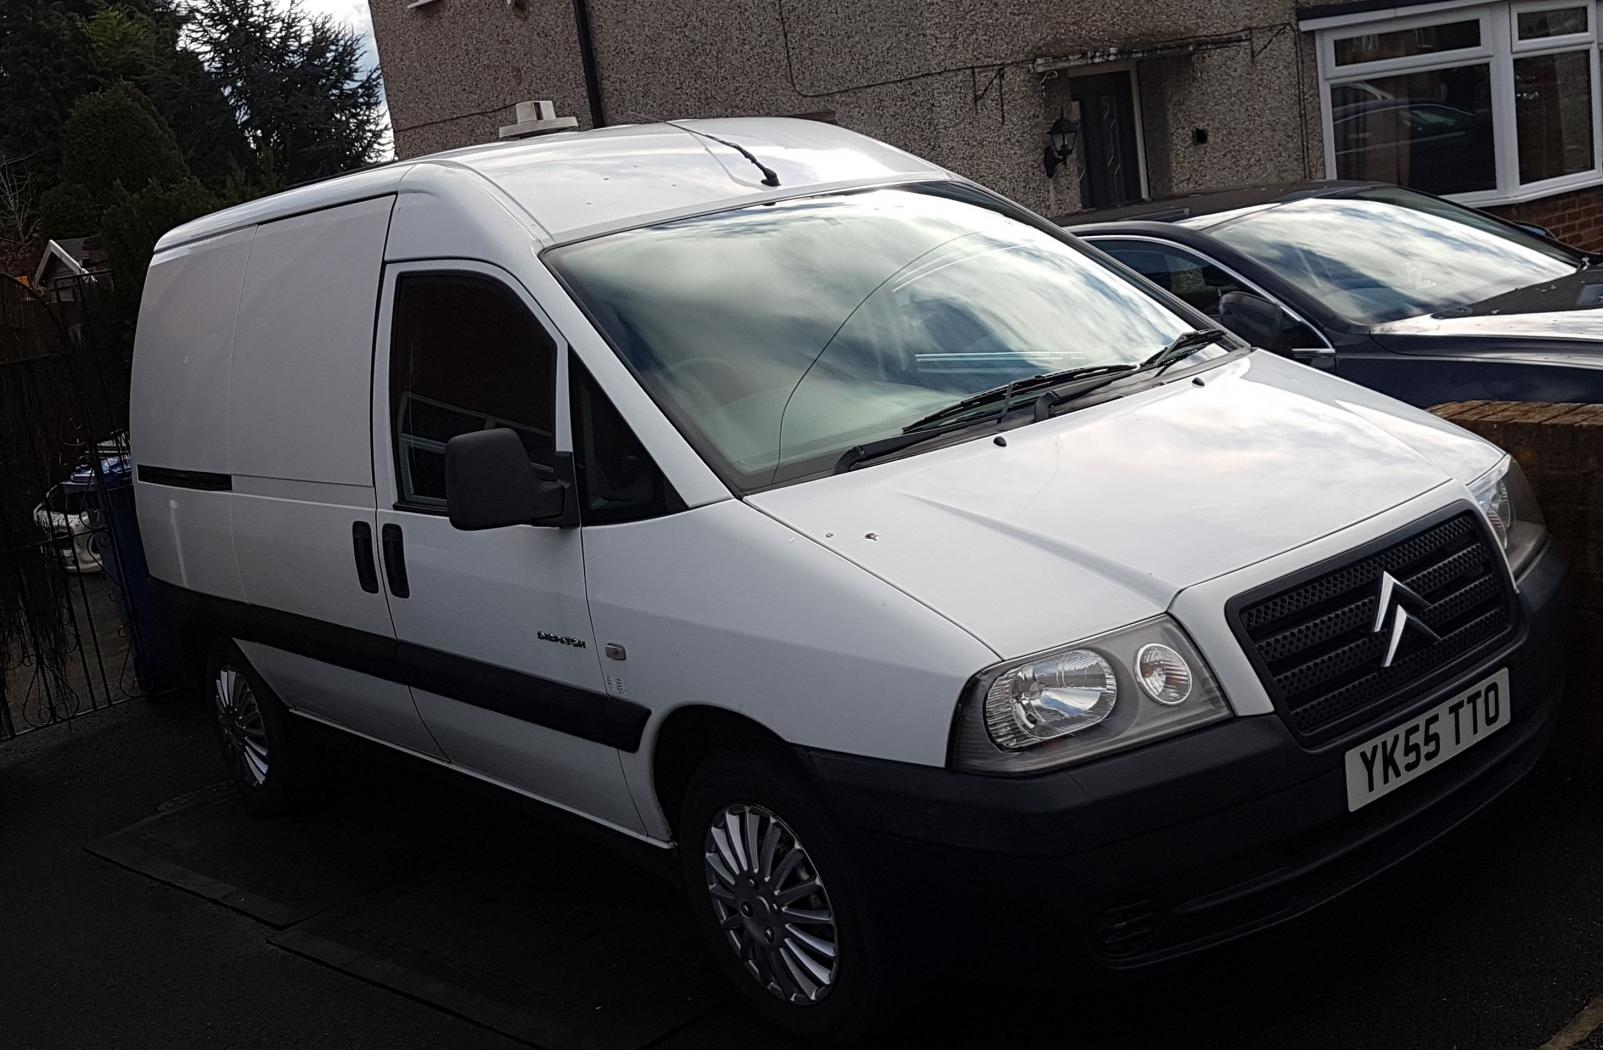
Welcome to the Story of my 2.0L HDi 110HP Citroen Dispatch.

Well a year or so ago my brother and i had the idea to get a van to convert into a camper. so we bought an Iveco Daily mk4 (2008). this was a refrigeration van. when we took apart the back of the van it had rather nice 50mm XPS insulation that we ended up recycling with much spare left over.
cut to a few months back, we still have the Daily which is still in the conversion stage but im enjoying it that much i want my own van. so i start looking at small vans. i originally was looking for a Doblo XL but i wanted something a little older, without advanced ECUs and emission controls. i went looking on Gumtree and saw this van for sale very cheap. i decided to go and have a look.
he told me it was being sold with faults. somehow over night it was draining its battery, and it over time started lacking in power. the chap had it in to a garage and they told him that it needs a complete new ECU to fix it. he was retiring from his self employed gardening business so the van was not needed as much as it used to be. fearing the cost of a replacement ECU and other faults that needed fixing he decided to sell it.
he also told me that he had the van a good 10 years or so and he religiously serviced it each year even if it did not clock up the required service mileage. on checking the dip stick i have never seen an engine so clean internally. not one bit of tarnish and the oil still a nice pleasant honey colour. little to no blow by and no noticeable oil leaks. Very Impressive.
on that i bought it.
i now was the registered keeper of a 2005 Dispatch "Enterprise 900" HDI with 99k miles on the clock for £325 with 12 months MOT.
my plans:
first off i wanted to install 2 extra seats to the van to make it a 5 seater. (more on that later!)
now i have some interesting wild Insane plans for this van. i love electronics. i cant help myself. so heres a little list of what i plan:
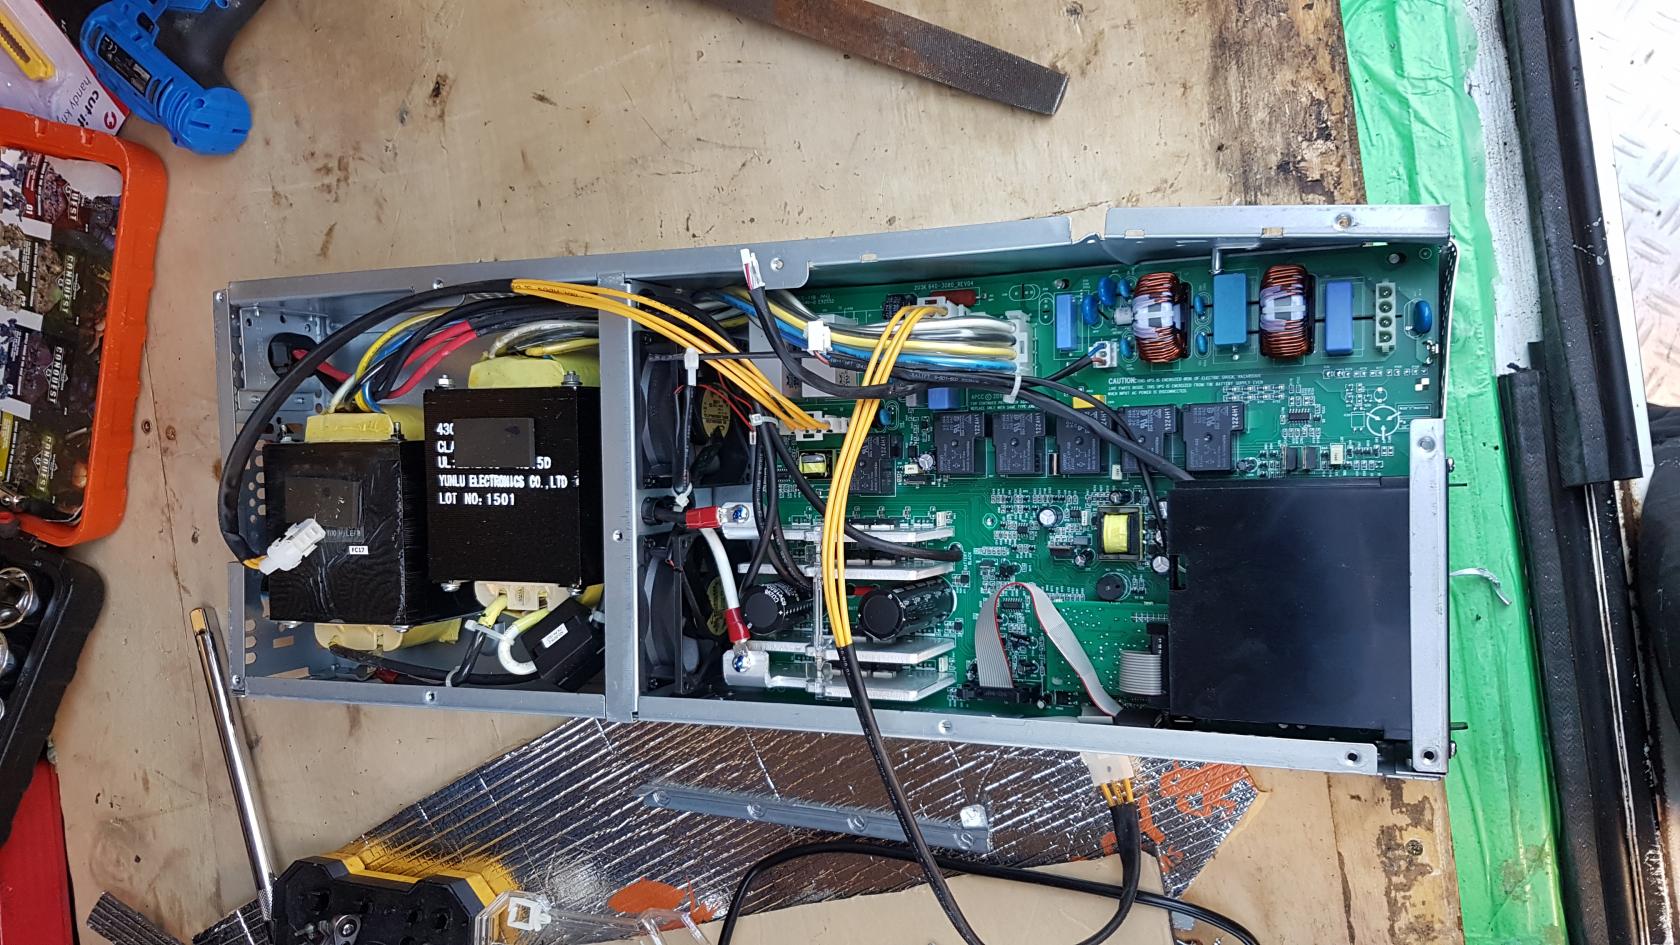
i plan to cram in a 48v leisure system to this van. the main component will be a heavily modified hacked and slashed 48v backup UPS (an APC SRT3000RMXLI)which will pretty much do everything for me. already having a mains charger built in, it also has a built in inverter at 2.7kw and being a UPS, if the electric hookup power fails, it will instantly switch over to battery power and keep all my 240v stuff working.
i will be using a "wind turbine" controller that i will use to tap directly into the alternators 3 phases to charge the 48v battery bank which i plan to store under the van in the gap the spare wheel usually hangs. ill be using gell cell / SLA, but if i can get my hands on some tasty AGM batteries i will use those.
the solar photovoltaic array i plan to have is also going to be pretty insane:
i plan to have a lot of solar power. i will be using a full sized roof rack on this van (that i may extend a little over the windscreen), and on that i plan to have a large roof box for storage (maybe 2) and maybe the spare wheel (though i may mount that to one of the rear doors). i plan on covering the roofbox(es) with semi-flexible solar panels. ive calculated that i should easy get 5x 18v 30 watt panels per roof box. each roof boxes solar panels will be linked in series so should get a nice 90 volts. if i do get another roof box i will add it in parallel to give my twice the amps output. i will then feed it into a Victron solar charger.
if that was not enough!
i will also have large pull out solar panels. these will be dual use. not only will they be able to be pulled out from under the roof rack for extra power, but they will also double up as a rain cover above the doors. i even have the plan on making them "push button deploy and retractable" using DC actuators. this however is something to do at my leisure as its more for "showing off"
im unsure of the total amount of watts all the panels combined will give but when the van is parked up at home it will be fed into our home self built solar array and power the house.
it does not end here however.
the van will also have a pressurised water system using a pump and bladder tank, both hot and cold running water. i will be using an old office drink water dispenser for the heating system. which has 2 modes, a 300w "instant heat" mode and a 30w "keep hot" mode where it stores water at a constant 60.c to 90.c (adjustable)
and lastly. yes there's more
i also plan to build my own refrigeration system in the van to run a fridge freezer. it will purely be a 48v system. the compressor and condenser (radiator on the back of a fridge) will be under the van (for noise and the coldest place giving the maximum efficiency) also saving internal space. ill be using a pre-built fridge i think. though not very well insulated (to my standards anyway) it will just make things easy.
i also plan on having a microwave grill too. that will be ran from the UPS inverter. should just about manage.
hacked and slashed 

now that's out the way, here is what i have done so far:
the evening i got it home i was sat in the van for a while reading through the booklets and various paperwork when i started hearing a buzzing/clicking sound. i traced the noise back to the rear left of the van, behind the lights. turns out the tow bar had an auto voltage detector for charging a caravans battery. this was looking pretty rough and quite melted to look at. i left it in place but pulled out the fuse. over the next 2 months i can report that the battery has never gone flat yet i have never really driven or even started the van up! will be an easy fix!
my first priority when i got the van home was to change the cam belt. 99k miles and a 15 year old cam belt is not odds that i like to play with. turns out its a really easy job on these vans. i locked the cam but never bothered locking the crank as i just used the visual timing mark to line it up. i replaced the water pump, tensioner and idler.i used a Gates timing belt kit. (we all know that they are the best!)


i also noticed that the throttle cable was very slack so "pegged" that back up a few notches.  sadly this did not fix the engine power issue.
now that was done i set about taking all of the original plywood out of the back. all in fantastic condition, all i planned to reuse again.
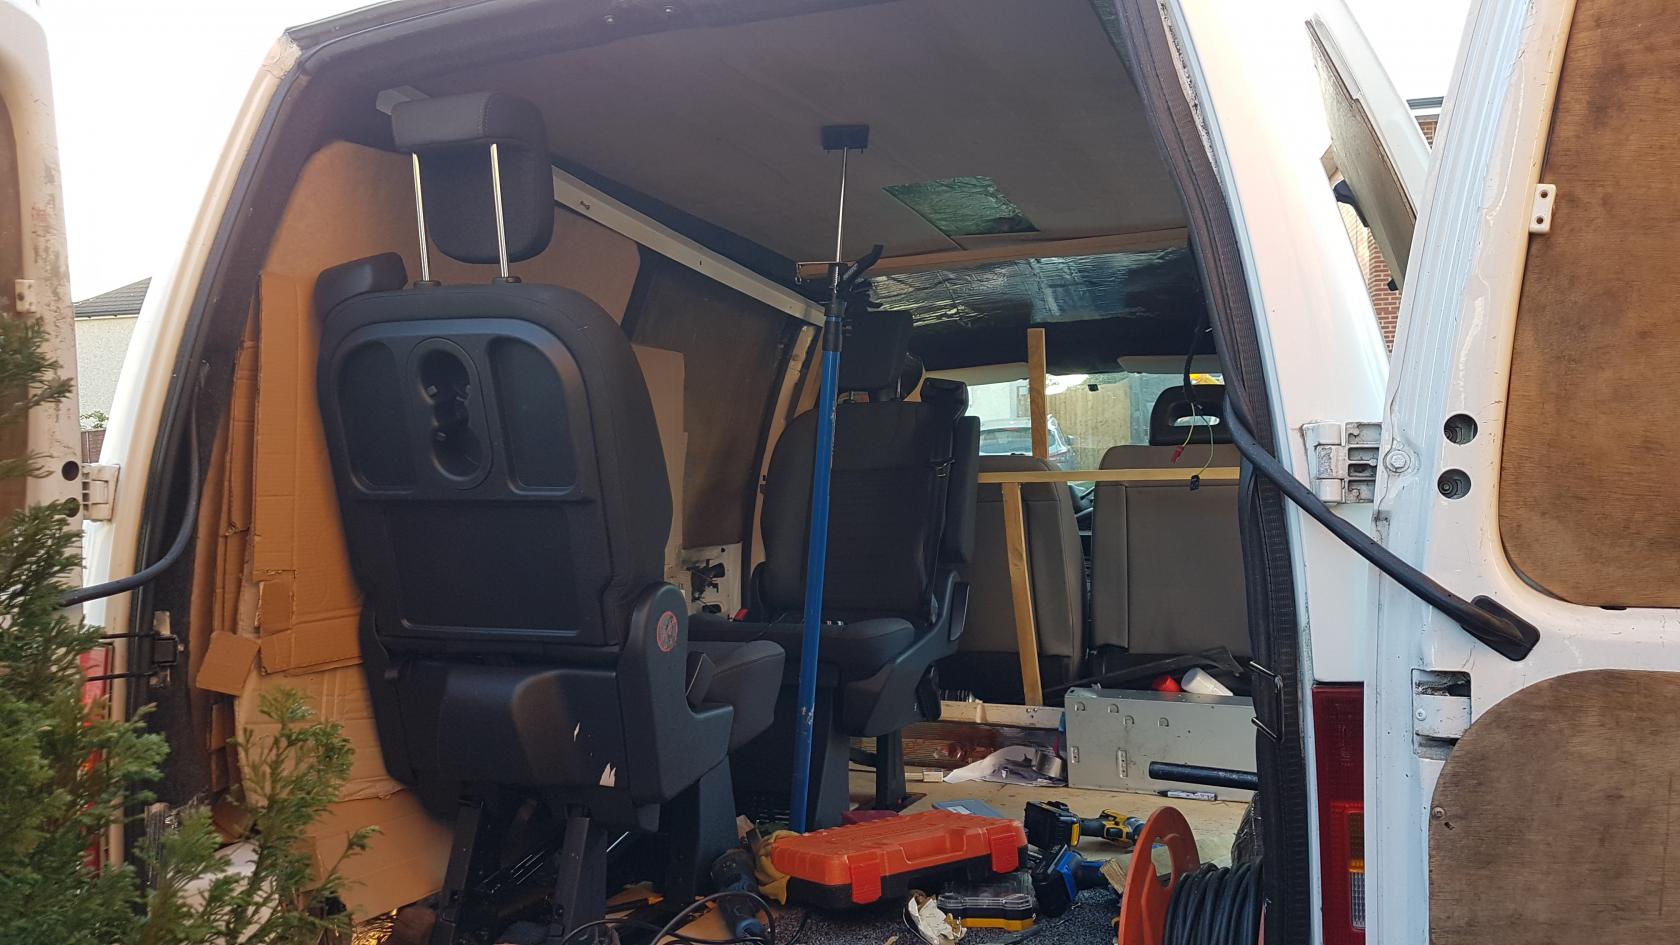
after cleaning the whole of the inside of the van with meths, my next priority was to install the extra 2 seats to the back. i wanted these seats totally removable as i still wanted to use it as a "lite van". my issue was that i wanted to have seats that could fold flat so i could lay a bed over the top of them. i also wanted them to have built in seat belts. all of which are quite rare things. i went into massive research looking for vehicles that have fold flat removable seats with built in seat belts. i eventually found out that Ford Transit Tourneo custom vans made after 2010 had just them! after contacting a few people i managed to buy two seats.
the seats fit perfectly in the original van floors "corrugation".
i welded in rather thick plate under the floor onto the chassis of the van so i had some very substantial seat mounting points. this did involve taking the fuel tank off in which i took advantage of the situation and repaired the very rusted fuel tank brace support, undersealed and rust proofed all chassis box sections using Dynax S50.
i bolted the seat runners in and installed the seats to test them before building the floor and its insulation.


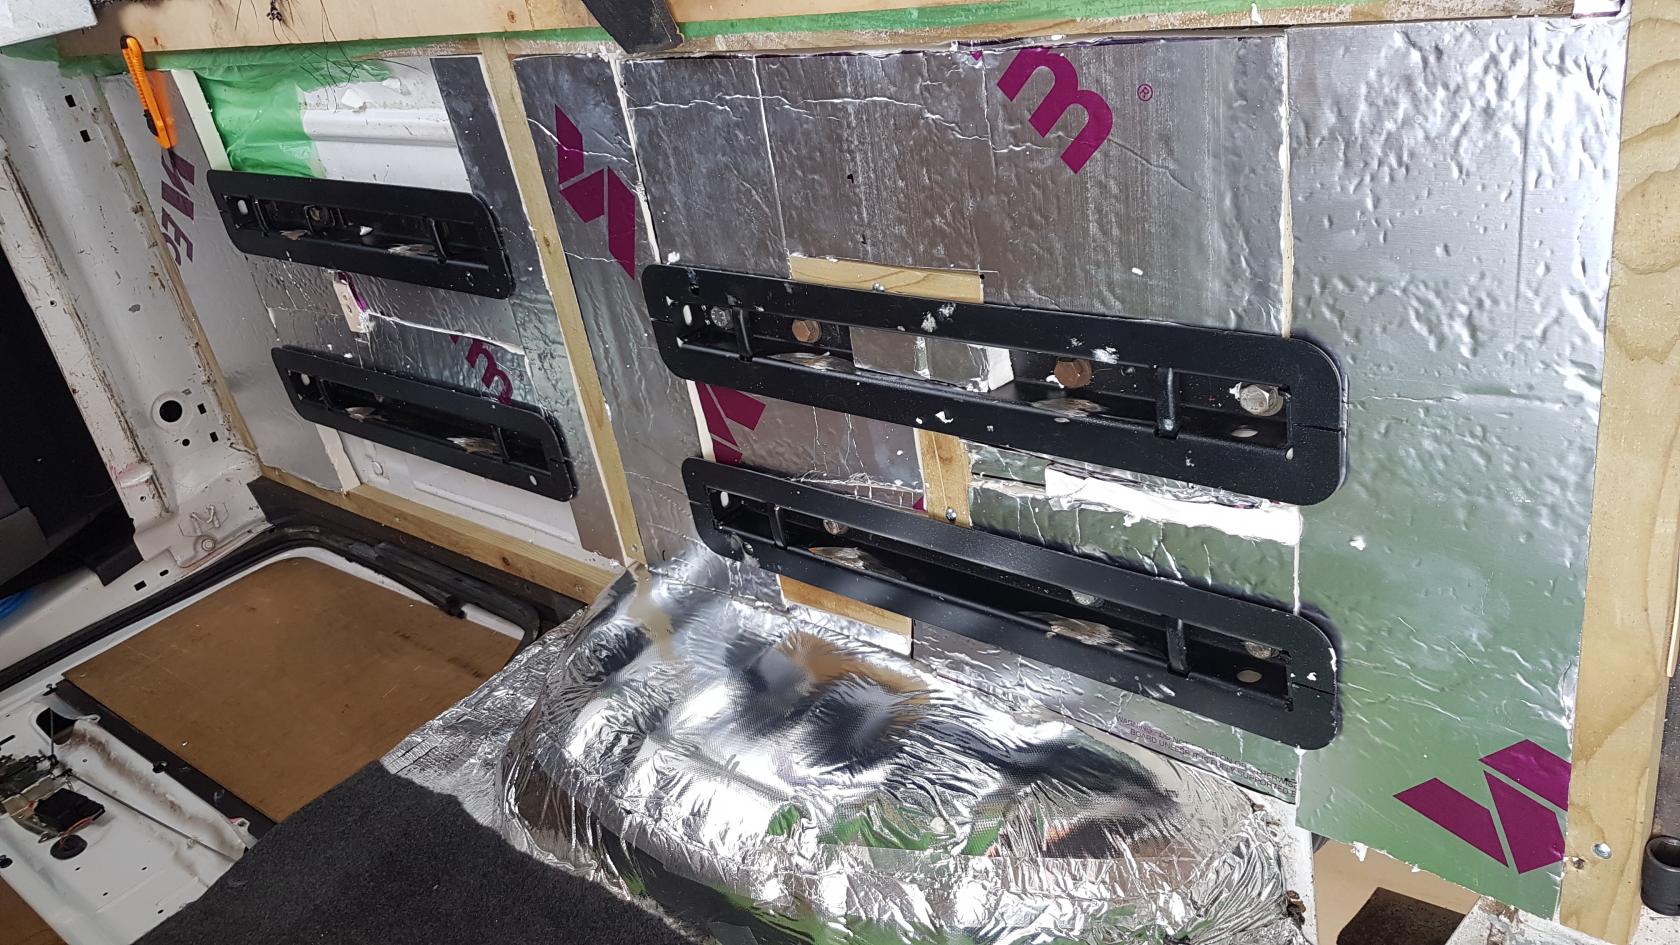
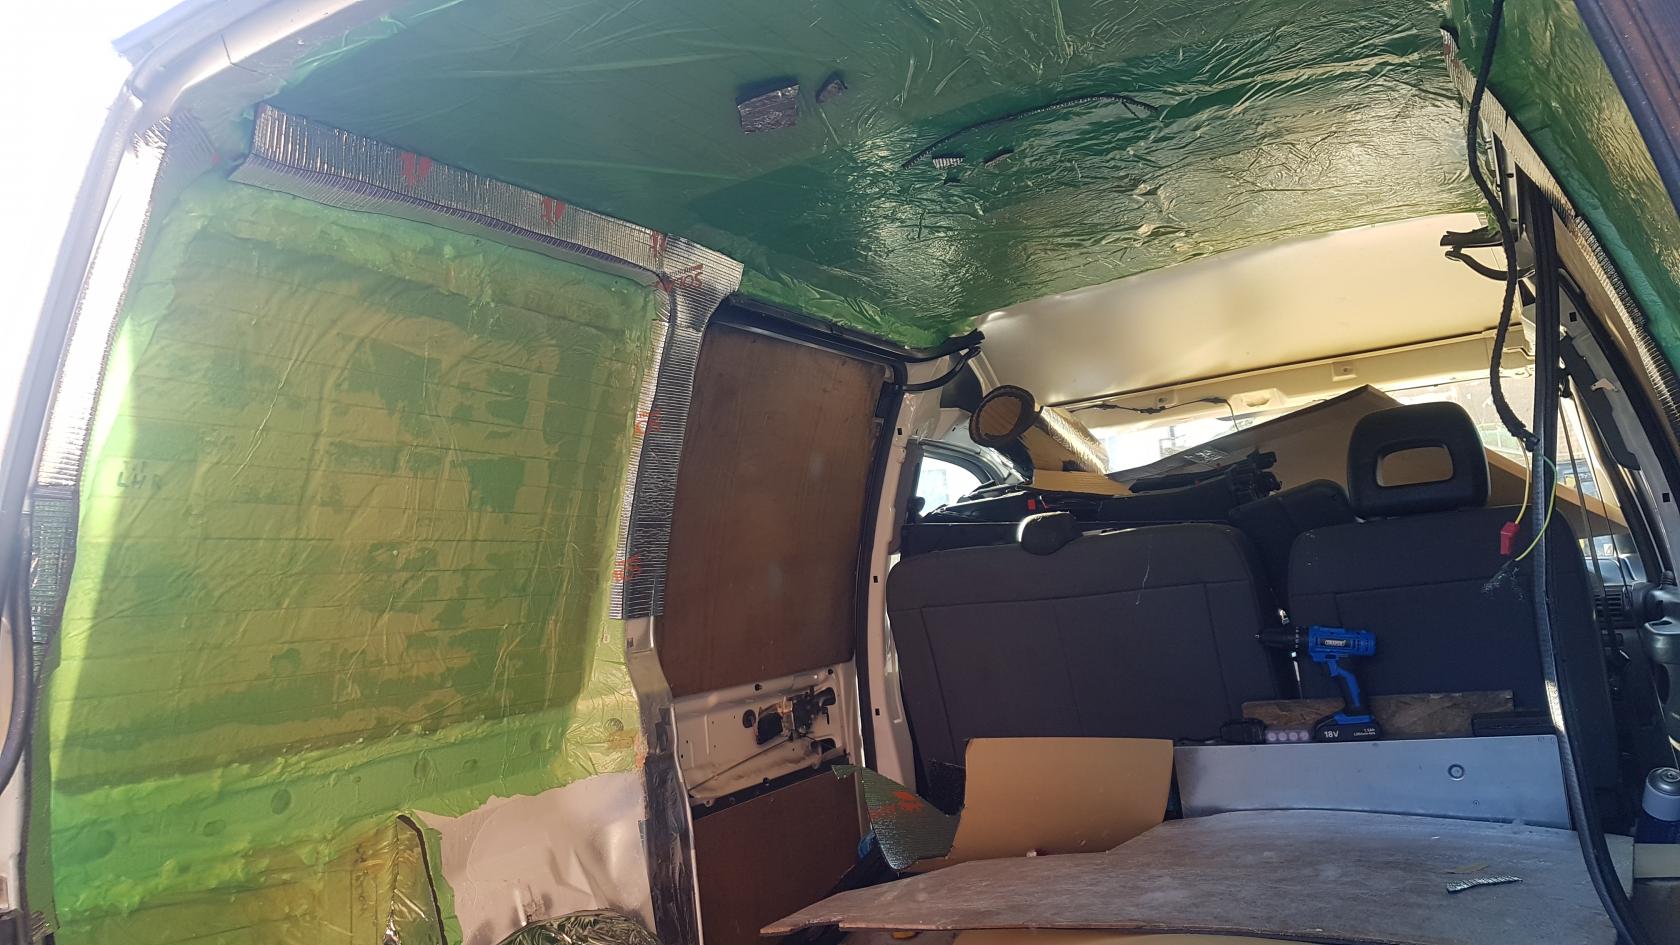
i then set to insulating the back of the van. remember that 50mm XPS insulation i had left over? we that is what i used! this got used on the roof and the sides of the van. it fits perfectly depth wise.
i used expanding insulation foam (not the normal builders expanding foam) to hold the XPS in place. it also filled any missed cavities in the insulation due to my bad cutting skills.

for the floor i used 25mm square wooden batons and 25mm Celotex. then layed the original plywood flooring over the top of it all after cleaning and cutting out the holes for the now fitted rear seat mounting points.
i also insulated inside the steel cavities using polyester "teddy bear" stuffing as it does not hold moisture and remains breathable.

After all that was done i "sealed" everything in with thin plastic sheeting as a vapour barrier using aluminium tape to cover all of the holes into the cavities. (i also dynaxed some of the cavities, just for rust precaution)
i then covered all of the steelwork with 6mm closed cell foil lined foam. to give it a "warm/soft" touch then covered it all with Auto Carpet. no cold hard steelwork to touch in the middle of the night!
i did the same with the original plywood side panels after cleaning them and cutting them down to size to lay on top of the insulation vapour barrier.
i went for a dark grey auto carpet for all metal covering and a cream auto carpet to cover the plywood side panels. i will be using black auto carpet around the bottom of the "walls" of the living space. about 20cm from the floor up. i will disguise the colour change line using a thin strip of "ornate" aluminium checker plate.
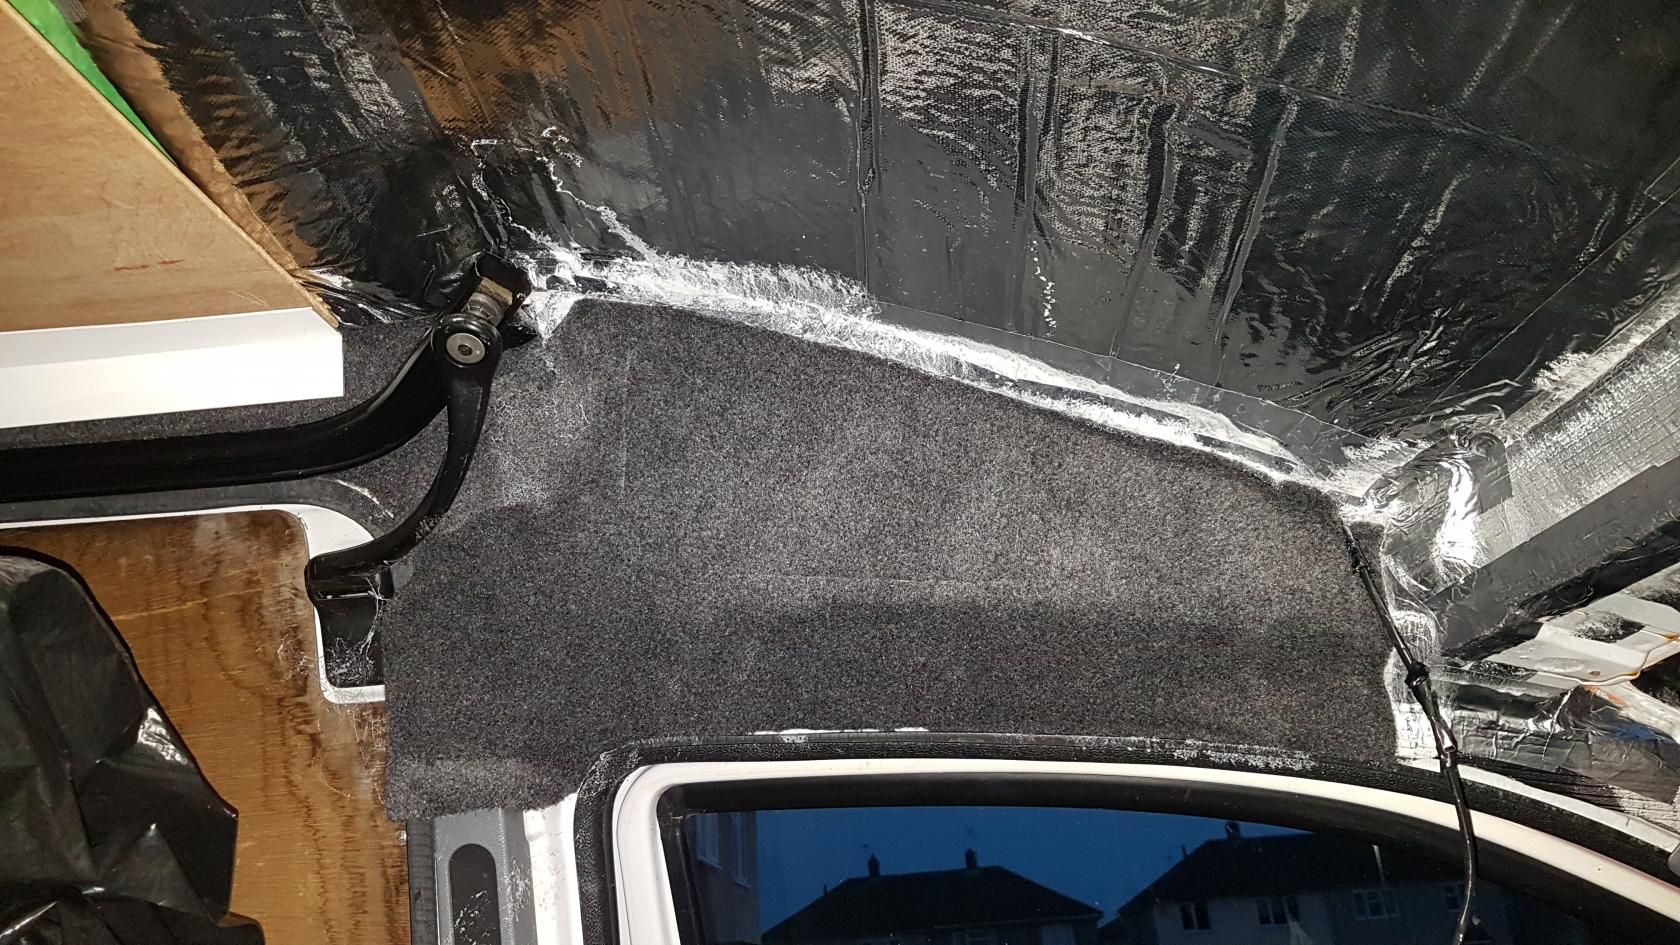
i started work on a bulkhead with a plan to make a sizeable over head cupboard. before that i took out the old headlining, sound proofed and insulated the aerial with dense sound deadening sheeting and 10mm closed cell foam.


while i was under the van i had a poke around at the rust and made quite a "holy mess"... holy sh!t. well i can weld it all up but having done that much of it i am at the point where i just do not want to do that kind of thing anymore. i ordered new sills and planned to take it to a body shop to repair as they would make a much neat job of it than i would.


i planned to leave the roof with some plywood over it and then stain it a darker colour. however i am unsure with this idea and may change it.
from the photos you will notice that the van has a spinning roof vent. i have great plans for this. swapping out the vent for a low profile one so i can still fit my roof rack on. i plan to use it as an air intake system. now i suffer greatly with hay fever. so i will be building into the roof a HEPA air filtration system and aircraft style air vents. i am the kind of person that likes to sleep with the noise and feel of a fan blowing on me (i am really very highly strange). this in the summer months will be quite nice.
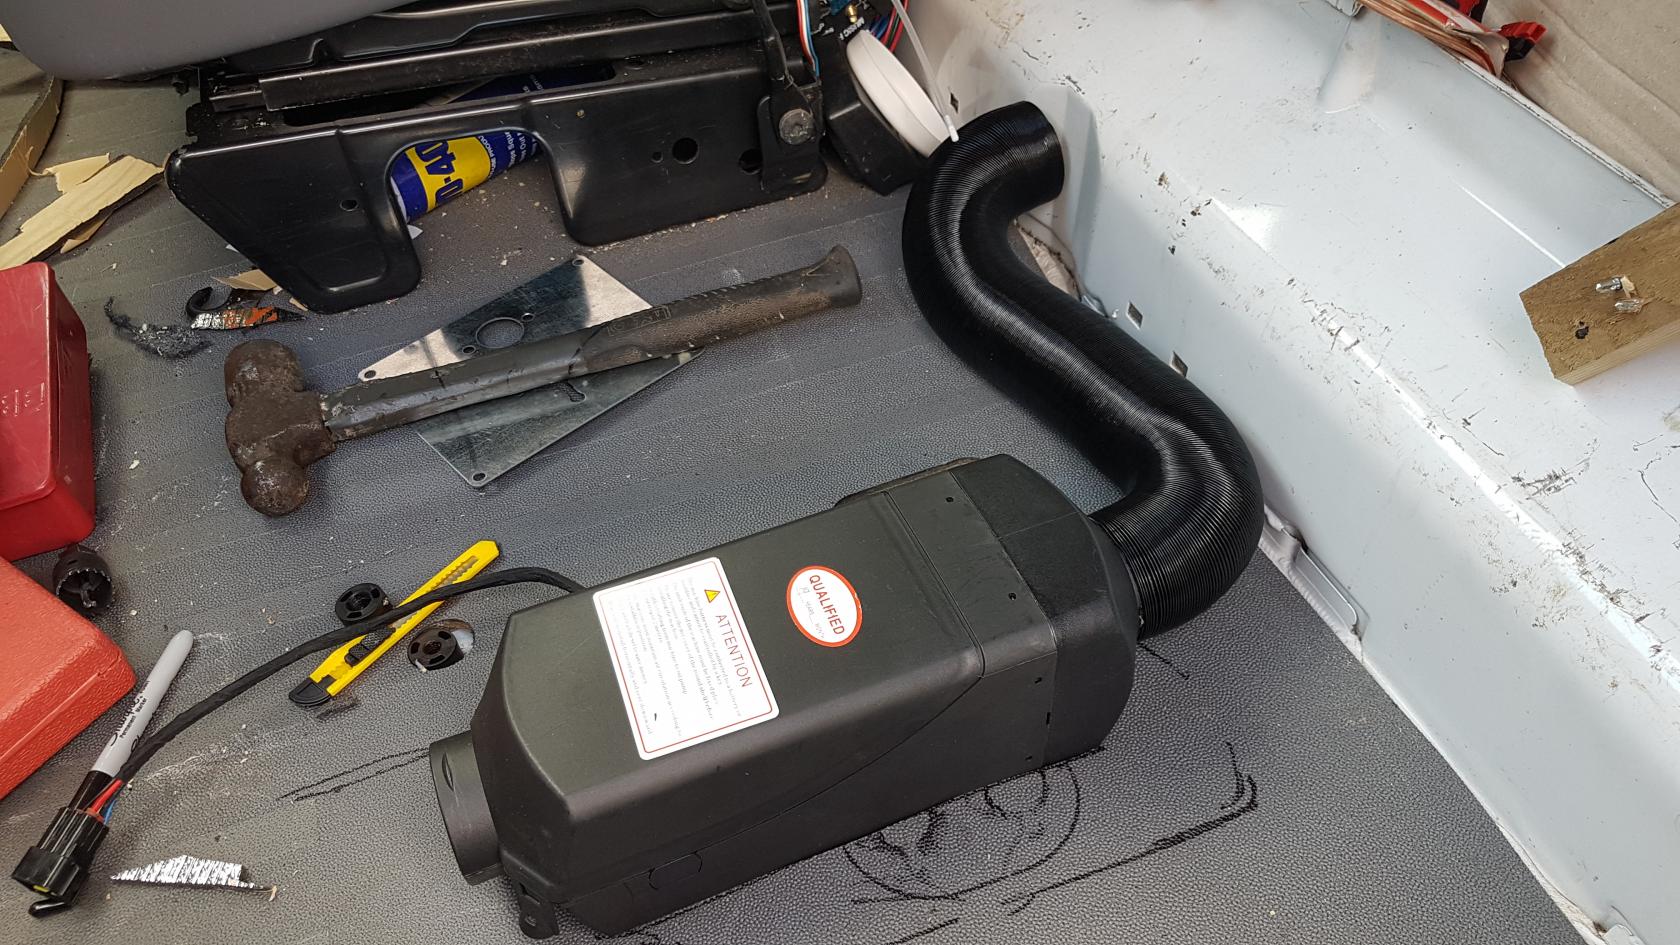
i have recently fitted a 2kw diesel air heater under the passenger seat. having cut out the "storage basket" to make way for it. i had to hammer flat some of the vans floor corrugation so it fit in nice and level. i did this using a trolley jack and a brick so i could hammer flat without concaving it. it fits in the gap really well but is close to fuel and brake lines under the van. i plan to make a heat shield for them. can never be too cautious. the heat output should blow nicely down the central walkway. between the seats and the kitchen units.


ok so as of today i have had the van for about 2 months and finally insured and taxed it. its insured as a camper in the conversion stage but still has SDPC specs so i can drive it to work 
so far i have not looked into fixing the engine power issue. i took it out for my first drive in it and i was a little worried about it being as slow as it was. thankfully i know a thing or two about modernish diesel engines so i started to unplug sensors. well first sensor to unplug was the Mass Air Flow sensor (just behind the air filter box). low and behold it was like i hit LAUNCH on Saturn 5 rocket. that was easy. too easy. well i have ordered a replacement MAF sensor and a replacement inter cooler. i will fit them when they get here.
That is as far as i have got! on Friday i will be taking it into the body shop for the welding work to be done. the body shop specialises in repairing E7 Eurotaxis so no stranger to these vans. they also have many scrap taxis around the back. i may even buy all the bits to retrofit air conditioning to my van from them! just for the filtered air mainly!
thanks for looking! i will be sure to add more updates as it progresses.
just to note, i am keeping Vlogs on this hosted on Youtube.
see the playlist here:
https://www.youtube.com/playlist?list=P … O2ISNI3vhn
-JohnDragonMan
Last edited by JohnDragonMan (2022-01-06 16:05:52)
- JohnDragonMan
Notice: I have the tendency to void warranties, blow fuses, cause fires, and other fun stuff.
Words of wisdom: Internally rust proof the sills and subframe! both skins!!. There's always user serviceable parts inside. "Oh that shouldn't have happened".
My 2005 Dispatch Camper Project
Offline
#2 2020-06-03 19:37:38
- tee_cee
- Member

- Registered: 2016-03-18
- Posts: 633
Re: JohnDragonMan's Dispatch Camper Conversion
All I can say is welcome & WOW!
Offline
#3 2020-06-04 13:33:39
- OAT
- Member

- From: Borders/Dales
- Registered: 2017-01-03
- Posts: 1,014
Re: JohnDragonMan's Dispatch Camper Conversion
Hello and welcome John. ☺
Your post breaks quite a few records I think. Not least for the investment of advanced skills and tech. I look forward to following your vlogs.
Are you building for a specific trip?
Offline
#4 2020-06-04 17:16:41
- JohnDragonMan
- Member
- From: Derby, East Midlands, UK
- Registered: 2020-06-02
- Posts: 456
- Website
Re: JohnDragonMan's Dispatch Camper Conversion
no not really, just building it because i want to.. i love messing with electronics so just plan to go crazy with it.
sadly since i have been driving it i am 90% sure the clutch is on the way out. in 4 and 5th gear i can give it full acceleration and the engine revs but the speed does not change. the clutch feels fine when pulling off and going through the lower gears however. the place where i am taking it to get the work done specialises in repairing the taxi version of this van so i may ask them to do it for me. i also plan on buying all of the bits needed to retro fit air conditioning
- JohnDragonMan
Notice: I have the tendency to void warranties, blow fuses, cause fires, and other fun stuff.
Words of wisdom: Internally rust proof the sills and subframe! both skins!!. There's always user serviceable parts inside. "Oh that shouldn't have happened".
My 2005 Dispatch Camper Project
Offline
#5 2020-06-04 23:59:19
- Casper
- Member

- From: East Lothian
- Registered: 2015-12-20
- Posts: 2,180
Re: JohnDragonMan's Dispatch Camper Conversion
Do you need a diesel heater in such a small space? That the 100 quid Chinese one? Soon to be starting a Convoy build myself and will be adding a diesel heater. How are you feeding yours? I was thinking a 2nd tank next to main fuel tank rather than that plastic crap they provide. My convoy has the Transit Duratorq engine what hates any sniff of air in the fuel lines so sod taking a feed from there.
Offline
#6 2020-06-05 00:25:11
- JohnDragonMan
- Member
- From: Derby, East Midlands, UK
- Registered: 2020-06-02
- Posts: 456
- Website
Re: JohnDragonMan's Dispatch Camper Conversion
i explain a few things in this video.. hope it helps!
edit:
just took the van in for a quote on welding. sadly ive been quoted around £1700 from multiple garages.
looks like i am going to have to do it all myself.
Last edited by JohnDragonMan (2020-06-05 12:30:51)
- JohnDragonMan
Notice: I have the tendency to void warranties, blow fuses, cause fires, and other fun stuff.
Words of wisdom: Internally rust proof the sills and subframe! both skins!!. There's always user serviceable parts inside. "Oh that shouldn't have happened".
My 2005 Dispatch Camper Project
Offline
#7 2020-06-06 20:58:09
- Casper
- Member
- From: East Lothian
- Registered: 2015-12-20
- Posts: 2,180
Re: JohnDragonMan's Dispatch Camper Conversion
i explain a few things in this video.. hope it helps!
edit:
just took the van in for a quote on welding. sadly ive been quoted around £1700 from multiple garages.looks like i am going to have to do it all myself.
I have LDV Convoys so know rust Bought myself a little gas less mig for 80 quid and slowly teaching myself to weld. They are OK but spit a tad. Welded a convoy and the wifes car through an MOT so must be doing something right
Offline
#8 2020-06-07 01:37:37
- JohnDragonMan
- Member
- From: Derby, East Midlands, UK
- Registered: 2020-06-02
- Posts: 456
- Website
Re: JohnDragonMan's Dispatch Camper Conversion
I have LDV Convoys so know rust
you cant beat the gas type.. ive been welding since i was 5. no exaggeration. for lazy reasons i use co2 fire extinguishers as they only cost £15 to refill and last ages. plus i have a few spare lying around as they are funnily enough good for putting out fires. heh. so when it comes to welding, handy for 2 reasons. who knows, i may end up enjoying it. who am i kidding. that £1700 sounds good.... if money was no object haha.
so i have a plan.
the clutch spring has gone. its about the mileage they do go at and i am pretty sure this was used for towing at some point. lots of ware on the tow bar ball..
so heres what i am going to do. i will do the welding on the arse end and sills of the van, paint them up and rust proof the living hell out of them. both internally and externally.
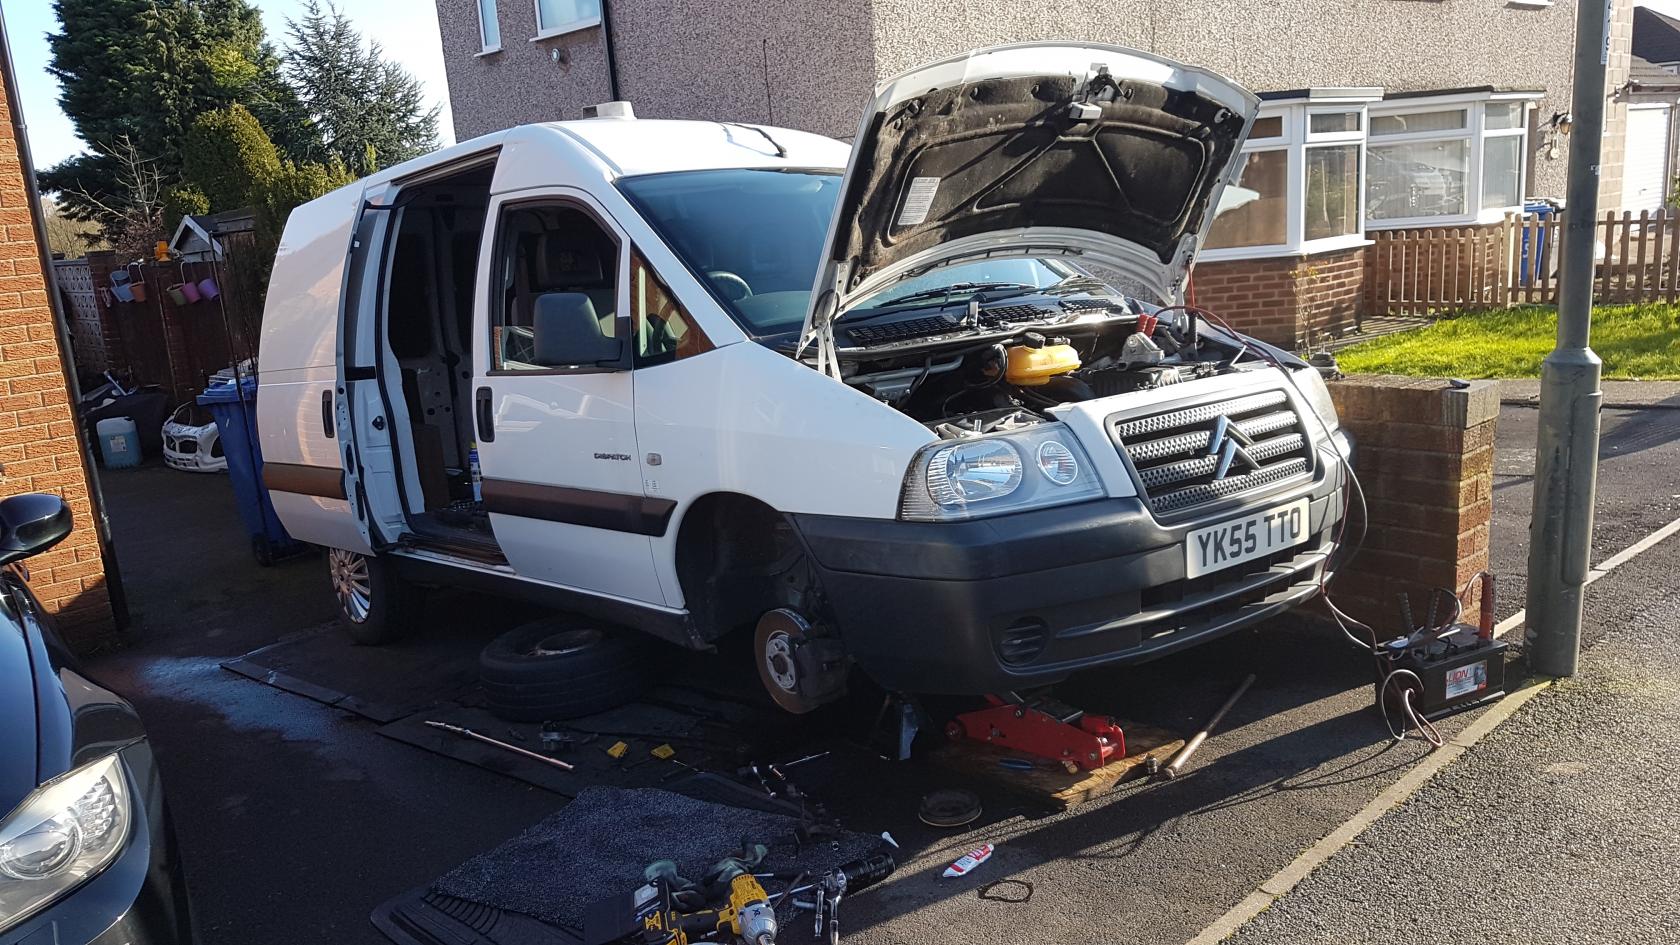
ill then flip the van around on the drive get the front end up on some ramps and start stripping it down. up on axle stands, wheels off, gearbox out, swap over to single/solid mass flywheel and replacement clutch, while the gearbox is off i will drop the sub frame, clean all of that up, repair if needed and repaint, change all of the bushes i can clean all of the chassis in and around the engine bay i can, then start refitting it. then it will be bumper off and replace the intercooler.
while i have the gearbox out i will also try to install all of the aircon components too. my dash is already half out so i am most of the way there.
if its not how i want it. i dont want it. im just looking forward to that clean pollen free air.
if anyone is local to Derby and has a van being scrapped with aircon, can i have a day with it so i can get all the aircon bits out of it? ill pay you for what i take! if you are worried about the gas escaping, i have got all the kit to reclaim it into a bottle. so no environmental hazard.
i have nothing but bad luck, so wish me the good luck stuff!
- JohnDragonMan
Notice: I have the tendency to void warranties, blow fuses, cause fires, and other fun stuff.
Words of wisdom: Internally rust proof the sills and subframe! both skins!!. There's always user serviceable parts inside. "Oh that shouldn't have happened".
My 2005 Dispatch Camper Project
Offline
#9 2020-06-07 23:28:46
- Casper
- Member
- From: East Lothian
- Registered: 2015-12-20
- Posts: 2,180
Re: JohnDragonMan's Dispatch Camper Conversion
Friend along the street has a gas hobby mig what ill borrow at some stage to try but till then happy to keep using my gasless, also my work has to be done it the side of the road to size and weight come into it for me anyway.
Tip my hat at your sir as no way would i put as much effort into converting such a small van to the standard that you are after and spending on. My (older) Dispatch is just a works van and i did hash convert a Expert but after one Holiday decided it was way to small. I was after a Boxer but the Convoy came along at the right rice. Funnily enough in Derby to took the train down and bought it.
Offline
#10 2020-06-13 05:47:10
- JohnDragonMan
- Member
- From: Derby, East Midlands, UK
- Registered: 2020-06-02
- Posts: 456
- Website
Re: JohnDragonMan's Dispatch Camper Conversion
ok i dont know if i told you guys but i took my van in to get some welding quotes. in excess of £1700. hot damn.
so i just started doing it all myself. so far i have one sill done. completely rebuilt with all serious rust chopped out and new steel cut to shape and welded in. no "cover it over with a patch" here. i did a video on it:
be sure to skip to the end of my part 2 video on it here to see the end result as i never took pictures.. guhh
i am now working on the back corner where the rear wheel sprays all the water and grit up.. have it all cleaned up, spot welds drilled, cut out and ready to make new steel parts and weld them in.
my plan is to make this a completely sealed cavity with just a little drain hole in it should water ever get in which it should not.
also i have bought almost everything needed to retrofit air conditioning into this van.
i made a topic >>Here<< for anyone foolish brave insane enough to follow me in the quest for perfection.
yes i have been up till now researching things on this van. its consuming me. finally something all the voices in my head can agree on.
... what?
- JohnDragonMan
Notice: I have the tendency to void warranties, blow fuses, cause fires, and other fun stuff.
Words of wisdom: Internally rust proof the sills and subframe! both skins!!. There's always user serviceable parts inside. "Oh that shouldn't have happened".
My 2005 Dispatch Camper Project
Offline
#11 2020-06-13 08:30:36
- OAT
- Member
- From: Borders/Dales
- Registered: 2017-01-03
- Posts: 1,014
Re: JohnDragonMan's Dispatch Camper Conversion
I have caught up on your videos. Thanks, very interesting. And I do agree...you are crazy. ☺
I don't understand what your aim is but sometimes it's the journey that matters. I thought when you discovered all the rot that it would be the end of the project. Your persistence is impressive.
I will be following with interest, (and no doubt, some bemusement )
Offline
#12 2020-06-14 01:18:06
- kenbw2
- Administrator

- From: Preston
- Registered: 2017-11-26
- Posts: 1,620
Re: JohnDragonMan's Dispatch Camper Conversion
My god, the work you've done on the inside is great. I love your two seats facing each other. Are they legal to drive with too?
You've given me ideas with that cubby hole next to the driver's cab! I'm trying to remember where it is. I crammed with with insulation but I might just claim it back!
2000 Citroen Dispatch 1.9TD XUD9 Camper Conversion
1999 Citroen Dispatch 1.9D DW8 Disassembled Camper Conversion
1996 Peugeot 806 1.9TD XUD9 Spare vehicle
1998 Citroen Synergie 1.9TD XUD9 Snapped timing belt
Offline
#13 2020-06-17 03:18:17
- JohnDragonMan
- Member
- From: Derby, East Midlands, UK
- Registered: 2020-06-02
- Posts: 456
- Website
Re: JohnDragonMan's Dispatch Camper Conversion
oh we do love ourselves some pictures, dont we.
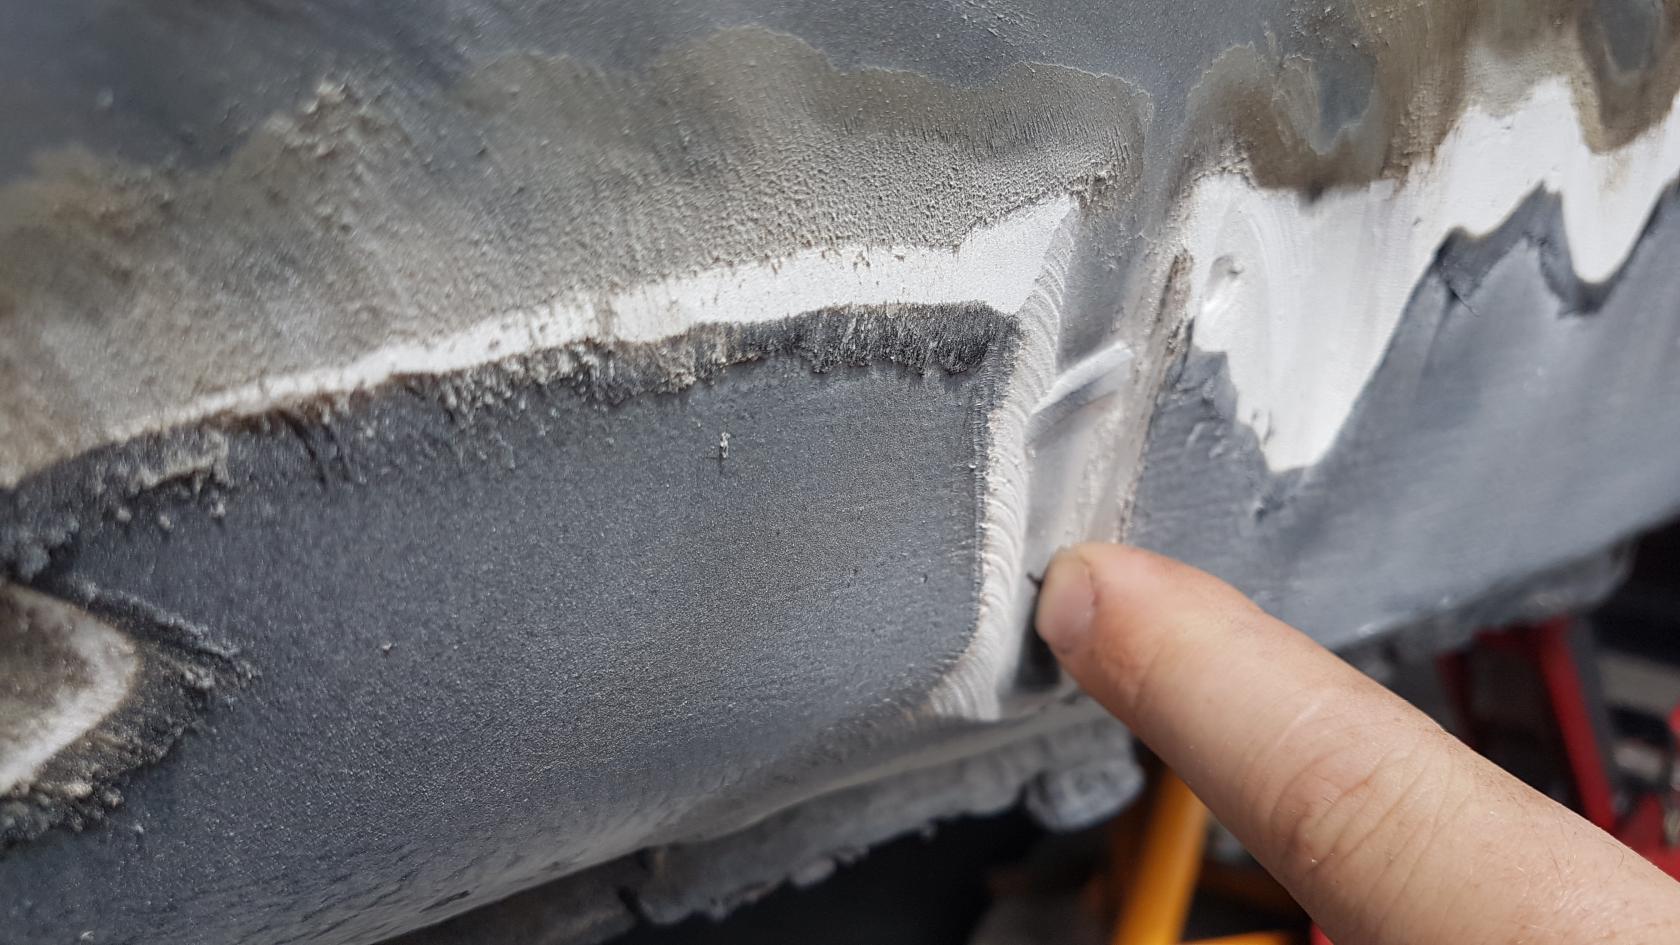
so i cut the outer skin off the sill, and i was greeted with this. what a pleasant sight indeed. time to get happy with the grinder

so that was fun time to start making new metal, yes some bits still looks rough but believe me, the magic of Dynax S50 will prevent future rust for many years.

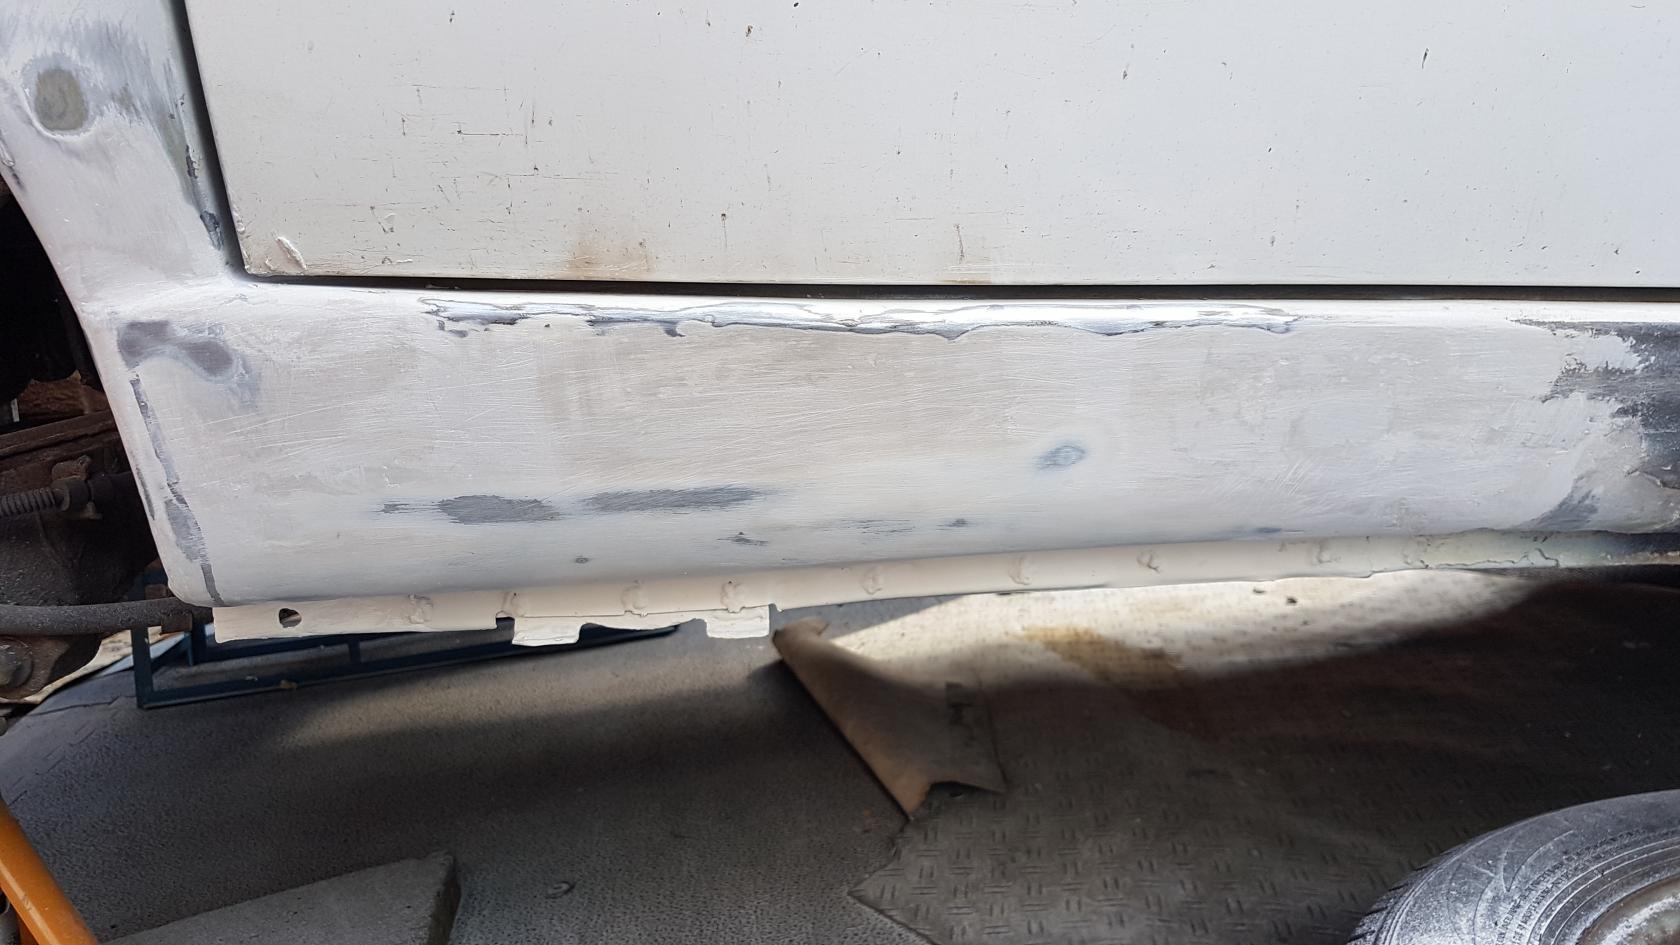
anyway, cut a long story short and we have this result. silky smooth. not bad for saying i have no experience with using filler. i usually just grind my welds totally smooth. (my welds are just THAT flat to start with)
-----------------------------------------------------------------------------------------------------------------
oh OHHHHHHHHH What is this?! "Youve not!!" i hear you say, well yes. YES i have done the unthinkable. i have painstakingly undergone the tedious task (it was actually quite easy) of removing the air conditioning system from another vehicle (Peugeot E7 Eurocab).

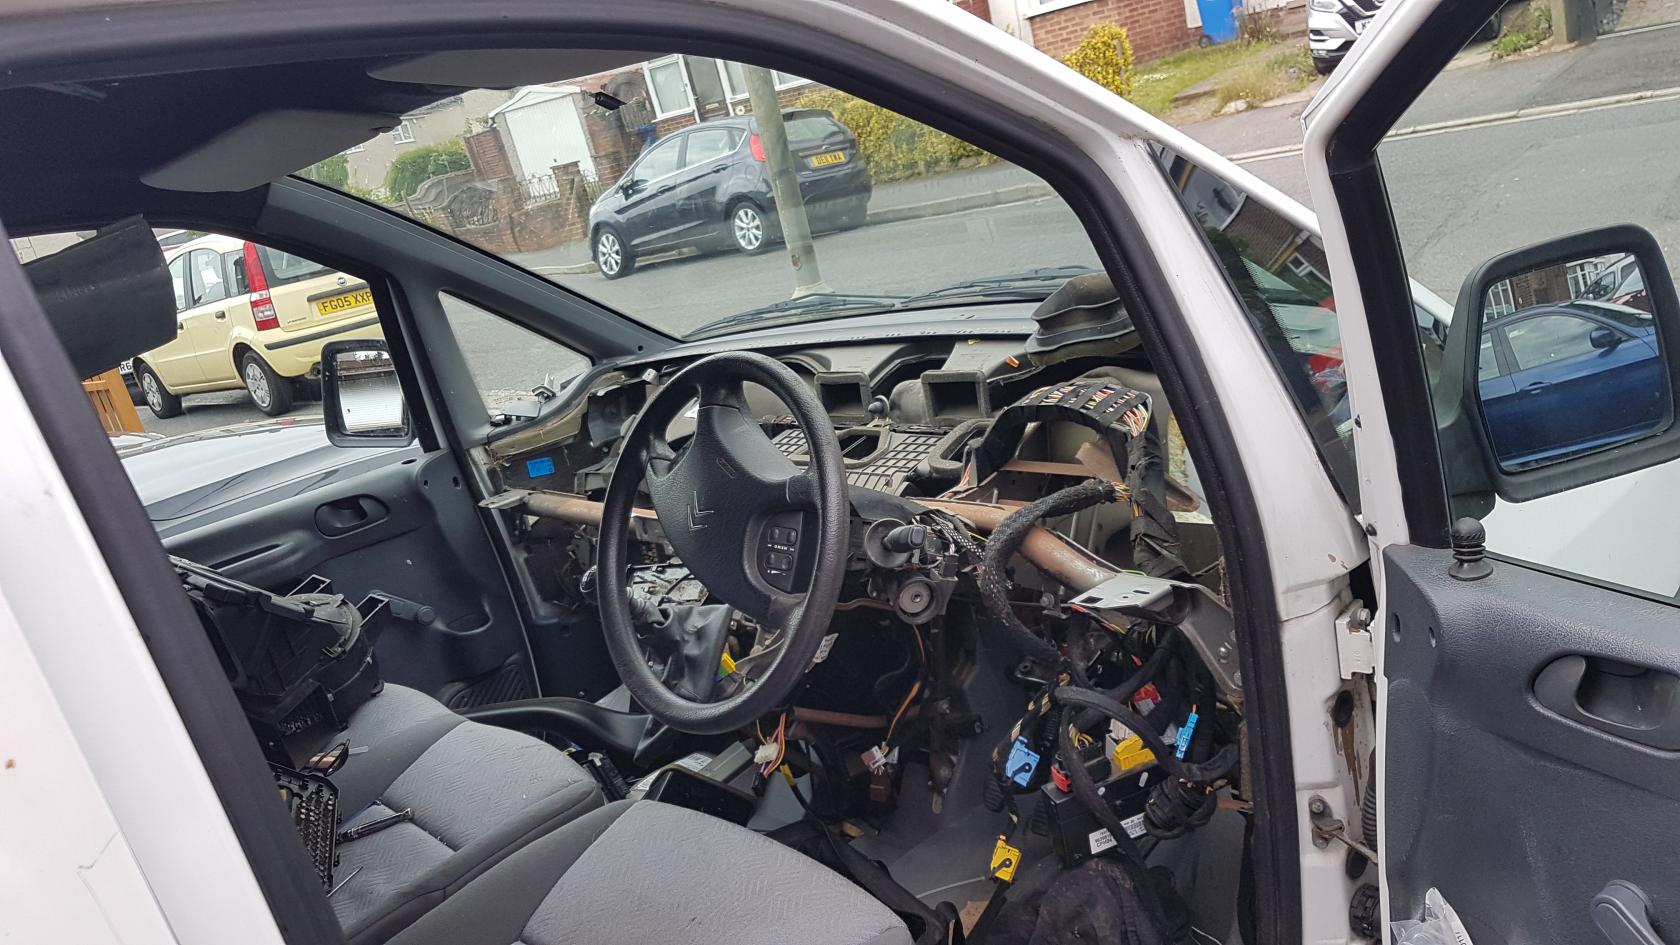
some disassembly required... again not as bad as it looks.. by far the most easy vehicle to remove the dash from (excluding my old Fiat Panda 4x4, 5x "normal" screws )
really a T20 torques bit and a 10mm ratchet.. no problem this. 10 mins work! (and it still starts, runs, and drives like this!)
now i "could" just attach this to my original air box system as it just happily sits on the back with 2 clips and a simple switch that turns the radiator cooling fan and compressor on (thats it!) but wheres the fun in that. you folks should know by now that its not the way I do things.
i need to get in with the wiring, become one with it (you will if you undo that loom!). i am just going to do the lazy thing and run new wiring alongside it. thankfully you get a nice wiring harness that just "plugs in" to your original vehicles wiring loom. that.. does seem... to be missing a few wires..... well im SURE it will be ok... i mean theres Already SO MANY.. i'm sure it wont mind a few not being there... ahem.
Moving right along..

now i do have to do some cutting out. remember i said that vans with aircon have 2 blower motors.. well turns out its a somewhat solid panel it mounts to. i was kinda hoping there was a plug i could just take out and to some extent there was.. but its too small. so Mr happy grinder time again.
this is how it should look...

and this is mine.

ahh but enough of that for now. check out this impressive filler work on the other sill the other side of the van. thats a good few mill thick that.

hmm nice.. wonder whats inside..

its like ive been here before! just everything is backwards now!
ahh and the bit i cut off? lets have a look and see the thickness of that filler work.. top job!

ahh but now it is time that i come to the end of my post..
remember, insanity and creativity is a close friend. or is that insanity and genius.. well whatever.
(must remember to not show these guys my old car)
Last edited by JohnDragonMan (2020-06-17 03:21:06)
- JohnDragonMan
Notice: I have the tendency to void warranties, blow fuses, cause fires, and other fun stuff.
Words of wisdom: Internally rust proof the sills and subframe! both skins!!. There's always user serviceable parts inside. "Oh that shouldn't have happened".
My 2005 Dispatch Camper Project
Offline
#14 2020-06-17 19:31:07
- Casper
- Member
- From: East Lothian
- Registered: 2015-12-20
- Posts: 2,180
Re: JohnDragonMan's Dispatch Camper Conversion
Some handy pictures as my sills are now bubbling from the inside out. MOT is 5 month away but may as well do it one W/E soon while its warm. My Dispatch as just a works van so it will just be MOT pass standard but good to know what i am cutting into cheers
Offline
#15 2020-06-17 23:08:33
- OAT
- Member
- From: Borders/Dales
- Registered: 2017-01-03
- Posts: 1,014
Re: JohnDragonMan's Dispatch Camper Conversion
Yes a lot of this info will be very useful in the future as our vans age. Thanks for all the detail and pics.
And your last car?... too late, I have seen it.
(once seen, never forgoten)
Offline
#16 2020-06-17 23:56:31
- JohnDragonMan
- Member
- From: Derby, East Midlands, UK
- Registered: 2020-06-02
- Posts: 456
- Website
Re: JohnDragonMan's Dispatch Camper Conversion
well bar the things i have already bought and replaced on my van, i have racked up quite the Ebay shopping basket.
i want to replace all things that could potentially cause issues in the future. lets face it, it is 15 years old now.
so, any other recommendations?
most drive train and braking system has been already replaced.
things like shocks and springs i will replace when they fail as well i can still move the van.
i'm going all in with this.
- JohnDragonMan
Notice: I have the tendency to void warranties, blow fuses, cause fires, and other fun stuff.
Words of wisdom: Internally rust proof the sills and subframe! both skins!!. There's always user serviceable parts inside. "Oh that shouldn't have happened".
My 2005 Dispatch Camper Project
Offline
#17 2020-06-18 04:25:37
- kenbw2
- Administrator
- From: Preston
- Registered: 2017-11-26
- Posts: 1,620
Re: JohnDragonMan's Dispatch Camper Conversion
Well, what I've learned today is that there's no need for me to worry about what's inside my sills. No need to worry at all.
2000 Citroen Dispatch 1.9TD XUD9 Camper Conversion
1999 Citroen Dispatch 1.9D DW8 Disassembled Camper Conversion
1996 Peugeot 806 1.9TD XUD9 Spare vehicle
1998 Citroen Synergie 1.9TD XUD9 Snapped timing belt
Offline
#18 2020-06-21 01:17:44
- JohnDragonMan
- Member
- From: Derby, East Midlands, UK
- Registered: 2020-06-02
- Posts: 456
- Website
Re: JohnDragonMan's Dispatch Camper Conversion
all of the rust has been cut out and new steel welded in.
the welding is complete.
before and after shot? you got it.

now this little set back has been dealt with, i can now focus on more "pressing" matters. or should i say lack of it given the clutch spring plate has failed.. get the van turned around.. and oh my favourite thing to do with vehicles.. rip its heart out.
i work in a scrap yard because i enjoy my work. its nice to bring it home. i have far better tools here to undertake such an operation. though my frankenforklift is duly missed. boss would not assign me a forklift so i pretty much built my own. when i eventually leave the company its coming home with me. it came in for scrap and i spent my days off fixing it with scrap. looks like hell but keeps passing yearly inspection. can build anything if you have a machine shop (that all came out of the scrap pile!)
looking forward to what is to come. its been too long since i've had an engine out of something. (i've got issues.. or withdrawal or something)
- JohnDragonMan
Notice: I have the tendency to void warranties, blow fuses, cause fires, and other fun stuff.
Words of wisdom: Internally rust proof the sills and subframe! both skins!!. There's always user serviceable parts inside. "Oh that shouldn't have happened".
My 2005 Dispatch Camper Project
Offline
#19 2020-06-22 02:11:00
- JohnDragonMan
- Member
- From: Derby, East Midlands, UK
- Registered: 2020-06-02
- Posts: 456
- Website
Re: JohnDragonMan's Dispatch Camper Conversion
clutch change time!
yes thats me!

so had to drain the gearbox oil, surprisingly clean looking! magnetic drain plug also is rather clean for 100k miles. wonder if its been changed before?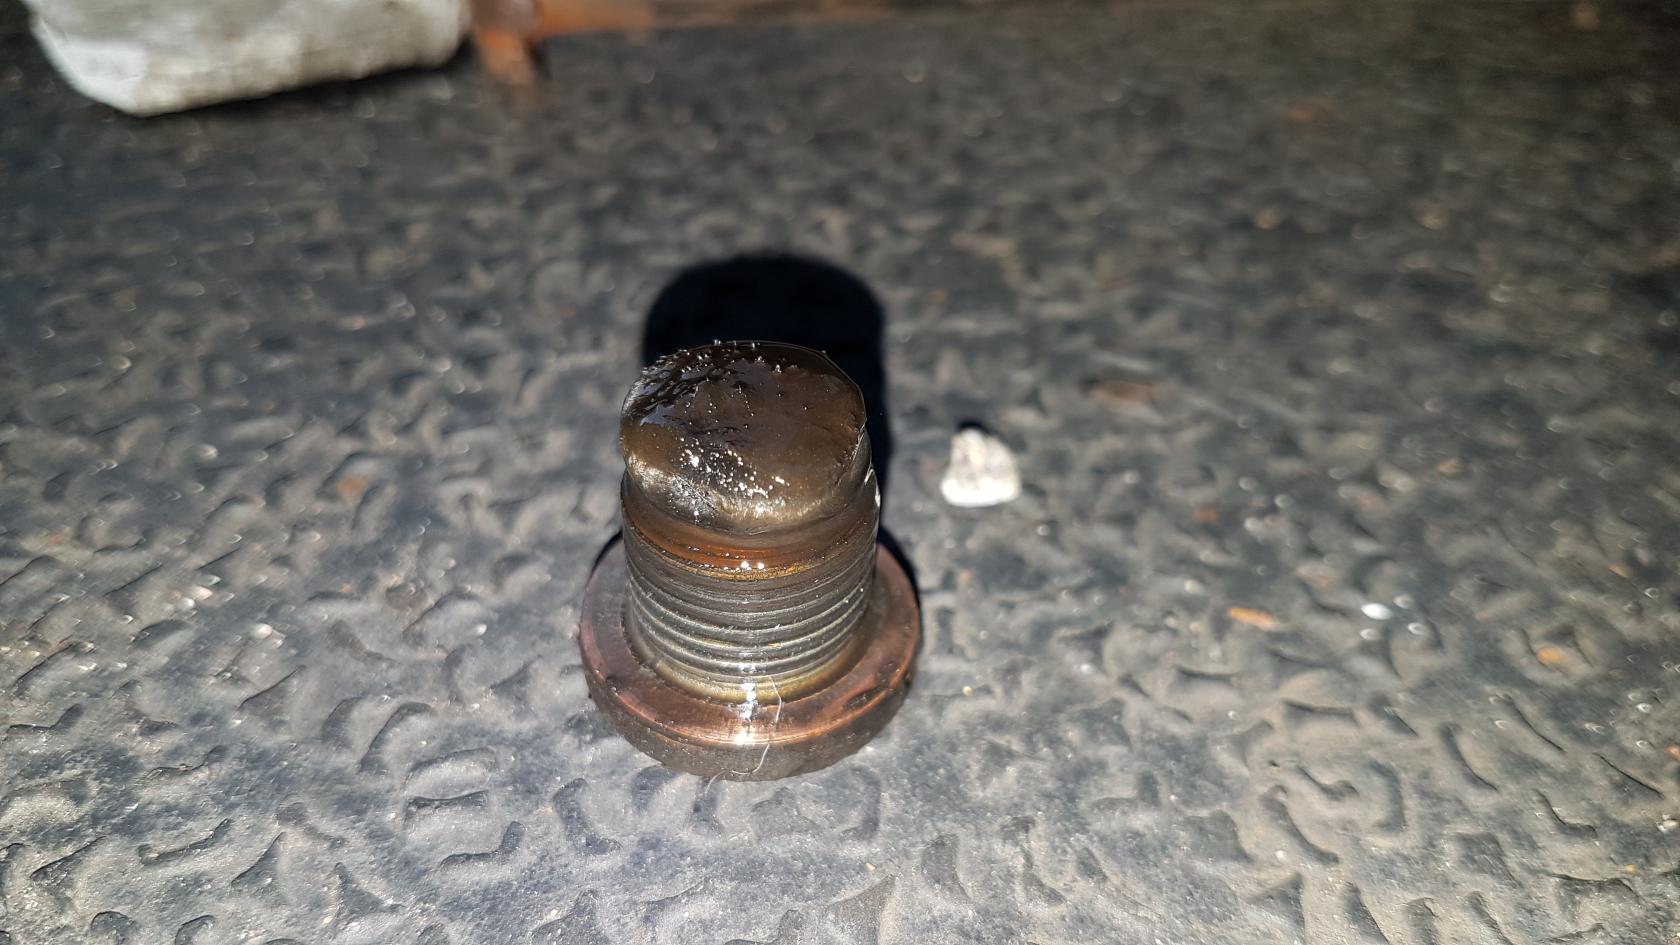

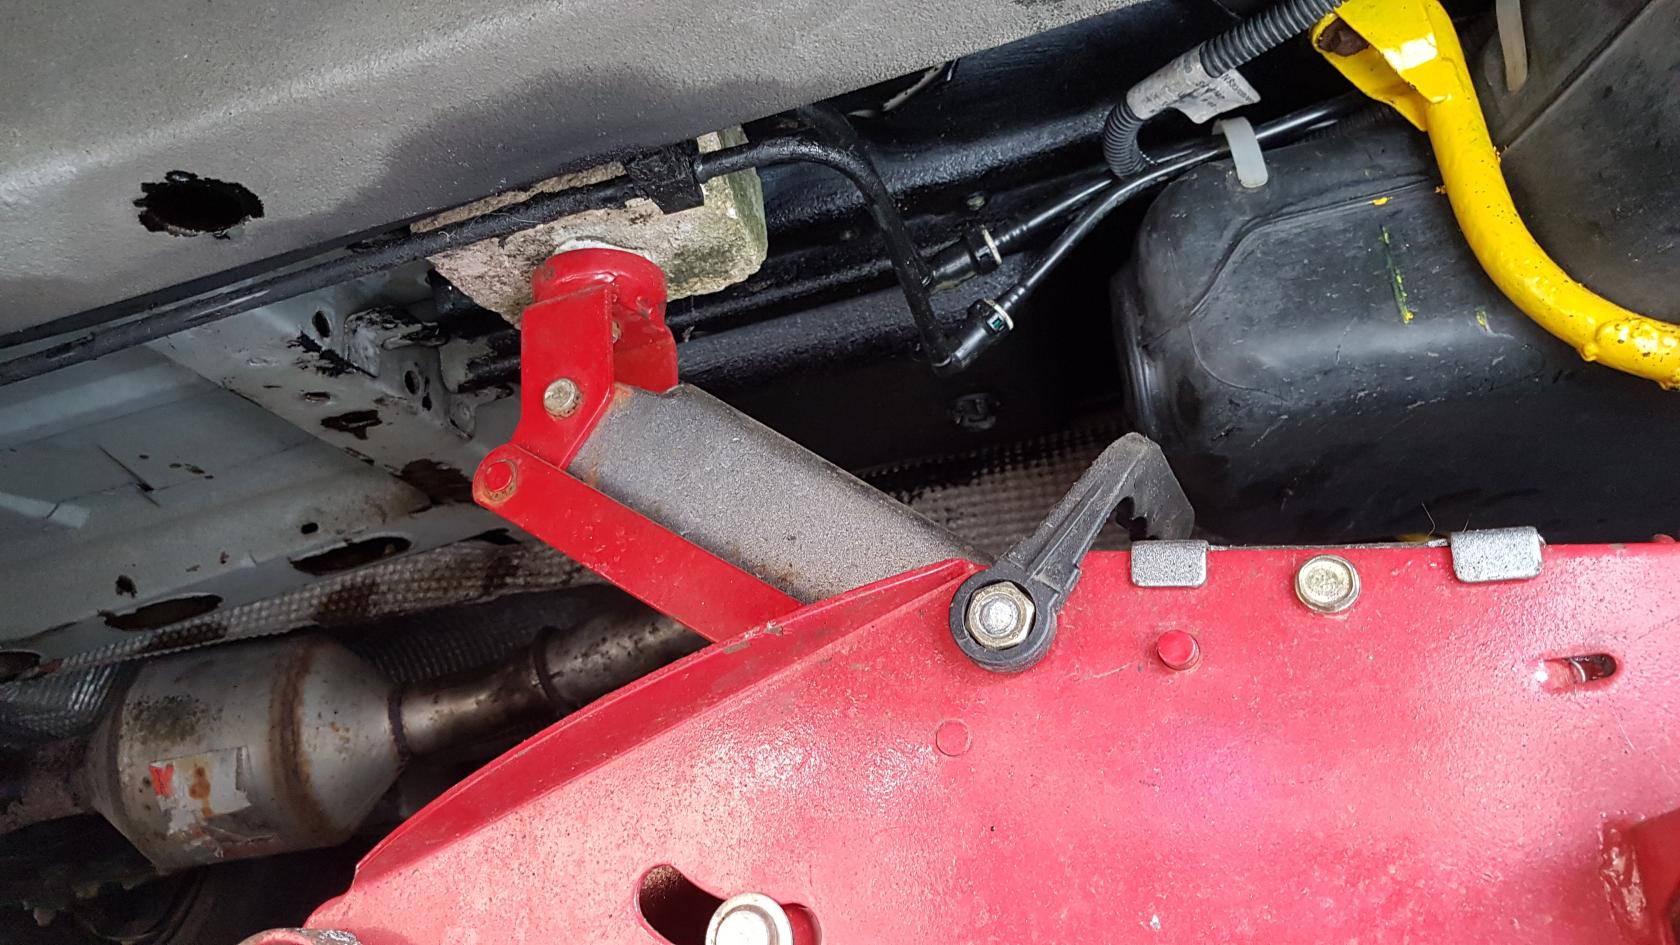
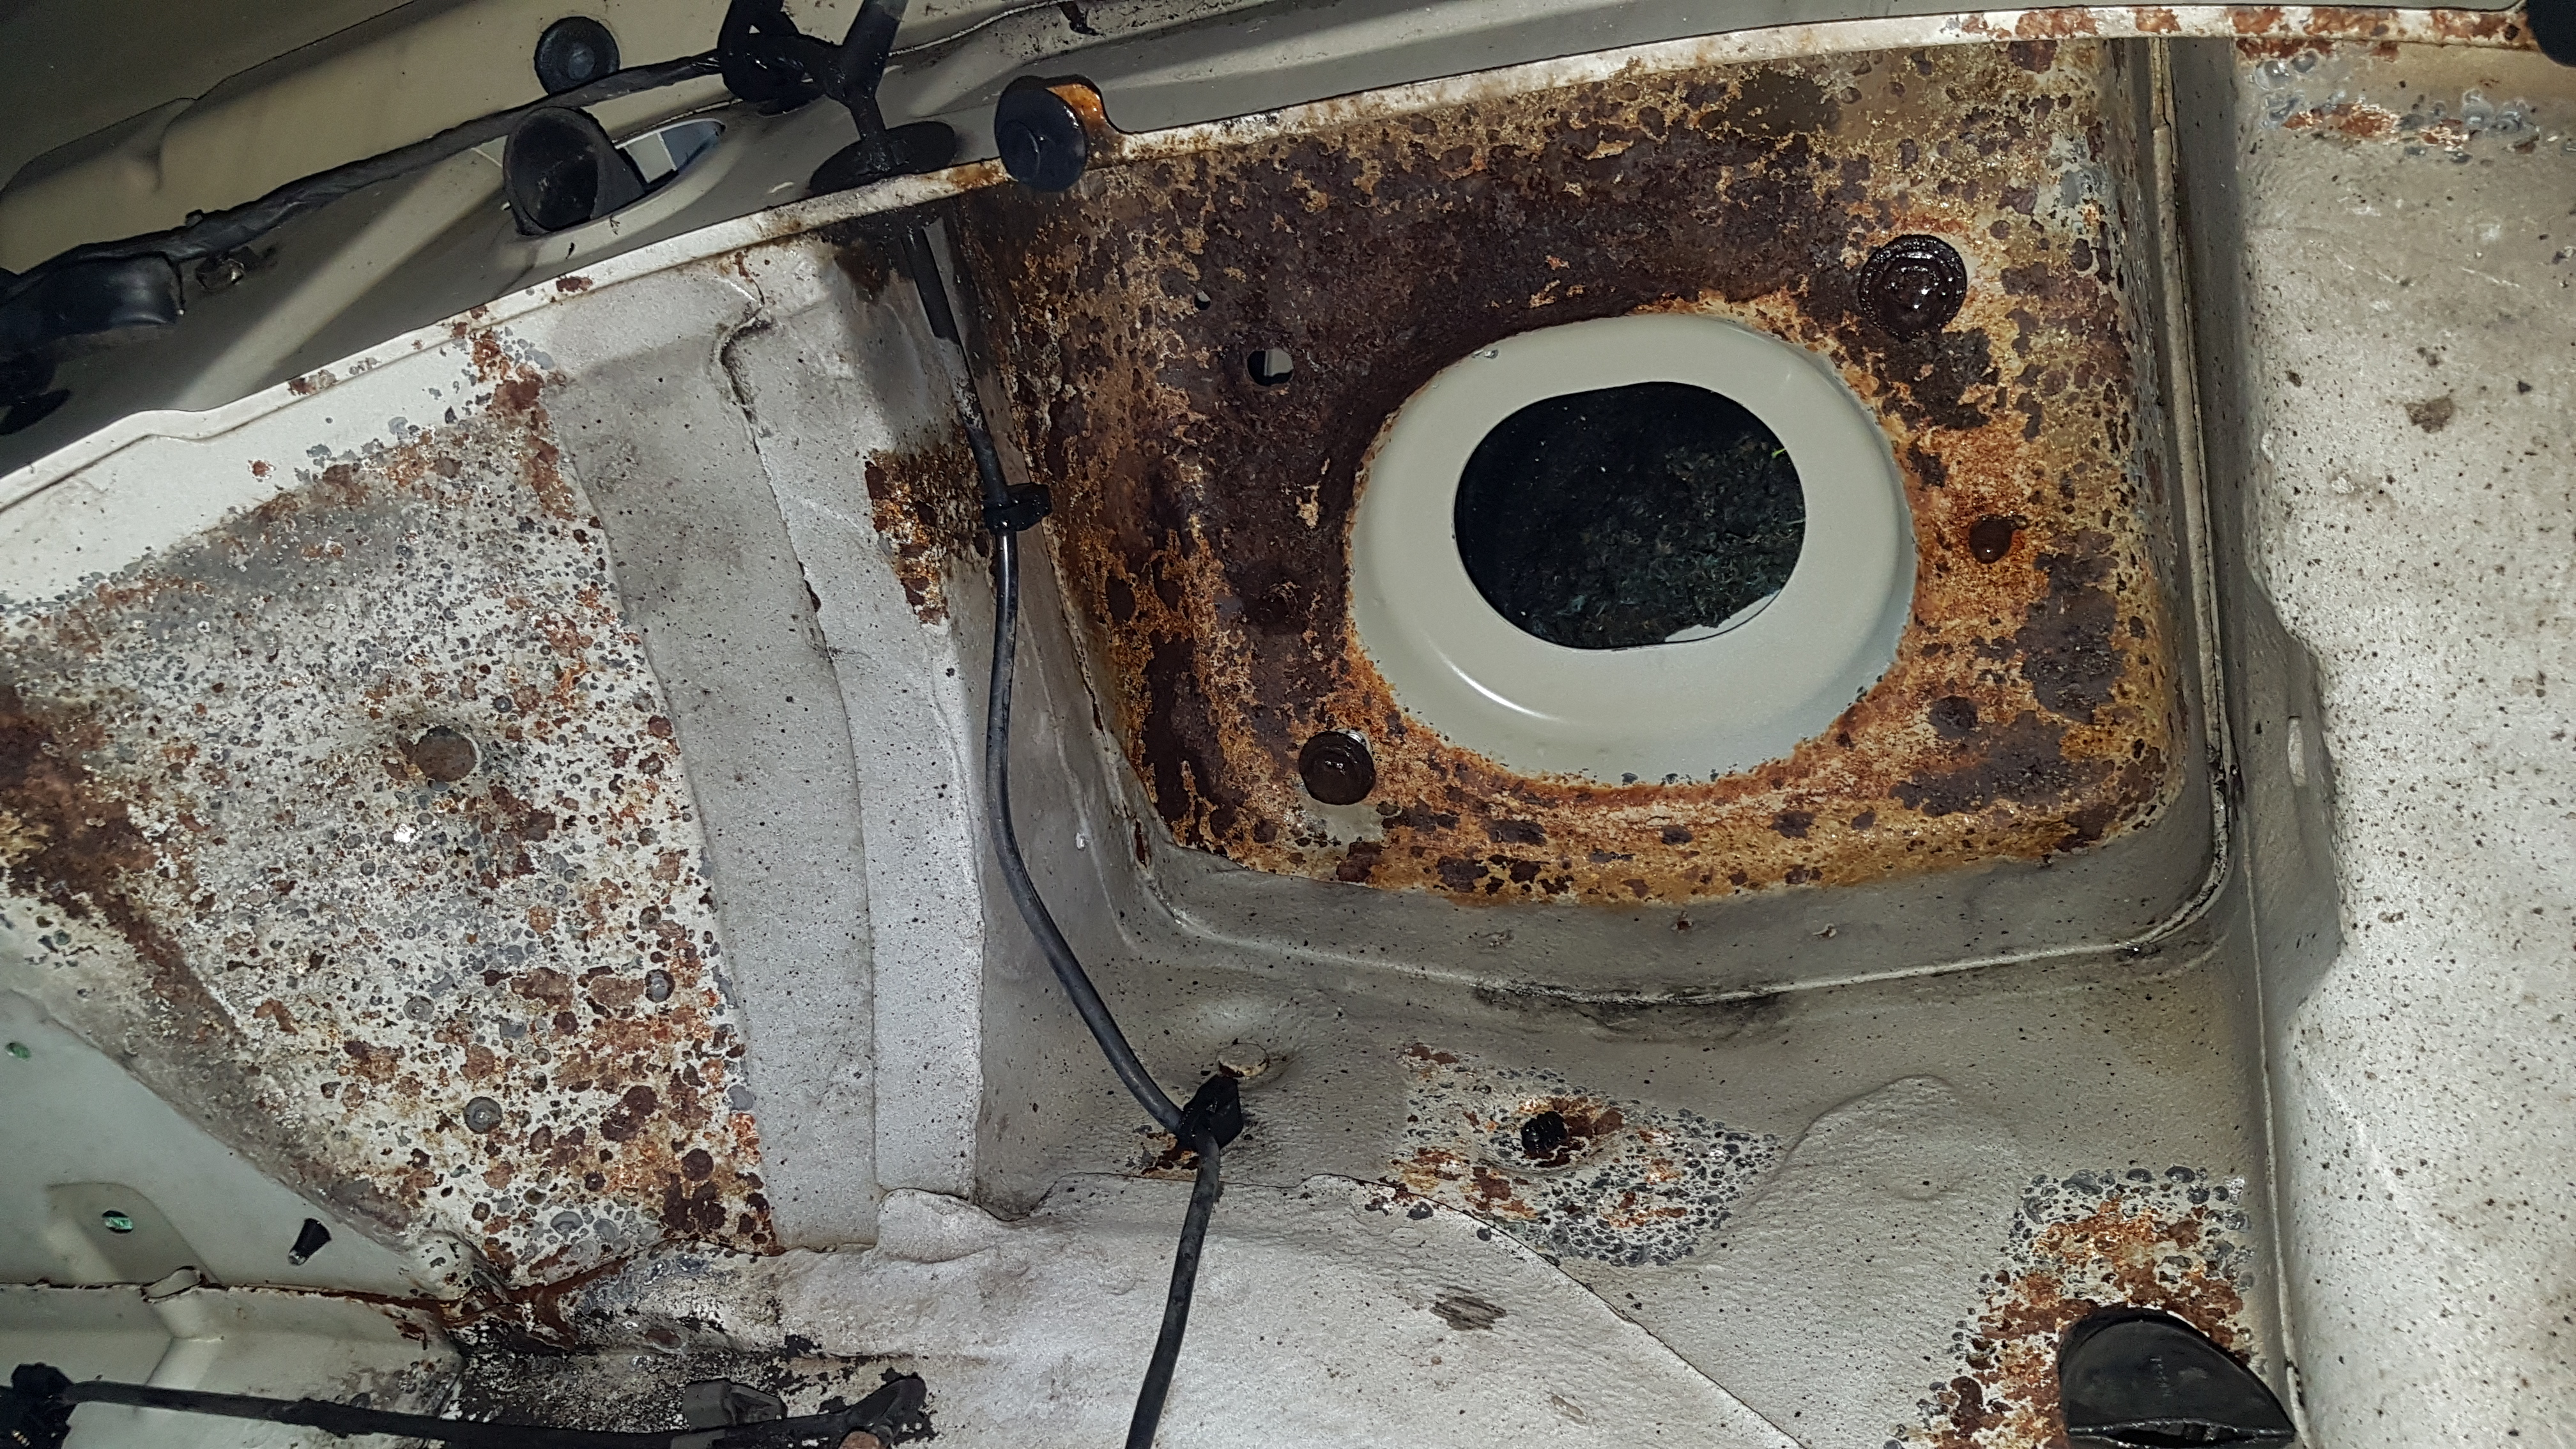
while taking the bumper off i found this.. well worth addressing as i bet everyones is like this!

and ill also be cleaning up, up here too!

still tempted to take off the sub frame completely so i can clean it up and repaint it. from what i have seen it is pretty rust free, just the bit s where its starting to get under the paint and rust out. wire wheel time! ill also fill it with dynax when i am done. protect the inside of it.
thats all for now!
- JohnDragonMan
Notice: I have the tendency to void warranties, blow fuses, cause fires, and other fun stuff.
Words of wisdom: Internally rust proof the sills and subframe! both skins!!. There's always user serviceable parts inside. "Oh that shouldn't have happened".
My 2005 Dispatch Camper Project
Offline
#20 2020-06-27 03:19:49
- JohnDragonMan
- Member
- From: Derby, East Midlands, UK
- Registered: 2020-06-02
- Posts: 456
- Website
Re: JohnDragonMan's Dispatch Camper Conversion
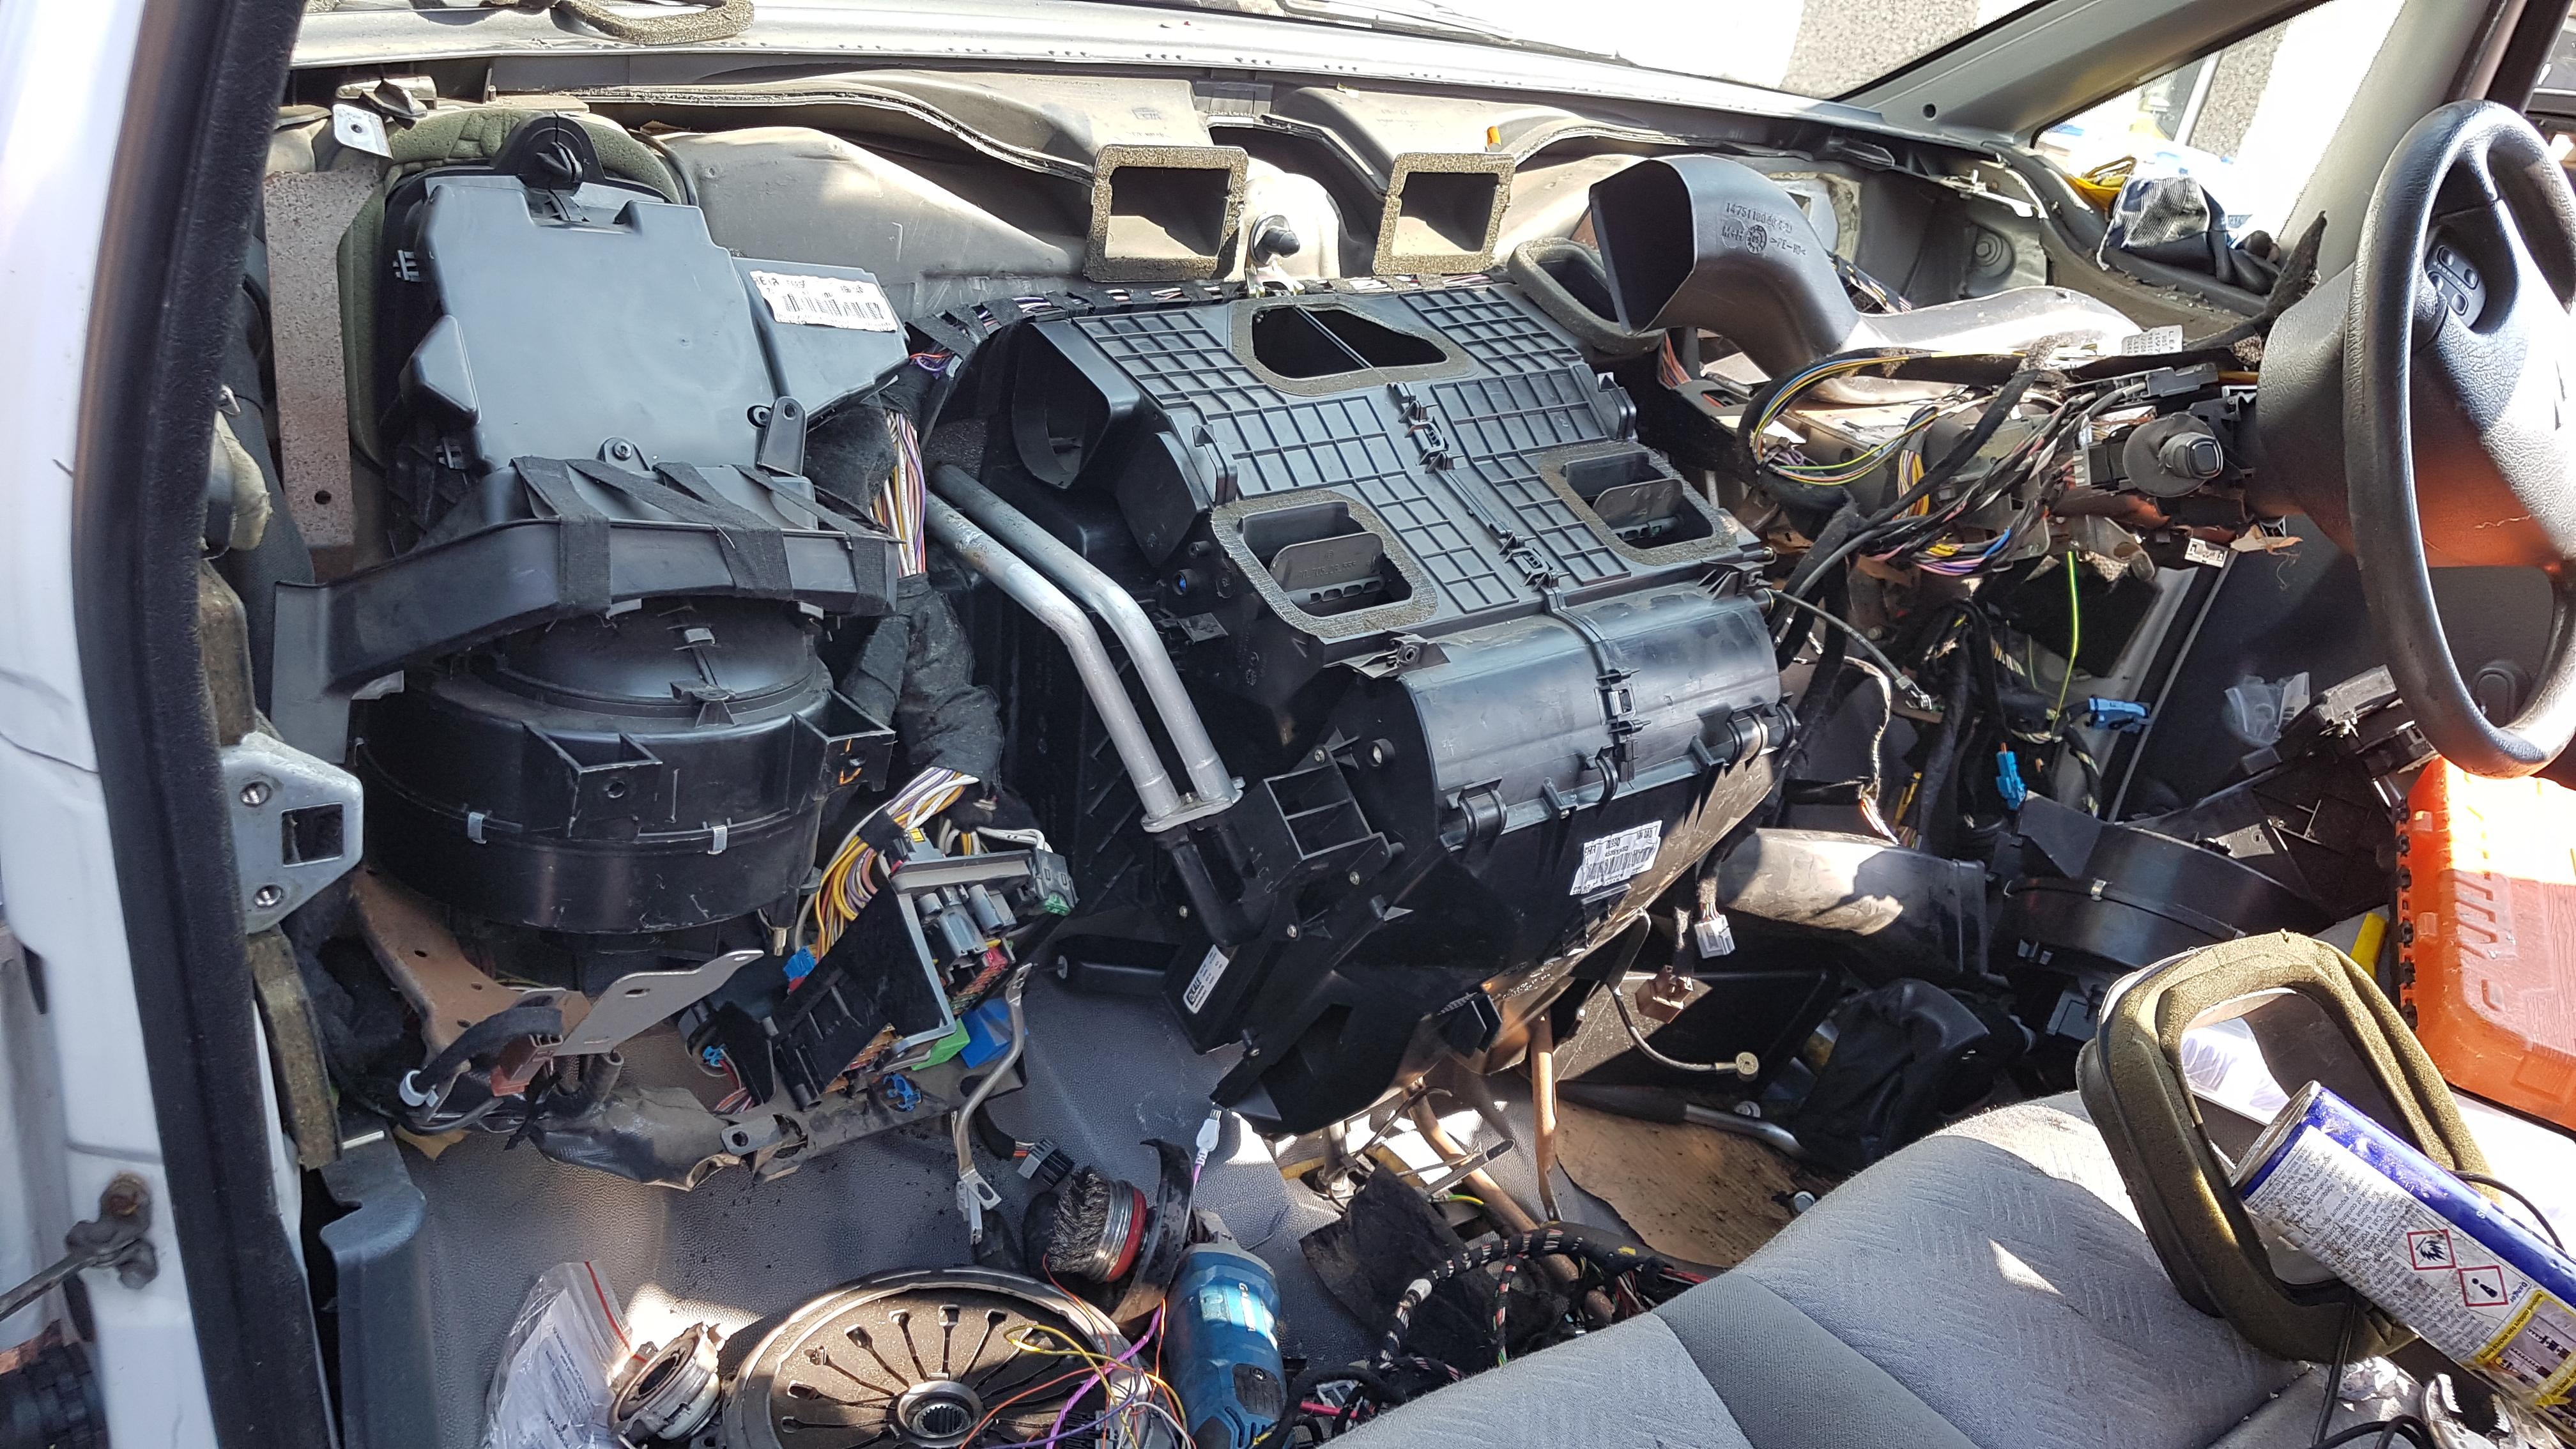
well things have happened.
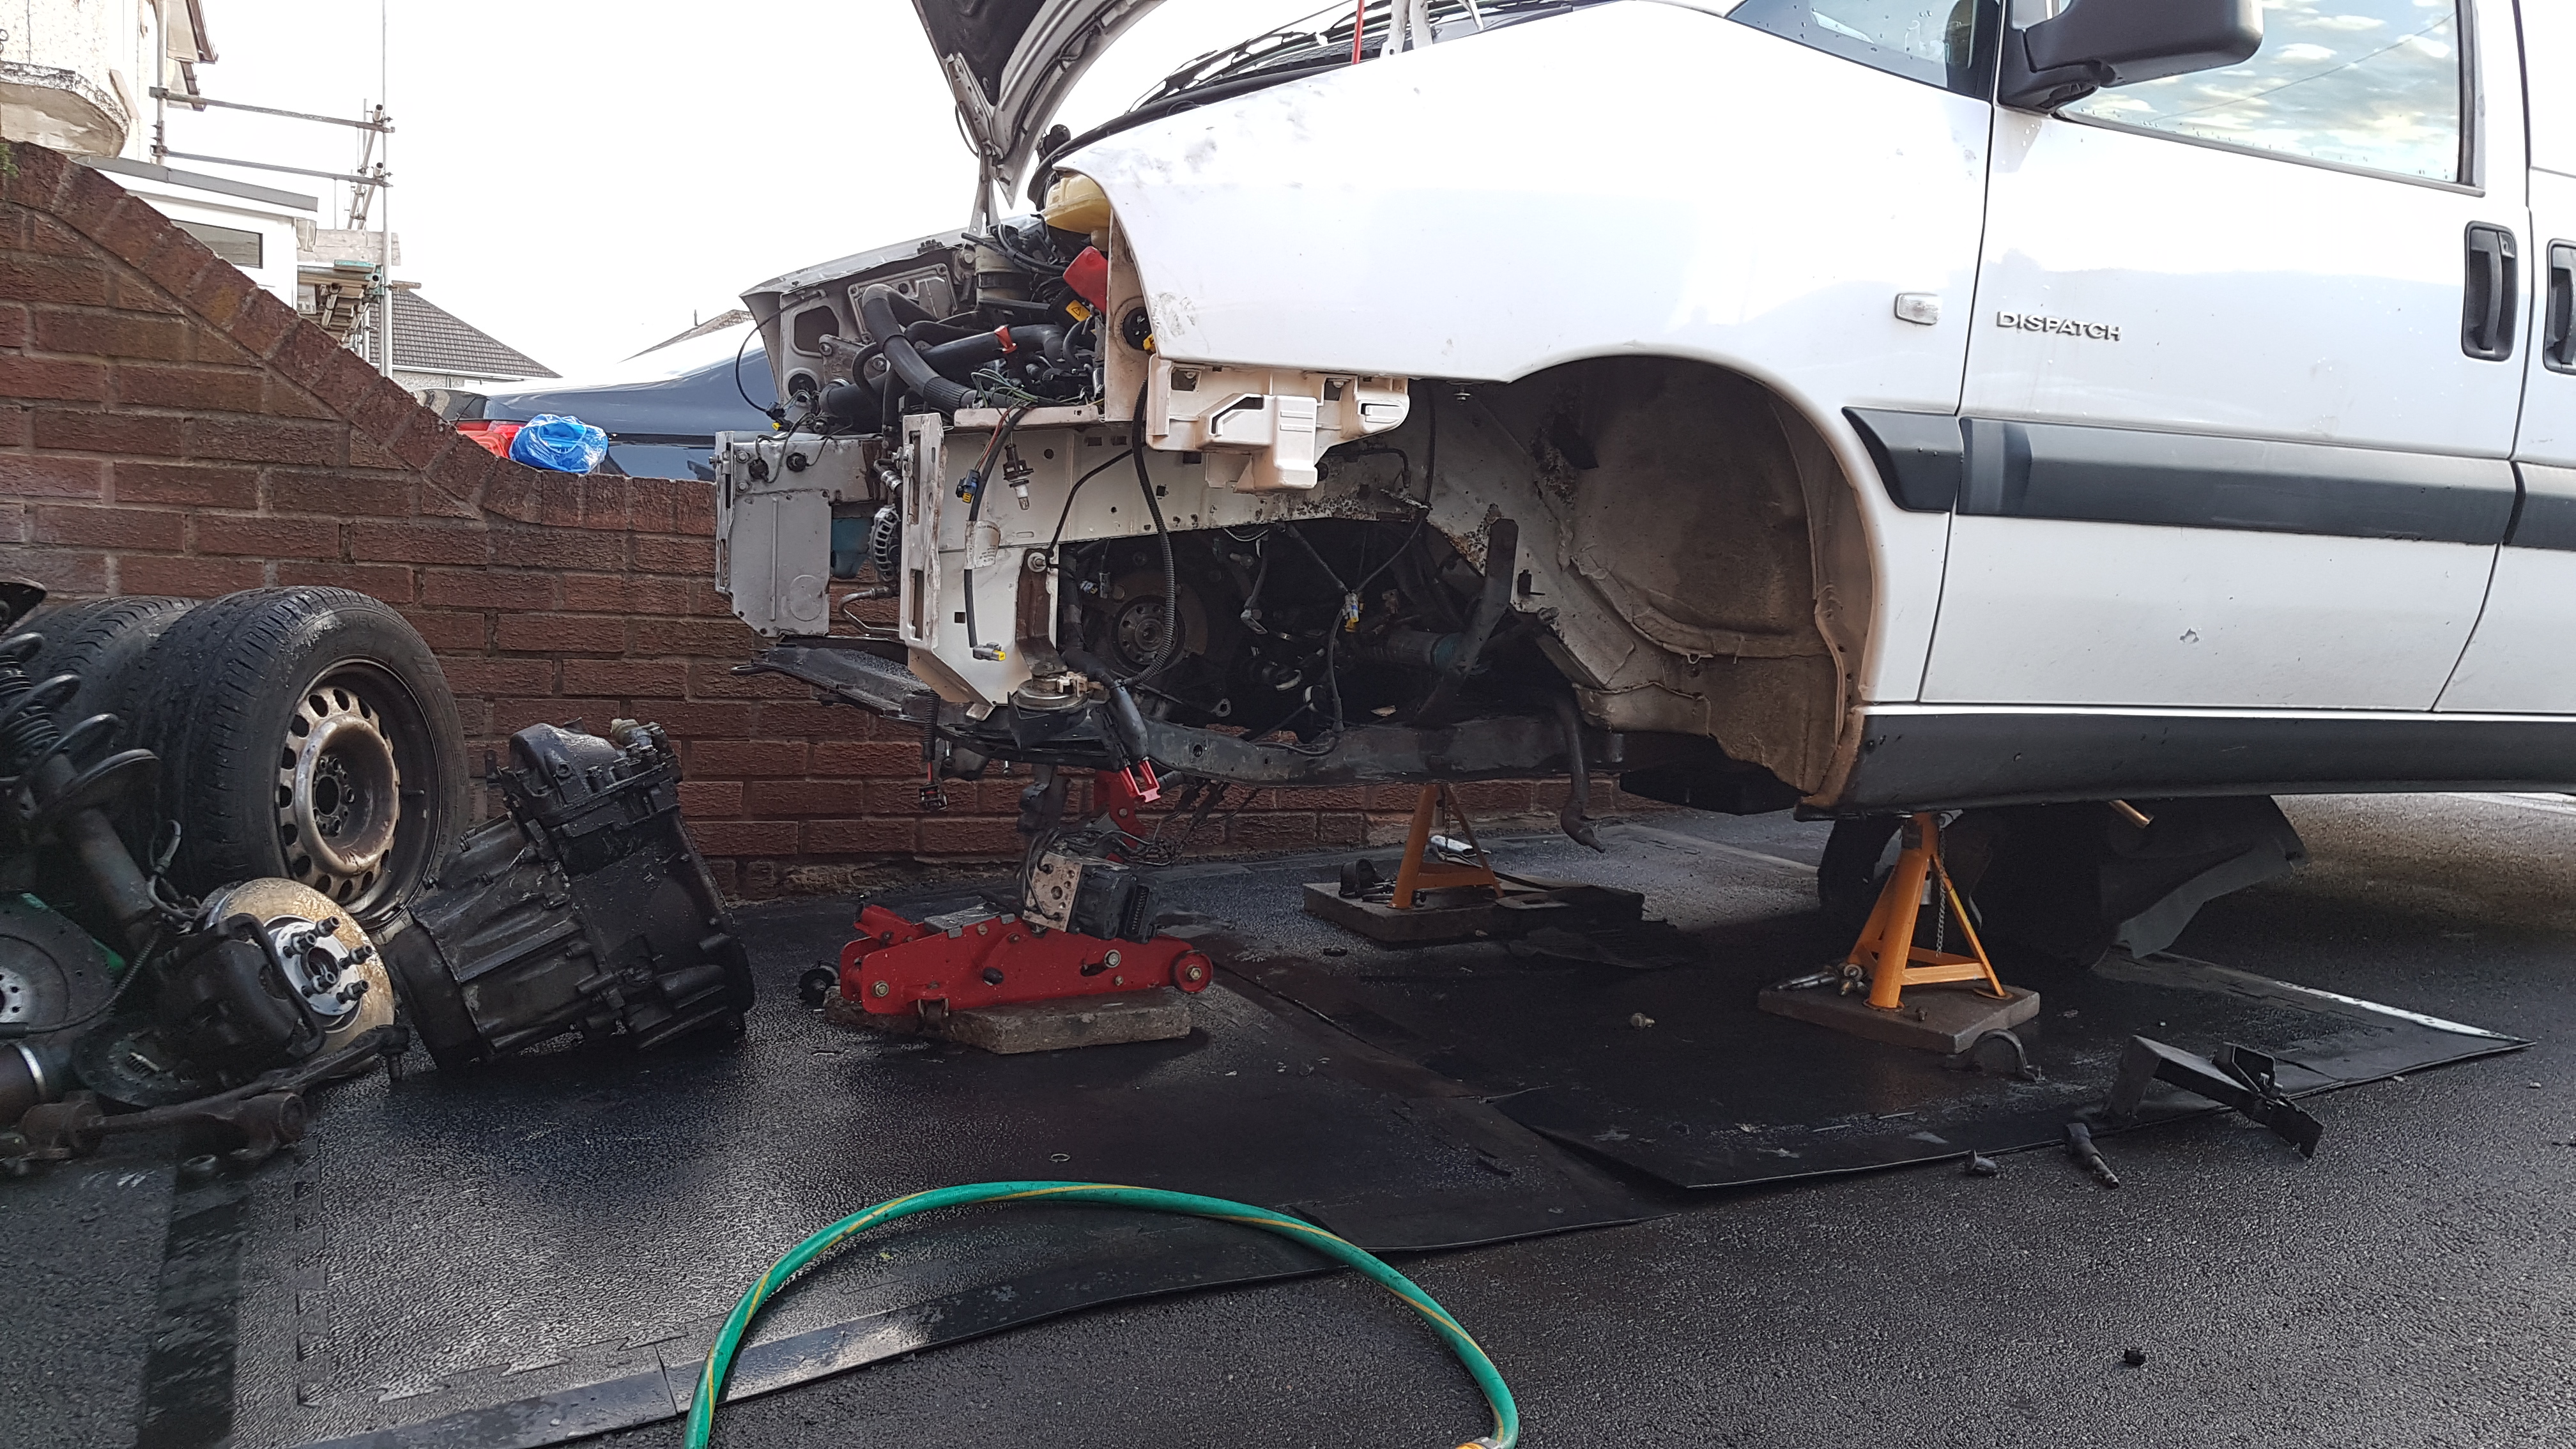
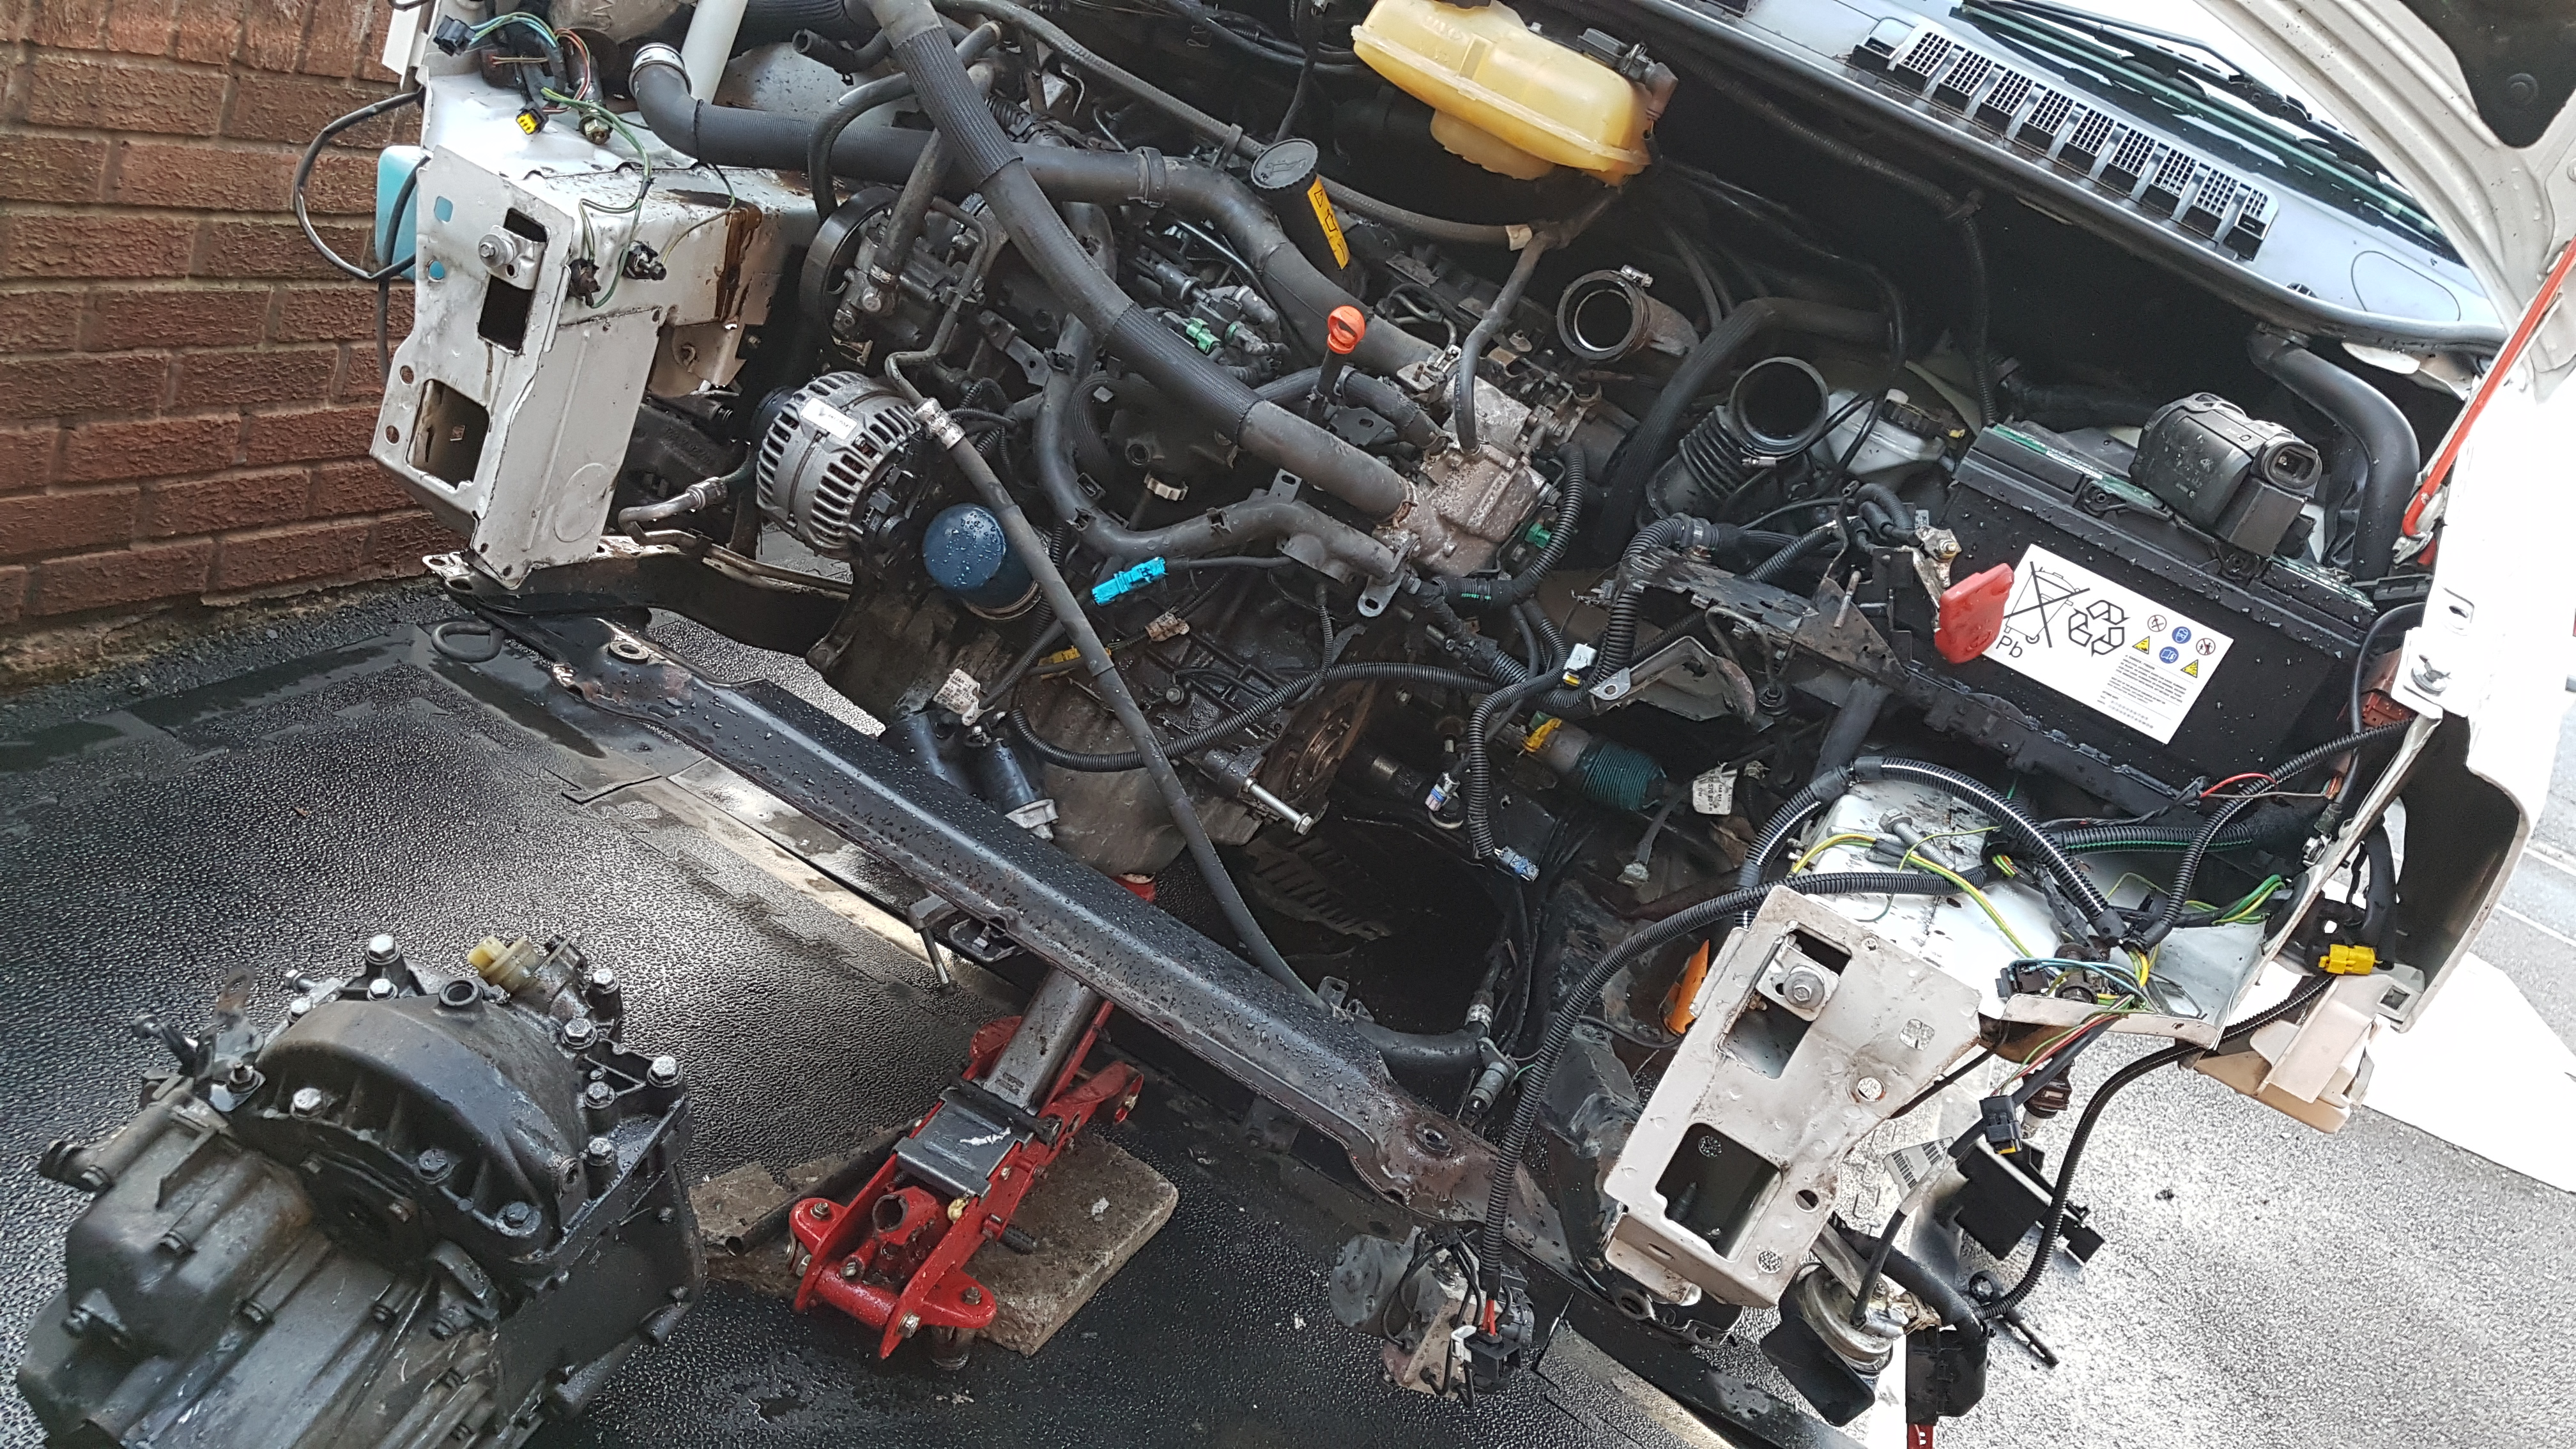
the gearbox somehow fell out. ... ... actually it took quite some getting out. one of the more harder vehicles to remove a gearbox on sadly.
after moving the ABS pump and a few strengthening bars it did come out.
anyhoo the flywheel ended up being a solid flywheel so i had to return my clutch kit and get a different one.
also the crank shaft seal was weeping so i replaced that too. on the HDI the crank shaft oil seal size is : 90-7-110 with a Left-hand twist.
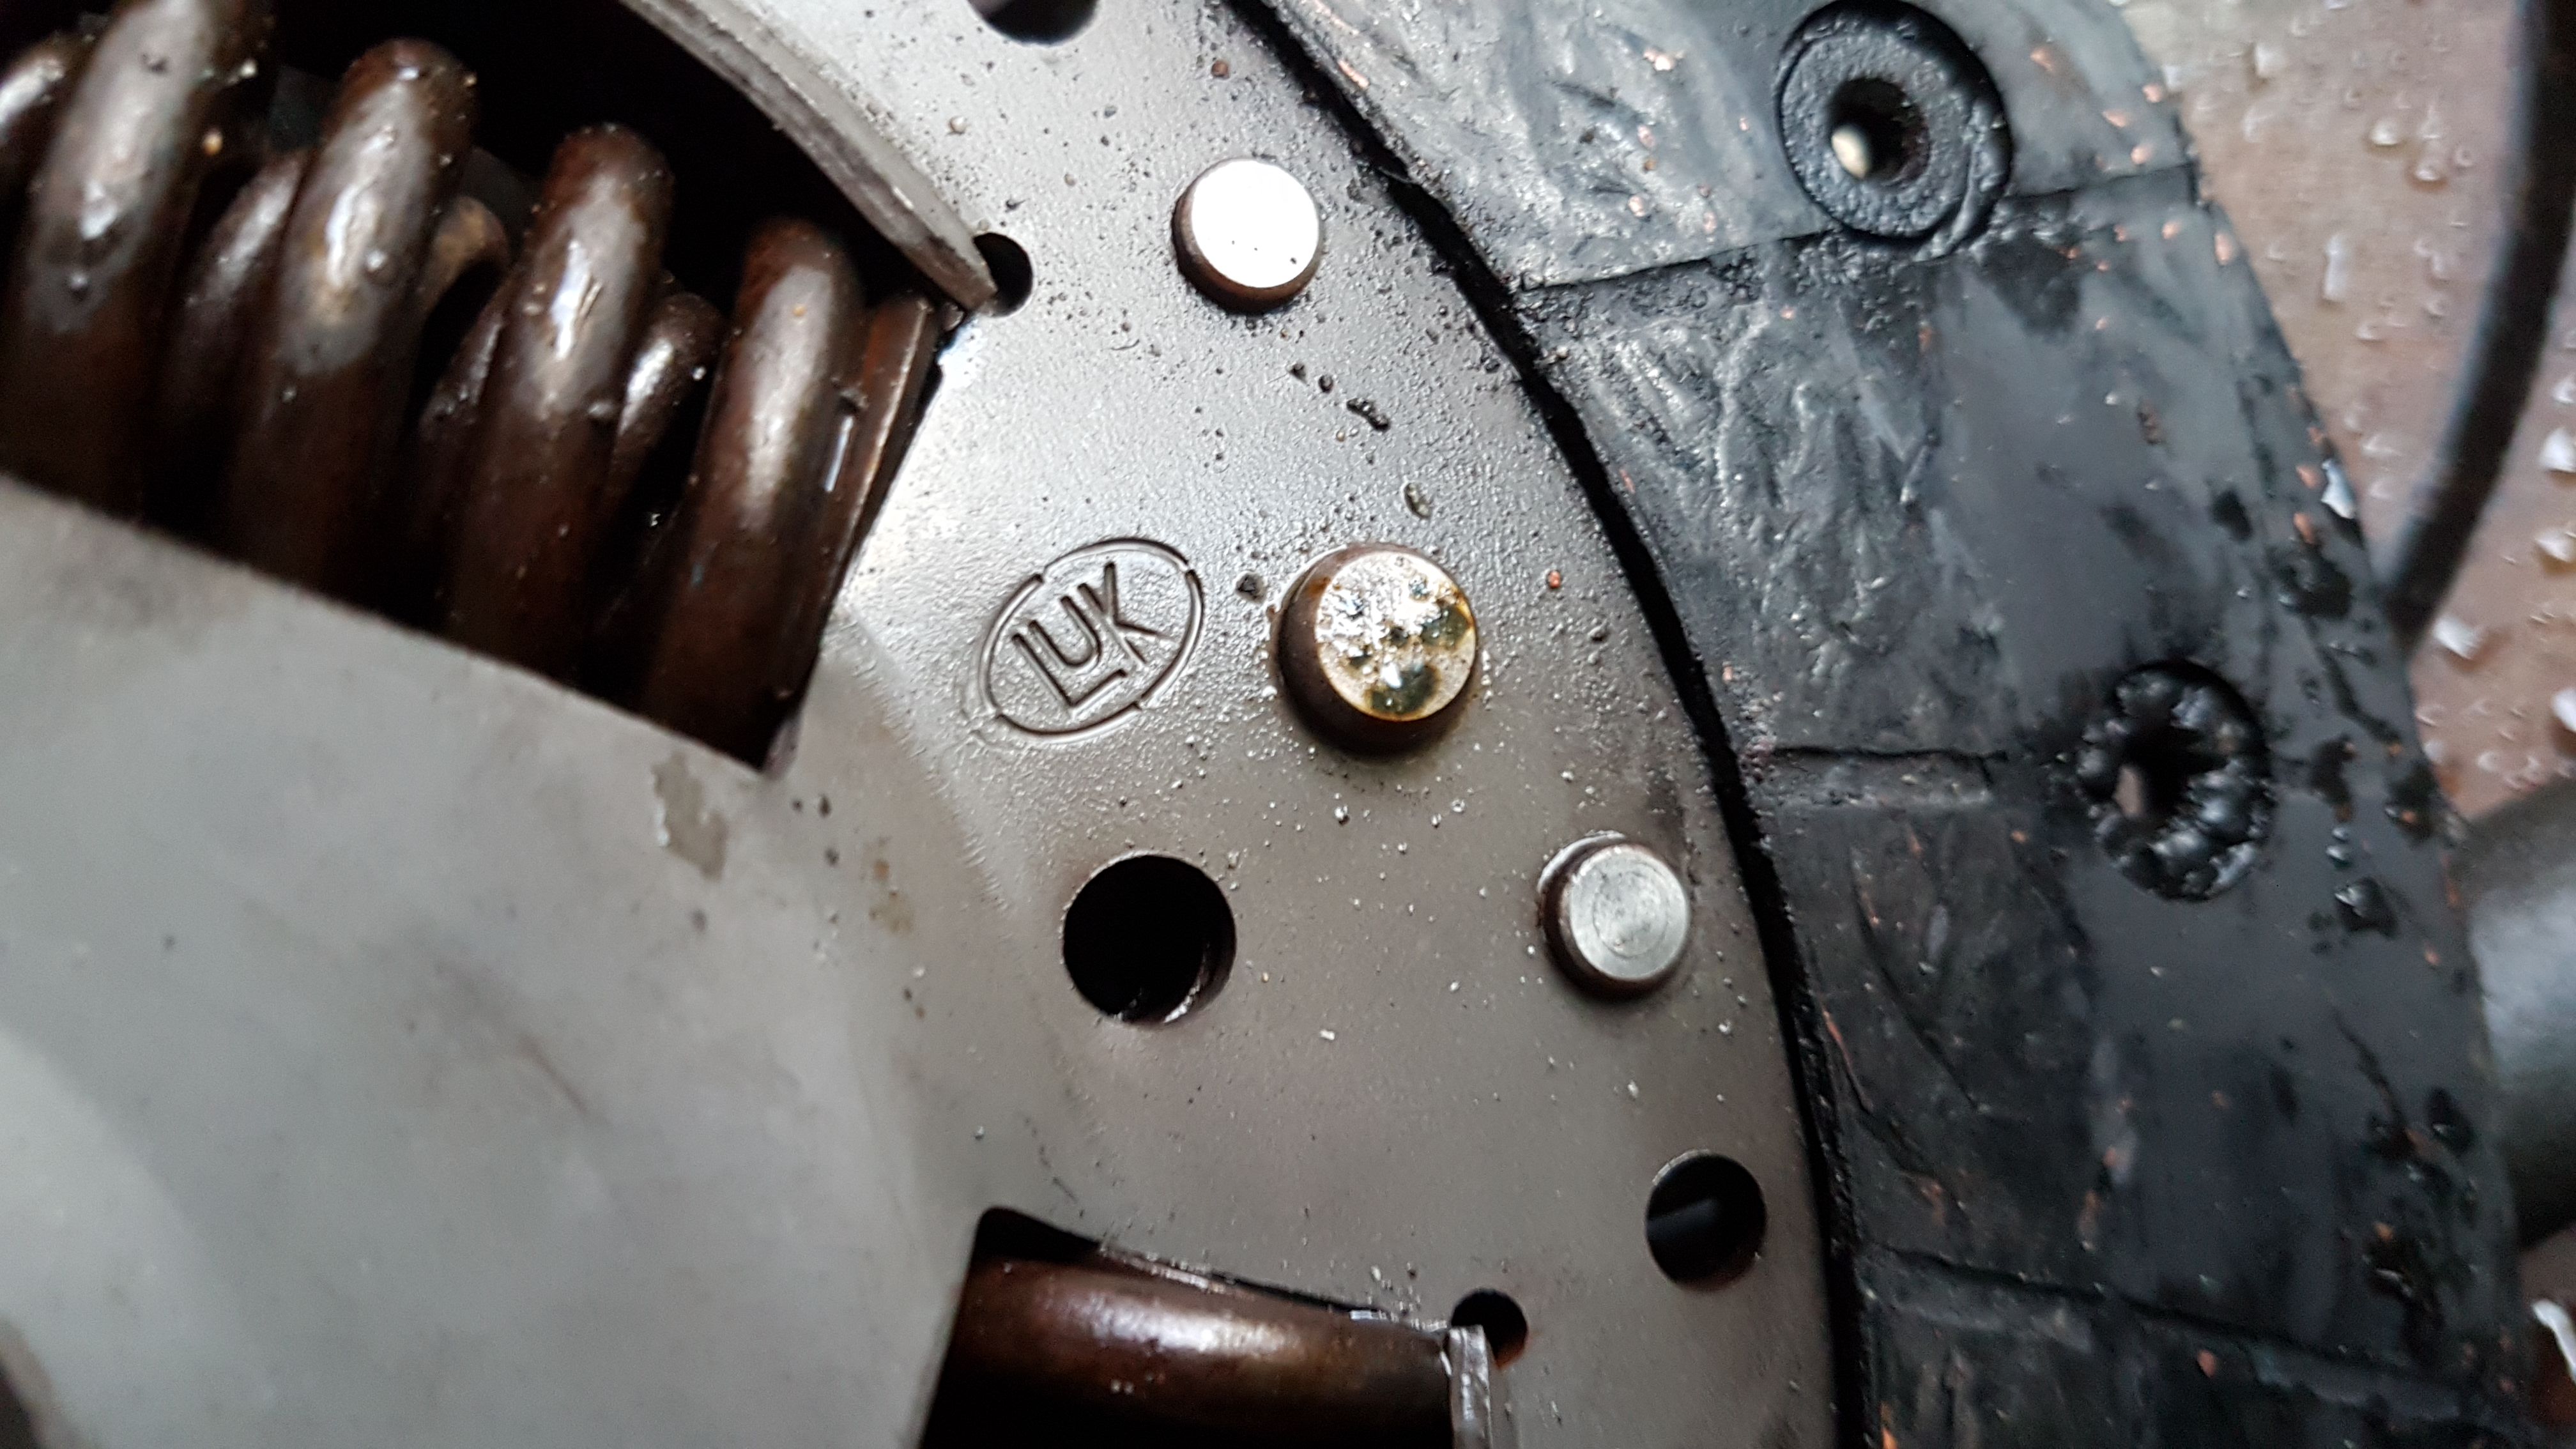
well used...
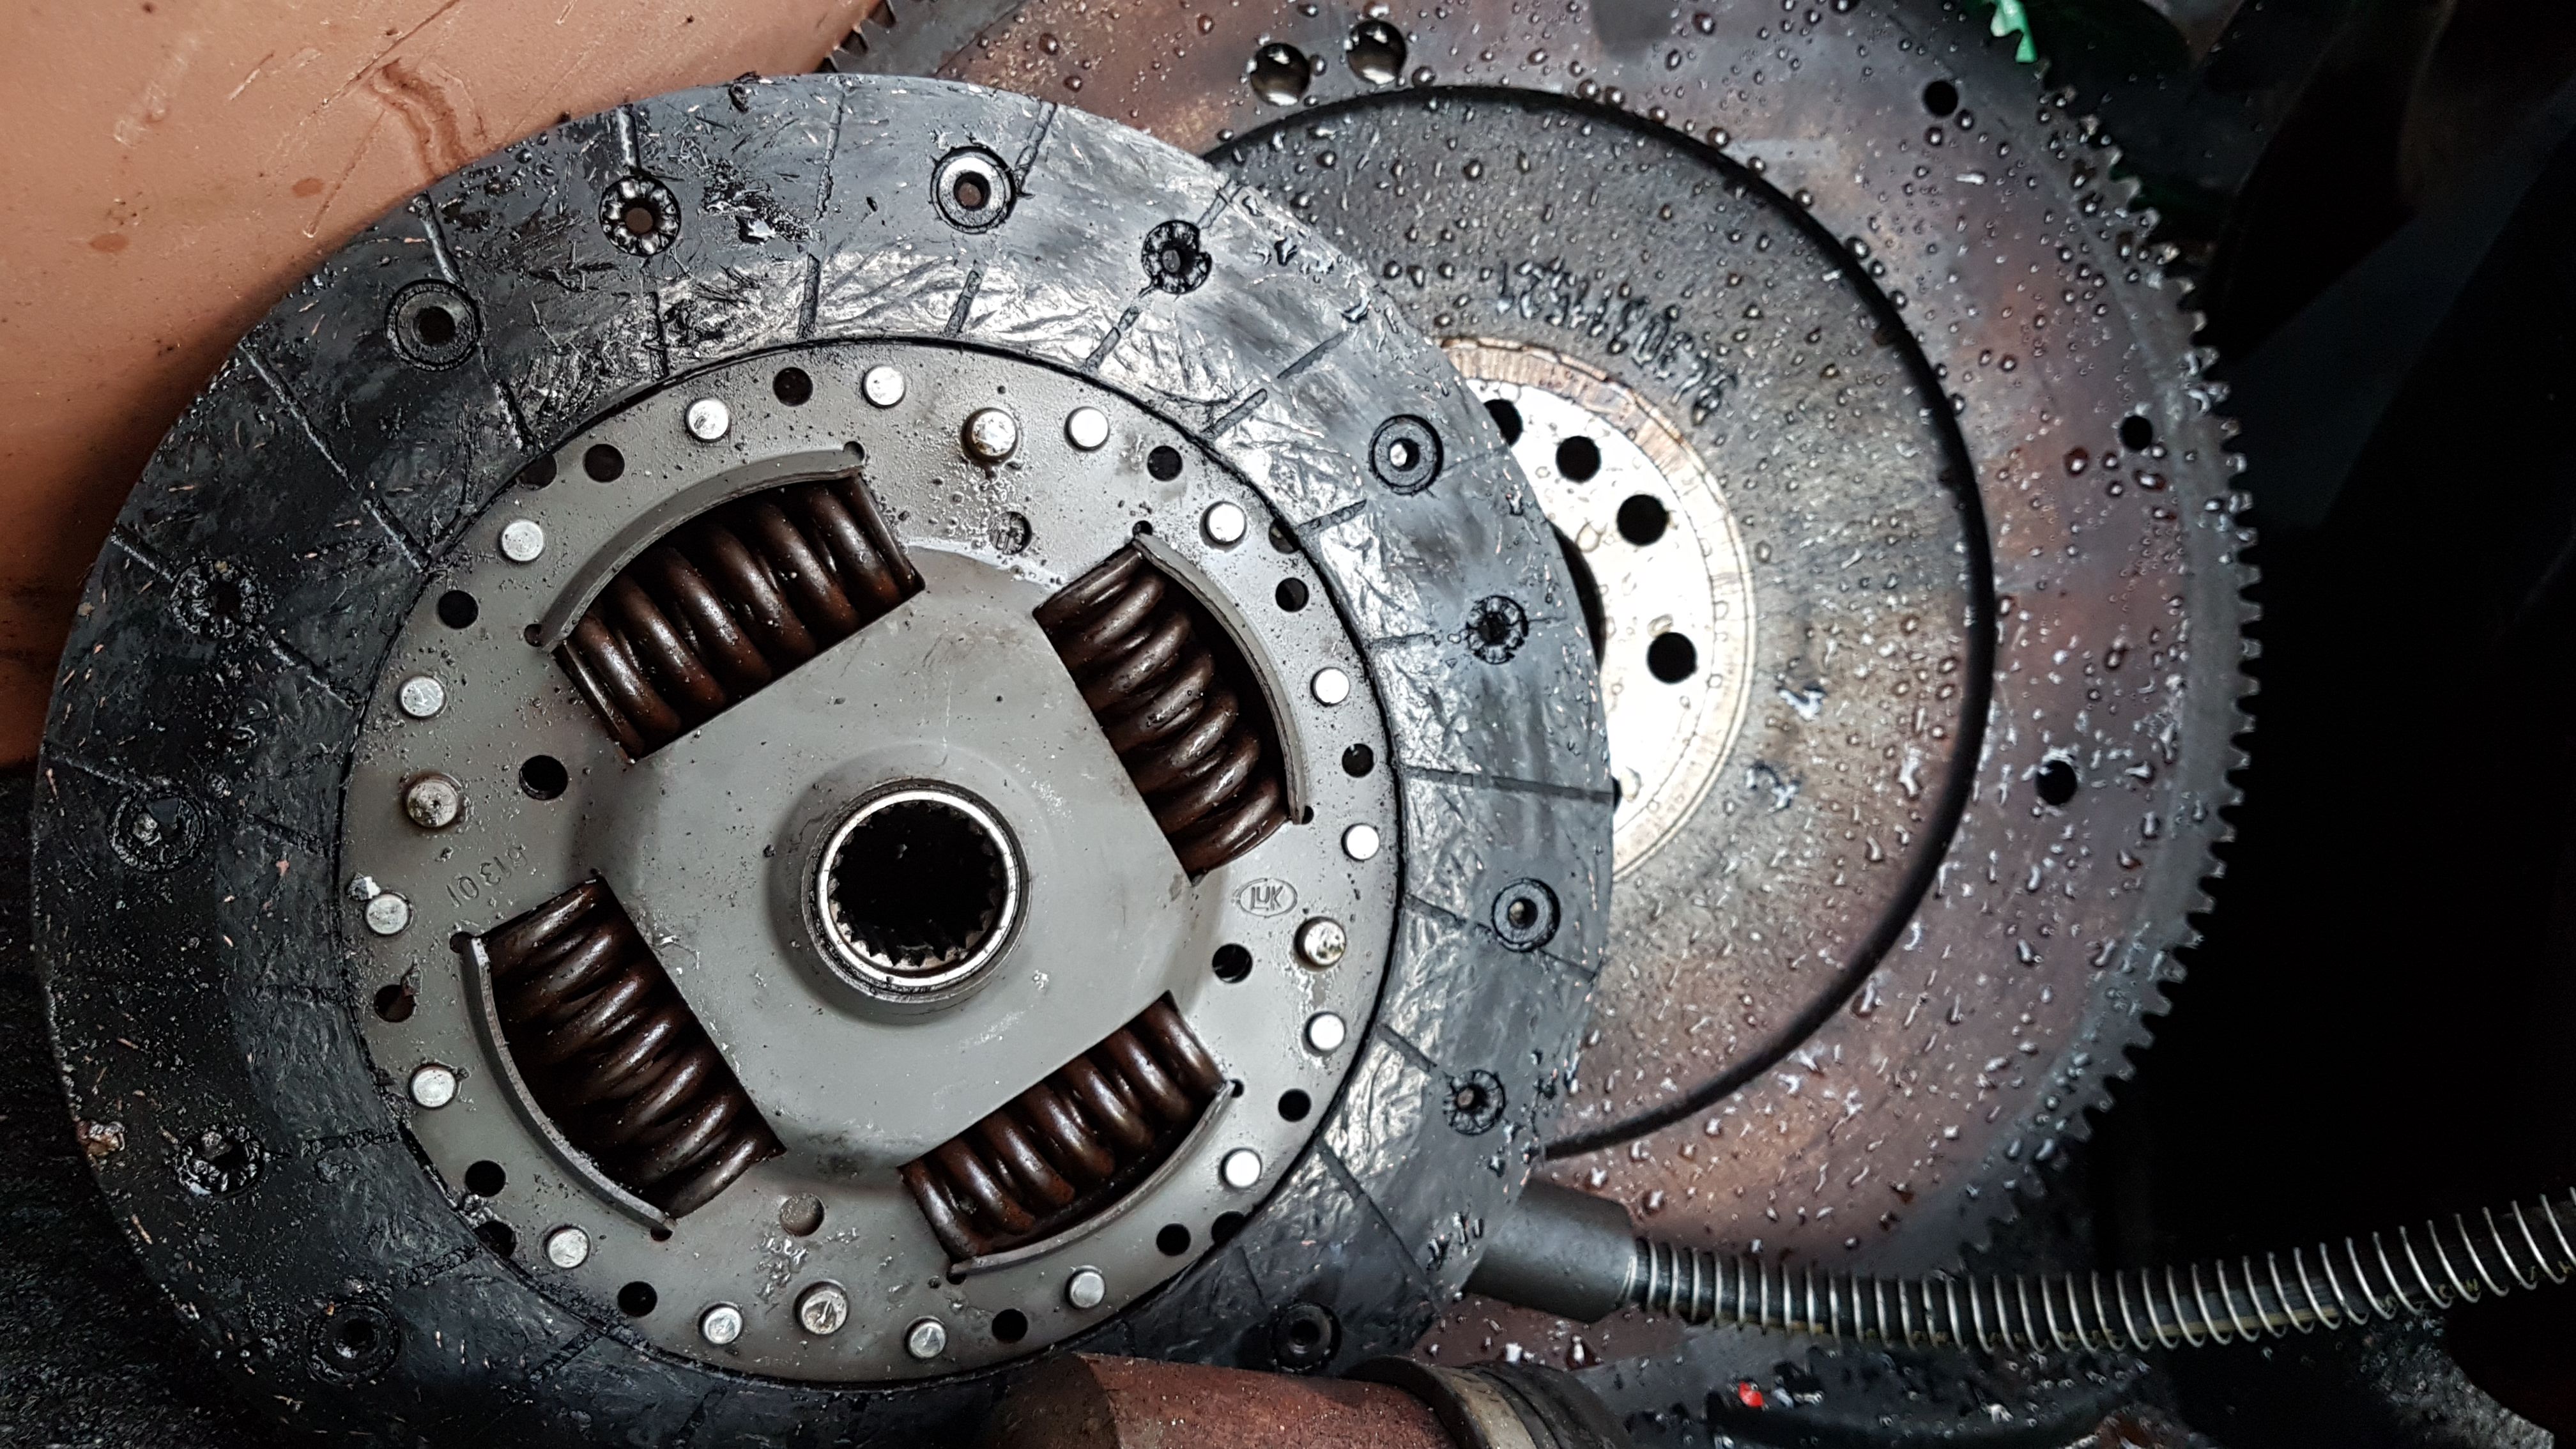
still life in it, but the spring plate had gotten very hot and warped the spring tips.
while i was waiting for the parts to come through the post i decided to do some cleaning up. de-rusting and painting.
after a jet wash i was left with this.. nice
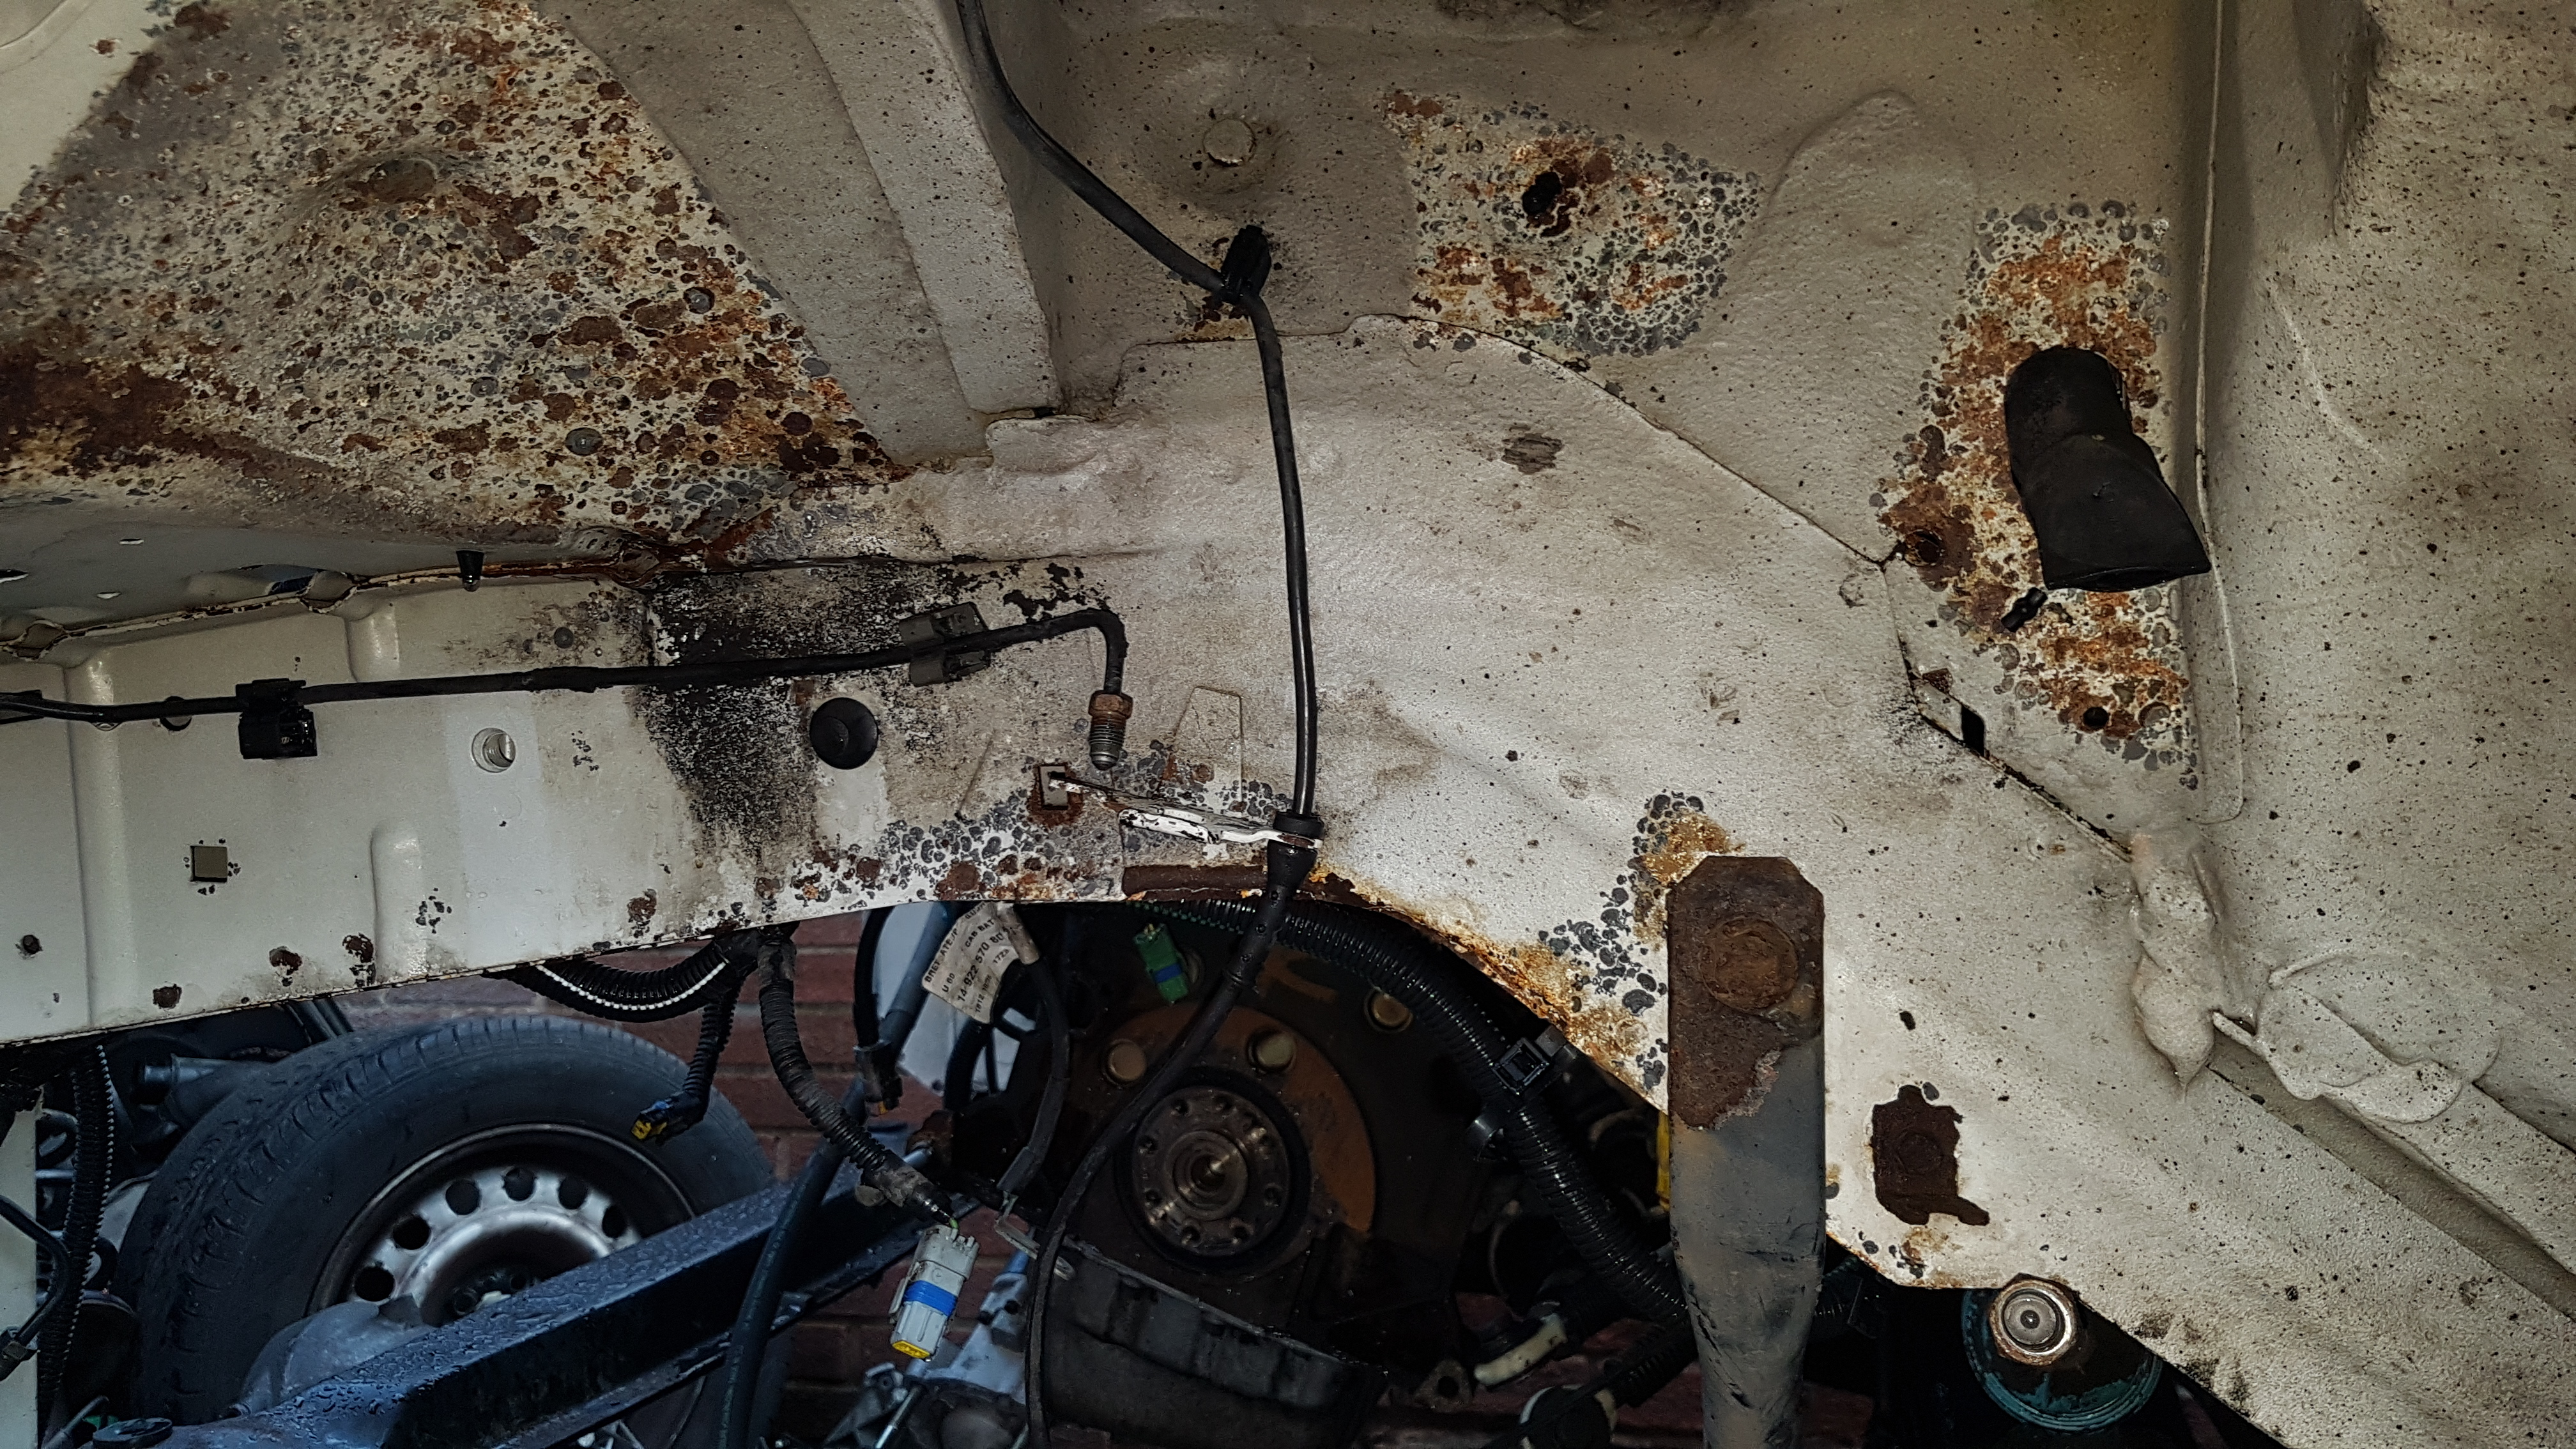
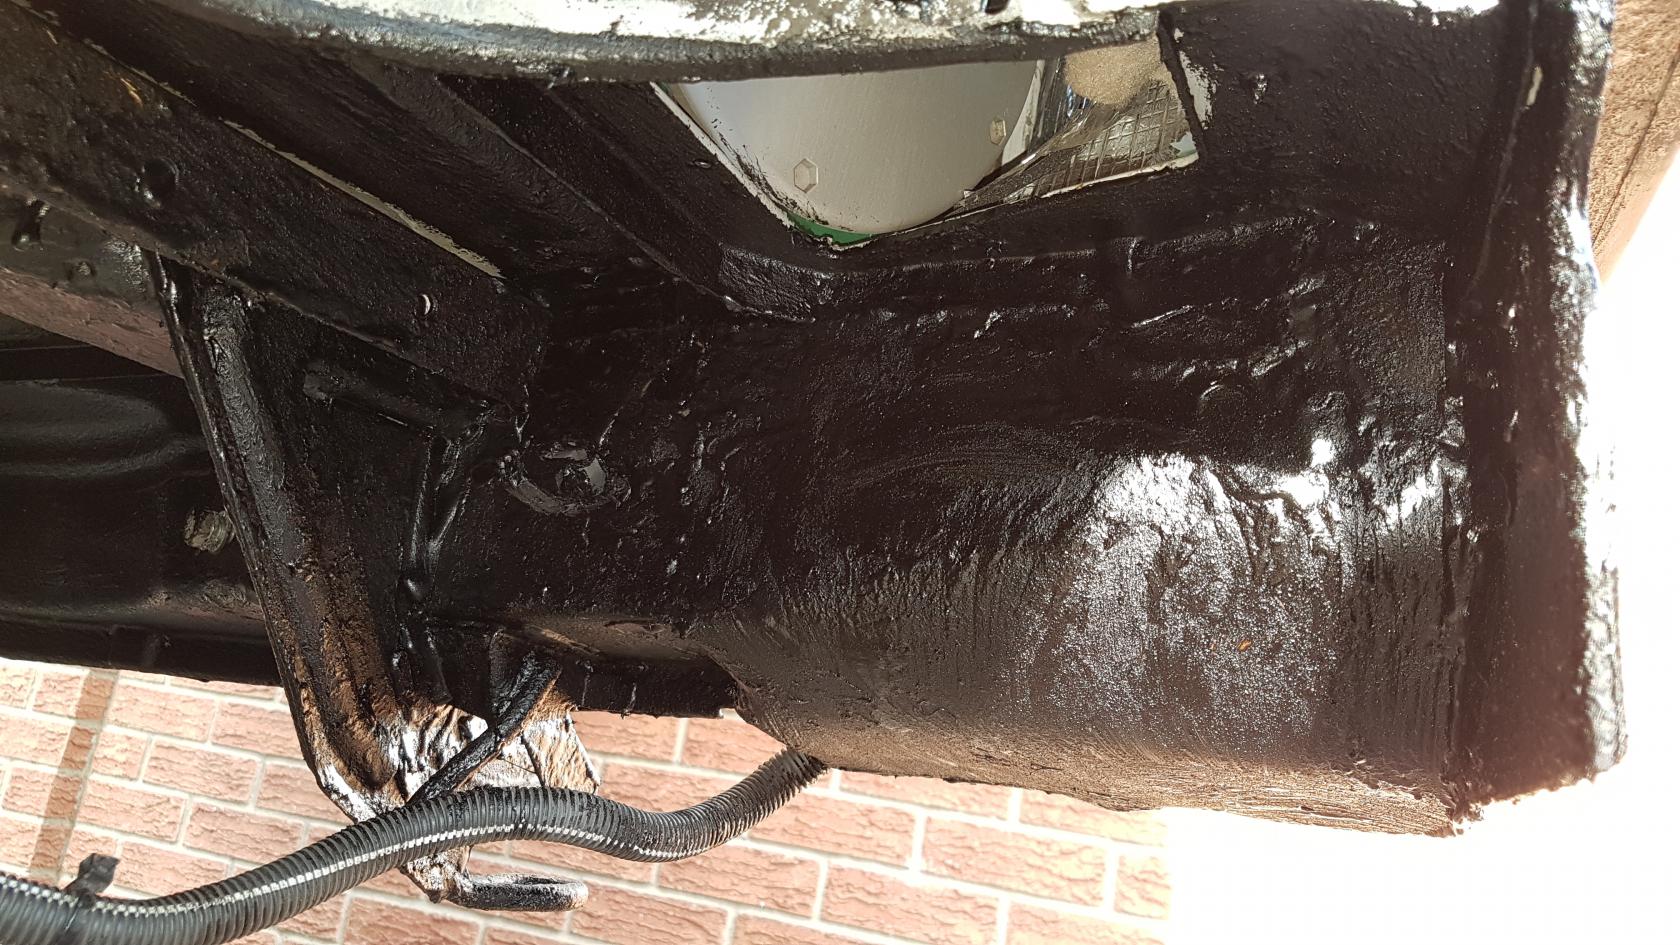
and when i removed the strut i found this.. nasty!
thankfully not eaten through!
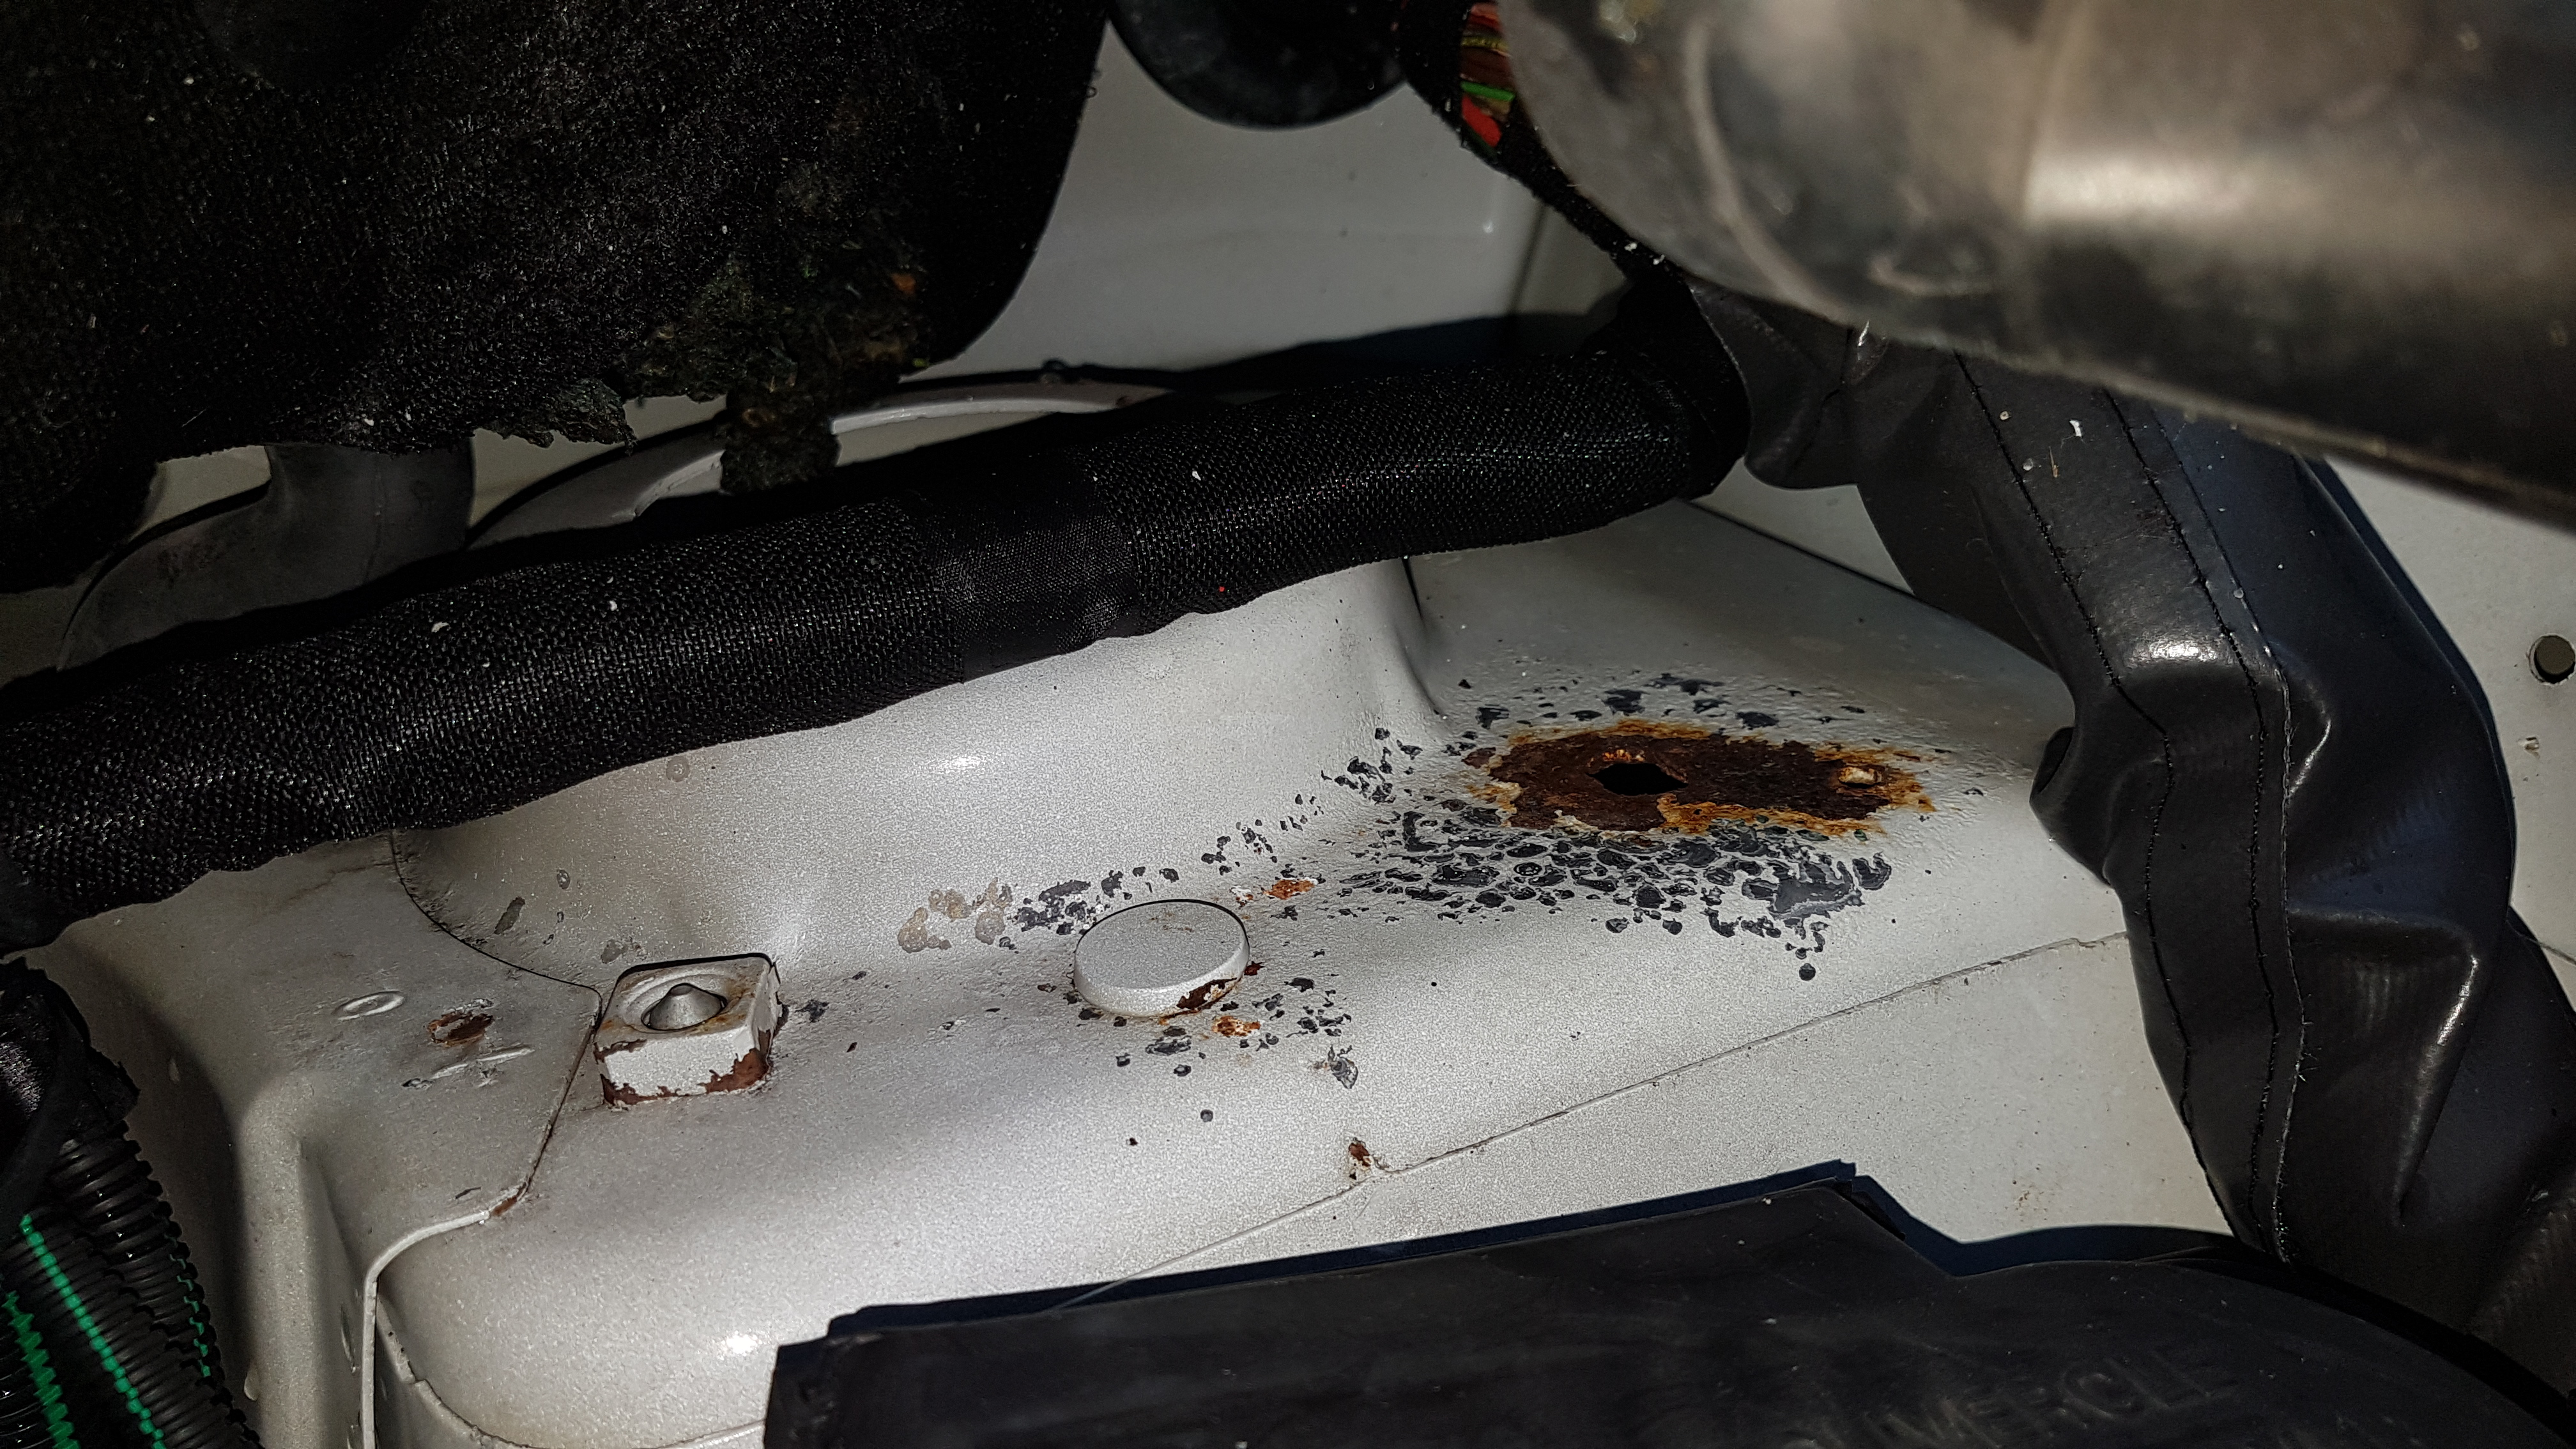
and if you look here, this is on the inside of the engine bay on the back of the suspension strut location.

just reclaiming sheared off bolts in the best way ever.. Fire!
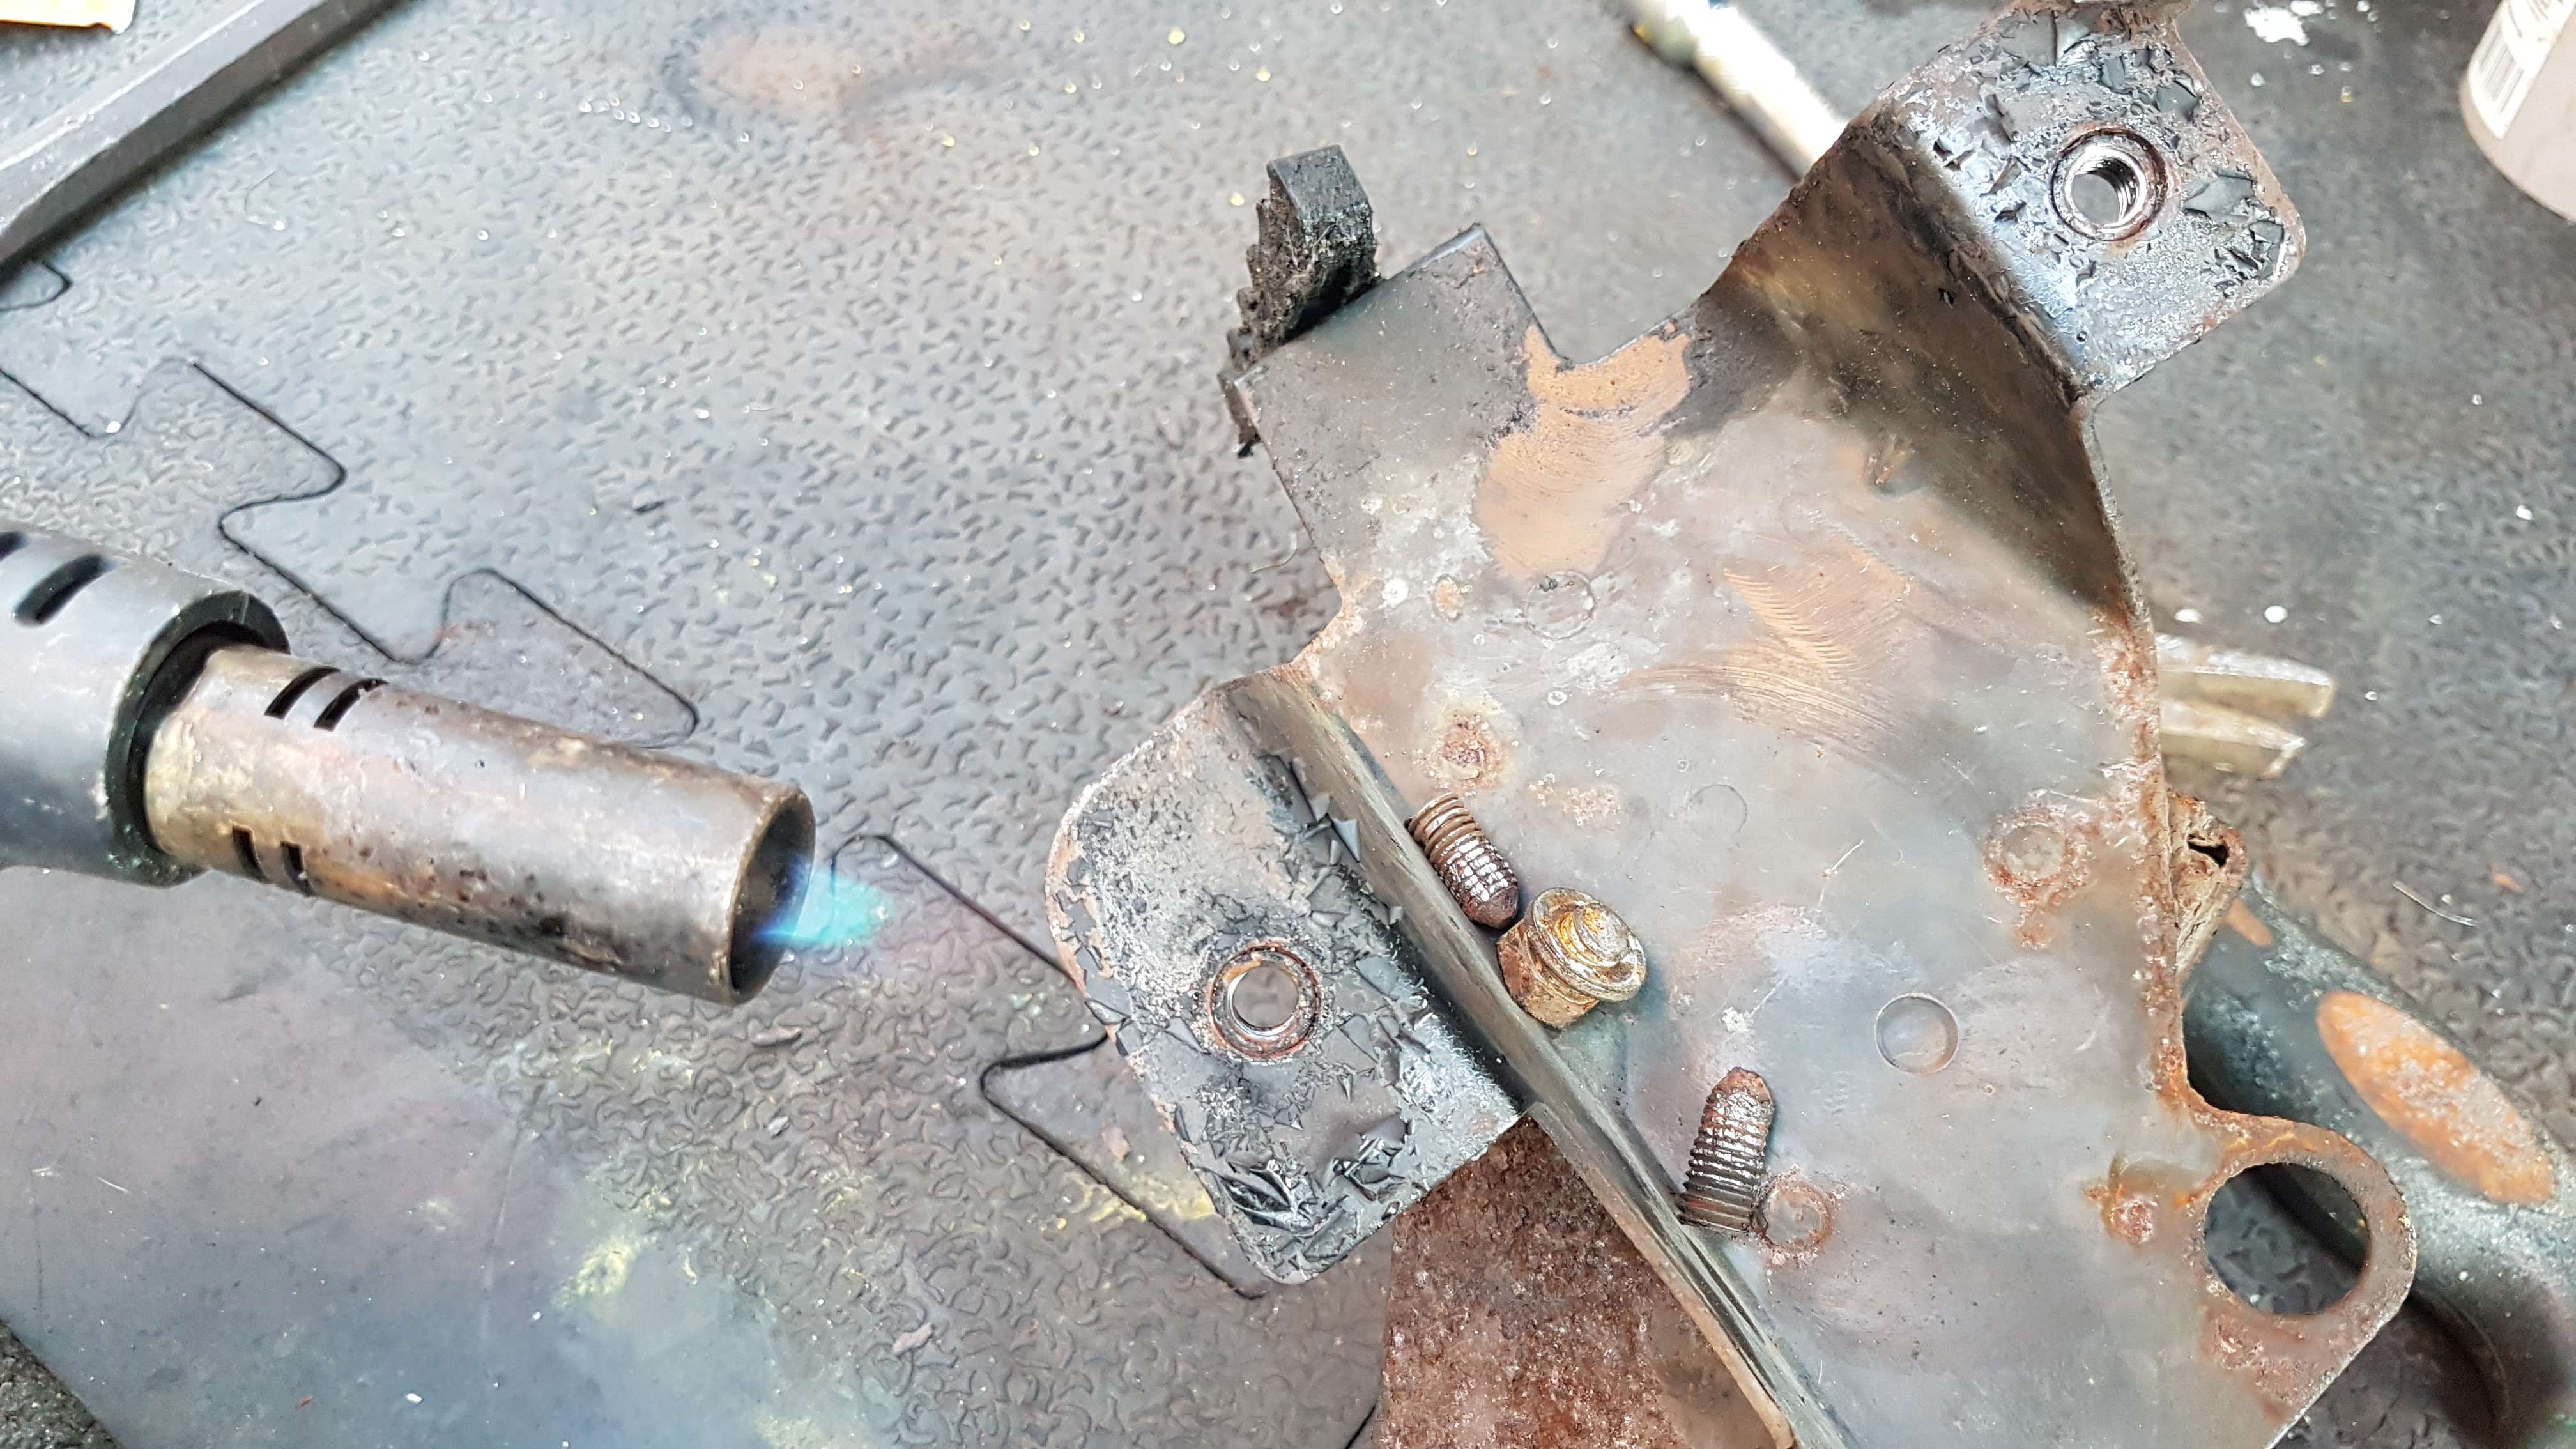
seen these things in the scrap yard with more left on them.. geez..
just uploading a video now.. all 4K stuff so rendering and uploading takes a while!
Edit: heres the video!
Last edited by JohnDragonMan (2021-02-07 22:17:33)
- JohnDragonMan
Notice: I have the tendency to void warranties, blow fuses, cause fires, and other fun stuff.
Words of wisdom: Internally rust proof the sills and subframe! both skins!!. There's always user serviceable parts inside. "Oh that shouldn't have happened".
My 2005 Dispatch Camper Project
Offline
#21 2020-07-11 21:10:12
- JohnDragonMan
- Member
- From: Derby, East Midlands, UK
- Registered: 2020-06-02
- Posts: 456
- Website
Re: JohnDragonMan's Dispatch Camper Conversion
well cut a long story short i have had the box out, replaced the flywheel and clutch i have it all together and tried to start it but nothing, just cranking.
so i get the code reader out (hello darkness my old friend, ive come to talk with you again) and sadly i am getting the dreaded P0230 "Fuel Pump Primary Circuit" fault code in the ECU.
this sux.
this sux for a few reasons as i have just put the front back on.
hmm well i tried the red fuel cut out button and sure enough it was tripped so i pressed it in and was damn sure that was going to be the end of my issues. sadly the same fault code persists. however the fuel system now primes when the key is turned.
i must have somehow damaged the wiring on the high pressure fuel pump on the engine. no idea how though as i have not touched any of the engines wiring.
hmm so i need to figure this out 
- JohnDragonMan
Notice: I have the tendency to void warranties, blow fuses, cause fires, and other fun stuff.
Words of wisdom: Internally rust proof the sills and subframe! both skins!!. There's always user serviceable parts inside. "Oh that shouldn't have happened".
My 2005 Dispatch Camper Project
Offline
#22 2020-07-13 12:09:09
- JohnDragonMan
- Member
- From: Derby, East Midlands, UK
- Registered: 2020-06-02
- Posts: 456
- Website
Re: JohnDragonMan's Dispatch Camper Conversion
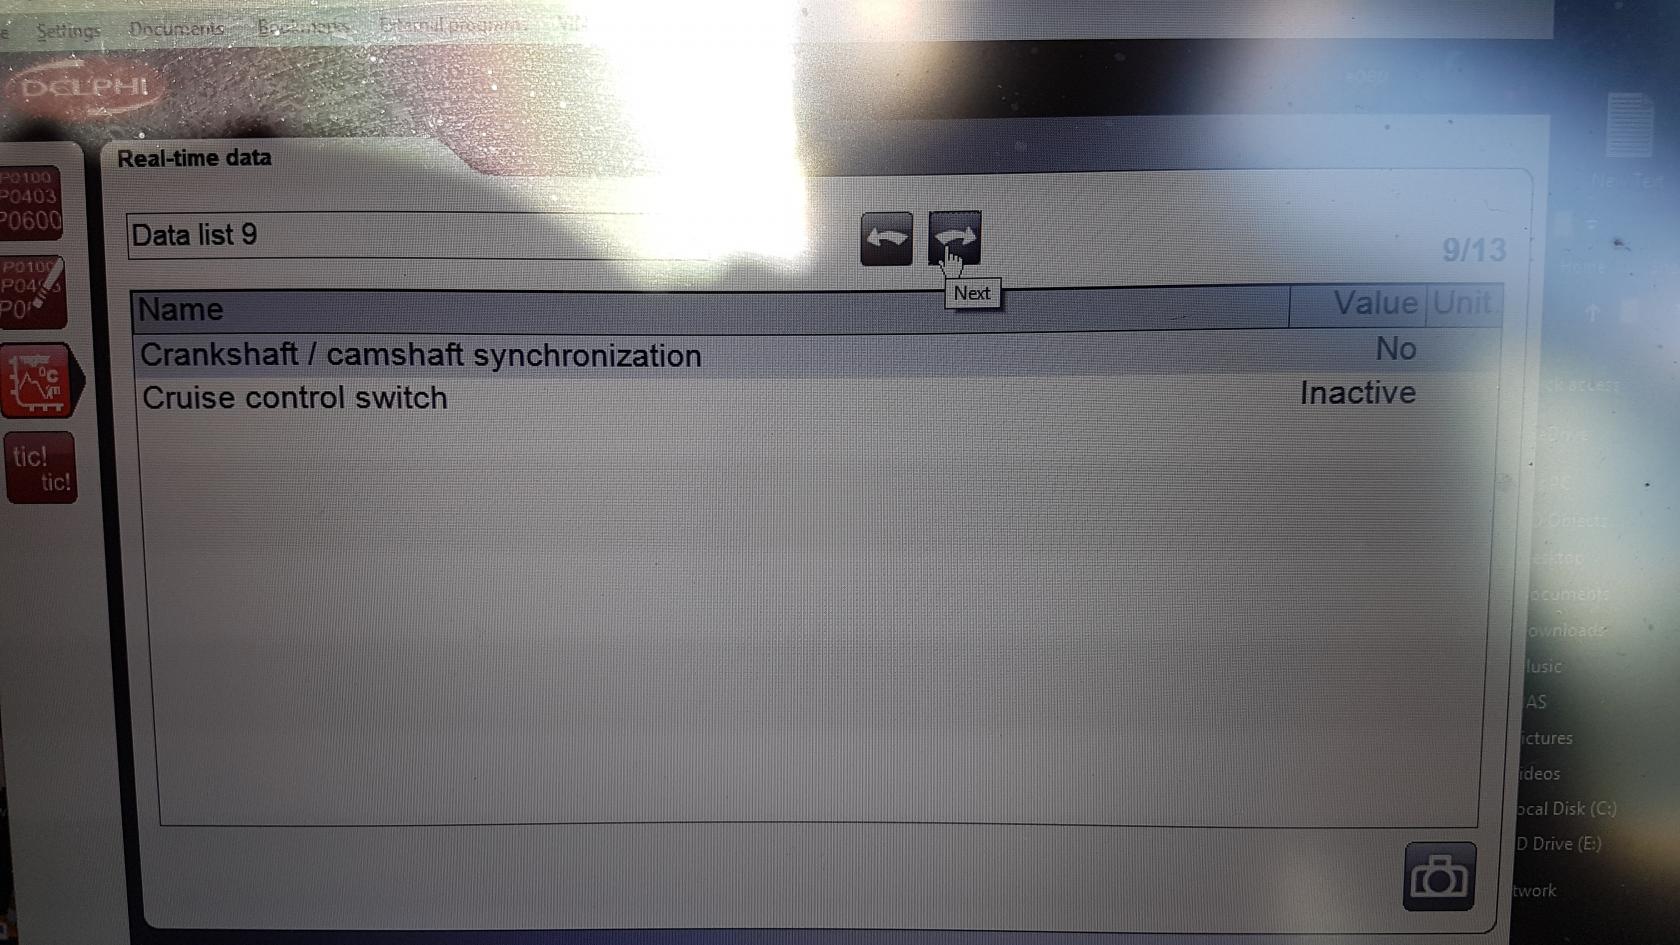
ok so i am getting a no cam and crank synchronisation issue with it. this can be because of a few reasons.
the timing belt has slipped. very unlikely.
the flywheel timing markings are not correct. (seeing as they line up good with the old flywheel) very unlikely.
the brand new crank position sensor which has the same resistance value as the old one is faulty. very unlikely.
the engine wiring loom has got issues.. yeah likely.. its 15 years old.
i have 300+ bar of fuel pressure while cranking, and a cranking speed of around 500RPM (*EDIT* note the "around".. it was not a constant 500 it fluctuated a lot while cranking!). the engine runs on easy start.
hmmmmm... heres some live data pictures if anyone needs these in the future:


Last edited by JohnDragonMan (2021-04-16 21:34:37)
- JohnDragonMan
Notice: I have the tendency to void warranties, blow fuses, cause fires, and other fun stuff.
Words of wisdom: Internally rust proof the sills and subframe! both skins!!. There's always user serviceable parts inside. "Oh that shouldn't have happened".
My 2005 Dispatch Camper Project
Offline
#23 2020-07-13 16:18:29
- JohnDragonMan
- Member
- From: Derby, East Midlands, UK
- Registered: 2020-06-02
- Posts: 456
- Website
Re: JohnDragonMan's Dispatch Camper Conversion
it starts again!
the crank sensor now hits the flywheel. the sensor pickup lobes on the new flywheel sit too tall compared to the old flywheel.
the old sensor had broken up and stuck to the flywheel making it have a false RPM readout.
I had to take the clutch slave cylinder and starter motor off. then use a hose pipe with a powerful jet to blast the magnet fragments from the flywheel timing marks.. blasting them through the starter motor hole FROM the clutch slave cylinder hole while the engine was being slowly turned over.
when i could see there was no more magnet fragments i stuck the new sensor back in the hole and felt it hitting the flywheel. so I put a dab of grease on the end of it and kept putting washers under it until I could see the mark in the grease was not contacting the flywheel.
now its running again!


Last edited by JohnDragonMan (2021-04-16 21:37:50)
- JohnDragonMan
Notice: I have the tendency to void warranties, blow fuses, cause fires, and other fun stuff.
Words of wisdom: Internally rust proof the sills and subframe! both skins!!. There's always user serviceable parts inside. "Oh that shouldn't have happened".
My 2005 Dispatch Camper Project
Offline
#24 2020-07-15 03:23:08
- JohnDragonMan
- Member
- From: Derby, East Midlands, UK
- Registered: 2020-06-02
- Posts: 456
- Website
Re: JohnDragonMan's Dispatch Camper Conversion
happy to say that the clutch change was a great success! its so light now! took the van for a little bit of a test drive and its very nice. the new mass airflow sensor is telling the ECU all the correct readings making the engine give a nice power output, the replaced bushes have made a huge improvement to the front end! no knocks or noises going over bumps in the road now. really impressive.
i have wire brushed the sub frame as best as i can and repainted it, been pulling old underseal off, wire brushing it and repainting.. ahh all good
now i just have the rear tow bar to clean, paint up and refit. then the bumper back on and it will be a fully semi restored vehicle.. the front end did have a damn good going over.
so all behind the wheel arch liners i have dynaxed it. all inside the sub frame has been dynaxed, everywhere i could poke the little pipe into, i have cavity rust proofed.
no. rust. ever.
got some videos to post too.
- JohnDragonMan
Notice: I have the tendency to void warranties, blow fuses, cause fires, and other fun stuff.
Words of wisdom: Internally rust proof the sills and subframe! both skins!!. There's always user serviceable parts inside. "Oh that shouldn't have happened".
My 2005 Dispatch Camper Project
Offline
#25 2020-07-15 06:53:08
- dRoyd
- Member

- Registered: 2019-11-19
- Posts: 38
Re: JohnDragonMan's Dispatch Camper Conversion
I have to say, I can’t believe how much time and effort has gone into your project .... true dedication!
Offline