The Dispatch | Expert | Scudo Hub
Get help & share your Citroen Dispatch (Jumpy) | Peugeot Expert | Fiat Scudo tips
You are not logged in.
- Topics: Active | Unanswered
#1 2021-02-22 19:45:36
- Tranzformer
- Member

- Registered: 2020-12-05
- Posts: 112
Citroen Dispatch best route through bulk head
Hi Peeps,
So I am getting nearer to installing a split charge and leisure battery.
Can anyone who has experience of passing cable from the engine bay through the bulk head, then into the rear - where the best place is to do this in a 2004 Citroen Dispatch van?
The most cleanest place - existing grommet hole or something?
Cheers.
Offline
#2 2021-02-22 22:28:13
- kenbw2
- Administrator

- From: Preston
- Registered: 2017-11-26
- Posts: 1,617
Re: Citroen Dispatch best route through bulk head
I used a grommet where the passenger door hinge is - you;ll find a grommet that's not being used, I drilled a hole in it and if you take the plastic panel off from the inside you can get to it from there
2000 Citroen Dispatch 1.9TD XUD9 Camper Conversion
1999 Citroen Dispatch 1.9D DW8 Disassembled Camper Conversion
1996 Peugeot 806 1.9TD XUD9 Spare vehicle
1998 Citroen Synergie 1.9TD XUD9 Snapped timing belt
Online
#3 2021-02-22 23:00:42
- Tranzformer
- Member
- Registered: 2020-12-05
- Posts: 112
Re: Citroen Dispatch best route through bulk head
Hi mate,
Yeah I seen that grommet at the passenger door hinge - but I assumed that I would have to drill through the engine bay to get to the side panel/passenger hinge. Am I correct in that or is there a pre existing hole within the engine bay that will take me straight to the passenger hinge grommit?
Cheers Kenbw2
Offline
#4 2021-02-22 23:35:45
- Casper
- Member

- From: East Lothian
- Registered: 2015-12-20
- Posts: 2,180
Re: Citroen Dispatch best route through bulk head
I cut into the scuttle drain hose and slit split charge cable into the inner wing. Opened passenger door and fiddled about till i could pull the cable through. Think it was door speaker cable grommet i used. Then lift the plastic on the floor as you step in the van and put cable under and into the back. If i was doing it again i would just drill the floor up the back and work my way forward under the van protecting the cable with open grommets and cable ties.
Last edited by Casper (2021-02-22 23:36:58)
Offline
#5 2021-02-23 01:20:42
- kenbw2
- Administrator
- From: Preston
- Registered: 2017-11-26
- Posts: 1,617
Re: Citroen Dispatch best route through bulk head
Pretty much the same as Casper for me, although I didn't need to cut into the drain pipe, I just fed it along the inside of the wing. Takes a bit of aiming and a firm cable, but I got it through
2000 Citroen Dispatch 1.9TD XUD9 Camper Conversion
1999 Citroen Dispatch 1.9D DW8 Disassembled Camper Conversion
1996 Peugeot 806 1.9TD XUD9 Spare vehicle
1998 Citroen Synergie 1.9TD XUD9 Snapped timing belt
Online
#6 2021-02-23 21:53:00
- Tranzformer
- Member
- Registered: 2020-12-05
- Posts: 112
Re: Citroen Dispatch best route through bulk head
ok thanks a lot for your input guys. It is really appreciated!
I have had several people promising me to help out with this conversion but they're a no show. I guess it's gonna be a slow process for me... hopefully youtube will be all that I need.
On a plus note today... the DODO DEAD MAT DUO turned up. So I will now start planning on taking the plywood out of the back and giving it a good clean.
Hey.. will white spirit be a good degreaser for cleaning the inside?
Ta
Offline
#7 2021-02-27 17:45:53
- Tranzformer
- Member
- Registered: 2020-12-05
- Posts: 112
Re: Citroen Dispatch best route through bulk head
Pretty much the same as Casper for me, although I didn't need to cut into the drain pipe, I just fed it along the inside of the wing. Takes a bit of aiming and a firm cable, but I got it through
@kenbw2
Did you have to drill a hole into the inside wing or was there already a hole there?
Cheers
Offline
#8 2021-02-27 18:33:46
- tee_cee
- Member

- Registered: 2016-03-18
- Posts: 633
Re: Citroen Dispatch best route through bulk head
I had a hole on my 2002 Expert on the passenger side, though it may have been part of the WAV conversion. The easiest way to check is to look for the cable going through in the driver footwell (maybe the bonnet release cable), and the hole will be in the same place on the passenger side.
Offline
#9 2021-02-27 21:42:20
- Tranzformer
- Member
- Registered: 2020-12-05
- Posts: 112
Re: Citroen Dispatch best route through bulk head
ok nice one TC.
Offline
#10 2021-02-28 03:10:41
- kenbw2
- Administrator
- From: Preston
- Registered: 2017-11-26
- Posts: 1,617
Re: Citroen Dispatch best route through bulk head
kenbw2 wrote:Pretty much the same as Casper for me, although I didn't need to cut into the drain pipe, I just fed it along the inside of the wing. Takes a bit of aiming and a firm cable, but I got it through
@kenbw2
Did you have to drill a hole into the inside wing or was there already a hole there?
Cheers
No the grommet was there in the existing hole. I'll get a picture tomorrow
2000 Citroen Dispatch 1.9TD XUD9 Camper Conversion
1999 Citroen Dispatch 1.9D DW8 Disassembled Camper Conversion
1996 Peugeot 806 1.9TD XUD9 Spare vehicle
1998 Citroen Synergie 1.9TD XUD9 Snapped timing belt
Online
#11 2021-02-28 06:21:20
- Ricko
- Member

- From: SW Lancs
- Registered: 2017-01-18
- Posts: 334
Re: Citroen Dispatch best route through bulk head
I used a grommet where the passenger door hinge is - you;ll find a grommet that's not being used, I drilled a hole in it and if you take the plastic panel off from the inside you can get to it from there
This is how I did it, then under the plastic trim by the passenger door into the rear of the van.
2004 Citroen Dispatch 2.0 Hdi
Offline
#12 2021-02-28 07:07:40
- Tranzformer
- Member
- Registered: 2020-12-05
- Posts: 112
Re: Citroen Dispatch best route through bulk head
@kenbw2
Looking forward to it.
@Rocko
I had seen the existing grommet in passenger door hinge but was wondering about the route from inside engine bay to the inner wing. Not sure if there is an existing hole in place... but if not then tee_cee mentioned about possibly following the bonnet release cable.
I'm going to have a look later today.
Offline
#13 2021-02-28 18:27:33
- Tranzformer
- Member
- Registered: 2020-12-05
- Posts: 112
Re: Citroen Dispatch best route through bulk head
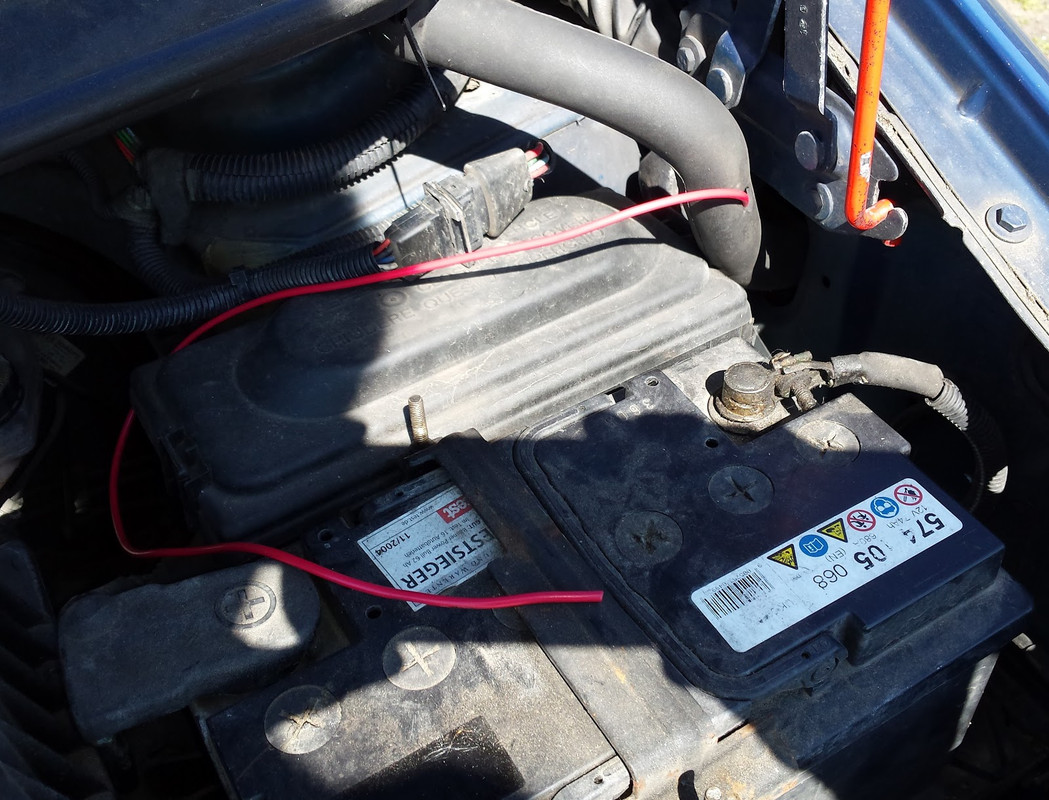
Ah it was pretty straight forward really. I managed to remove the scuttle drain pipe and feed the cable through the drain pipe hole (enough room for both the cable and scuttle pipe). Then fed it down the inside of the wing and fed it into the passenger grommit. I would uplaod a photo showing this but there is no option to upload a photo!
Offline
#14 2021-03-01 15:19:04
- kenbw2
- Administrator
- From: Preston
- Registered: 2017-11-26
- Posts: 1,617
Re: Citroen Dispatch best route through bulk head
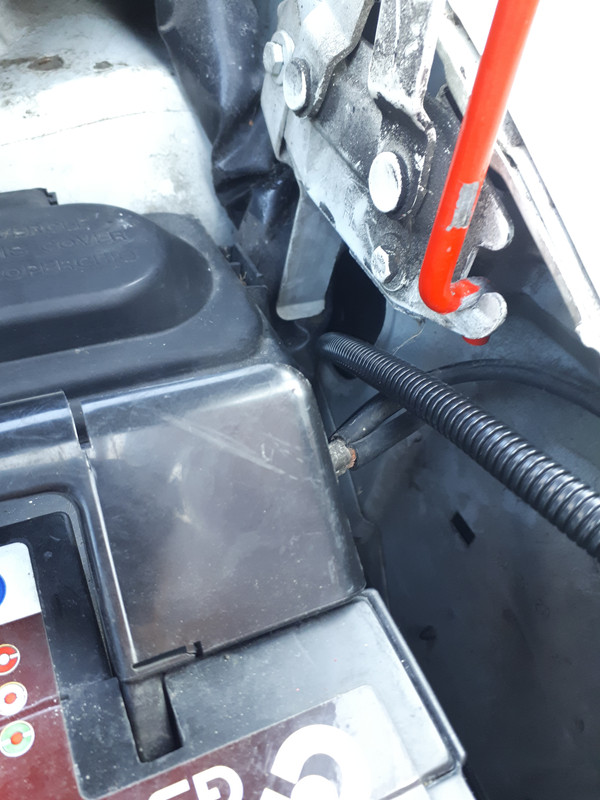
This is the grommet I used inside the passenger door

2000 Citroen Dispatch 1.9TD XUD9 Camper Conversion
1999 Citroen Dispatch 1.9D DW8 Disassembled Camper Conversion
1996 Peugeot 806 1.9TD XUD9 Spare vehicle
1998 Citroen Synergie 1.9TD XUD9 Snapped timing belt
Online
#15 2021-03-01 15:57:39
- Tranzformer
- Member
- Registered: 2020-12-05
- Posts: 112
Re: Citroen Dispatch best route through bulk head
Yeah same here. It was great that I just took the cable via the drainage pipe hole in the inner wing. Another bonus was that it had it's own cable channel in the cab floor.
Offline
#16 2021-03-01 21:11:14
- Casper
- Member
- From: East Lothian
- Registered: 2015-12-20
- Posts: 2,180
Re: Citroen Dispatch best route through bulk head
Im trying to find a way through the wifes VW fox just now. Want to put a trickle solar charger in and its looking like ill need to extend the cable and also come out and along the inner wing.
Offline
#17 2021-03-01 21:41:09
- Tranzformer
- Member
- Registered: 2020-12-05
- Posts: 112
Re: Citroen Dispatch best route through bulk head
Man... I ordered a 5 metre cable thinking that was ample for my Mark1 Dispatch. No way...after looping round the wing, through the bulk head and behind the seats... it didn't even reach beyond the sliding door! I would say run a piece of string prior to purchase on the exact route so that you are not short.
So today, I've just applied the Hammerite Kurust on the rust parts where the water pools on the rear floor from the sliding doors and gave them a coating of the Hammerite white spray - also resealed the existing rubber seals with clear sealant too. Hopefully that should help with preventing water from coming in (or it maybe condensation that is pooling on the slider rollers?).
Last edited by Tranzformer (2021-03-01 21:41:52)
Offline
#18 2021-03-01 21:58:25
- Tranzformer
- Member
- Registered: 2020-12-05
- Posts: 112
Re: Citroen Dispatch best route through bulk head
Guys/Gals... how does one upload a photo in this post? (for the life of me I can not see an upload tab). I'll post some photo's of my conversion in future.
Ta
Offline
#19 2021-03-01 22:14:37
- Casper
- Member
- From: East Lothian
- Registered: 2015-12-20
- Posts: 2,180
Re: Citroen Dispatch best route through bulk head
Get an account from here https://postimg.cc/files Upload your pictures to it and when you want to share one click one click on the image and click on share. Copy the link for forums like this
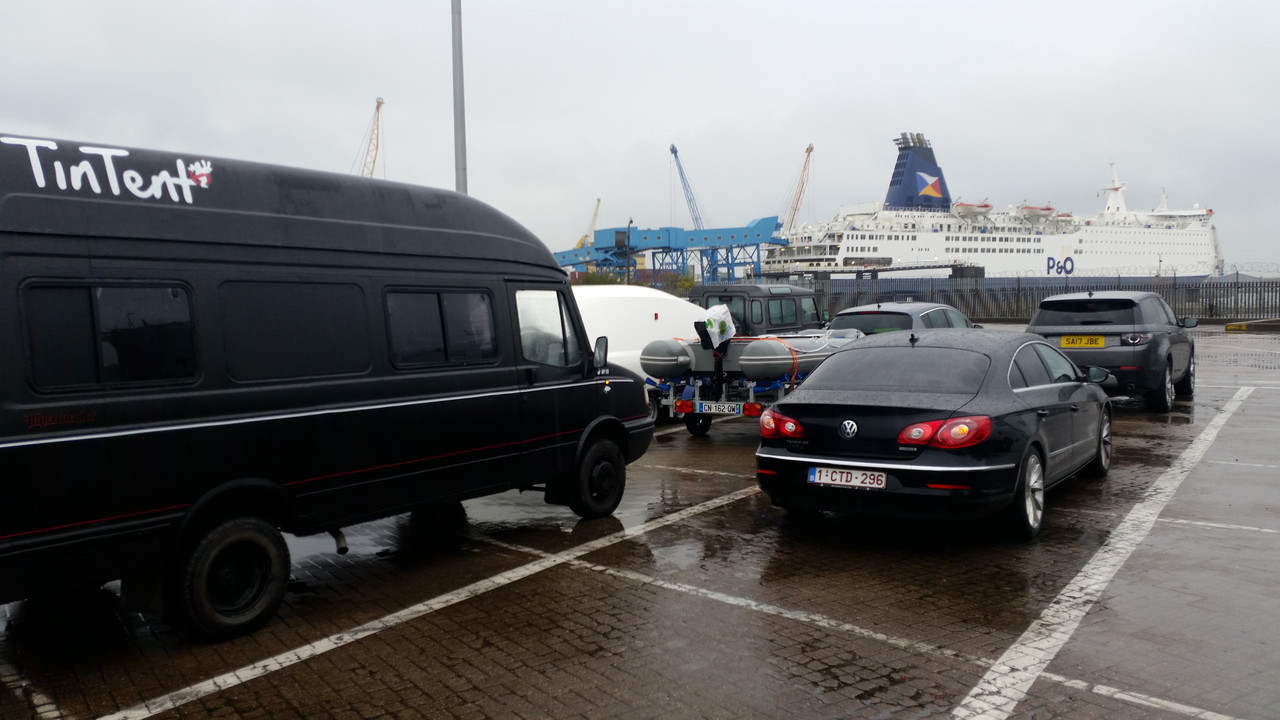
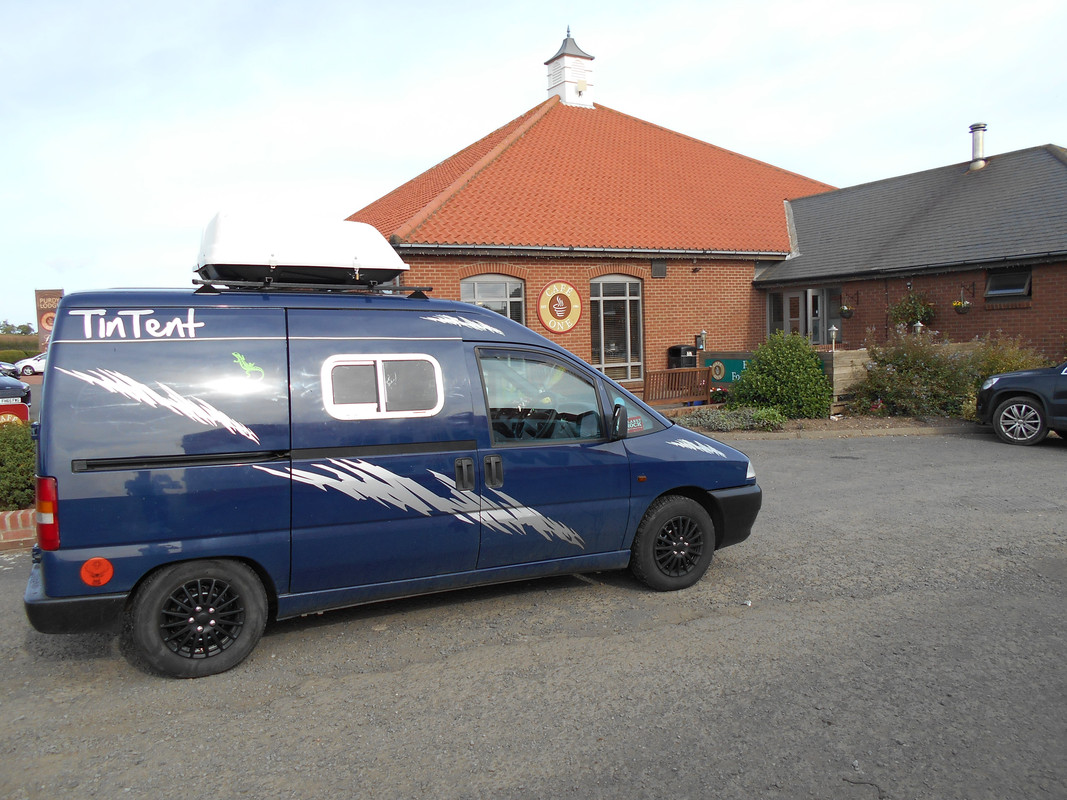
That was TinTent Two. This was One
Last edited by Casper (2021-03-01 22:17:08)
Offline
#20 2021-03-01 22:23:59
- Tranzformer
- Member
- Registered: 2020-12-05
- Posts: 112
Re: Citroen Dispatch best route through bulk head
Never straight forward is it lol. I'm sure I uploaded photos in the past without having to open another account. Not tha keen to have another account to memorise. Thanks for the info though.
Nice pics. Tin Tent big daddy looks mint mate. You still got both vehicles?
Offline
#21 2021-03-01 23:11:40
- kenbw2
- Administrator
- From: Preston
- Registered: 2017-11-26
- Posts: 1,617
Re: Citroen Dispatch best route through bulk head
https://postimages.org/ doesn't require an account
2000 Citroen Dispatch 1.9TD XUD9 Camper Conversion
1999 Citroen Dispatch 1.9D DW8 Disassembled Camper Conversion
1996 Peugeot 806 1.9TD XUD9 Spare vehicle
1998 Citroen Synergie 1.9TD XUD9 Snapped timing belt
Online
#22 2021-03-01 23:33:21
- Tranzformer
- Member
- Registered: 2020-12-05
- Posts: 112
Re: Citroen Dispatch best route through bulk head
Offline
#23 2021-03-01 23:34:46
- Tranzformer
- Member
- Registered: 2020-12-05
- Posts: 112
Re: Citroen Dispatch best route through bulk head
Cheers Kenbw2
No instructons on how to use Postimages on the page what so ever. Not straight forward for someone who has never even heard of this thing Postimages.
Actually it may have worked eh...I was expecting to see the image uploaded without the need to click on the Postimage link. I don't know how you guys do it without pasting the URL.
Last edited by Tranzformer (2021-03-01 23:39:15)
Offline
#24 2021-03-02 00:01:48
- Casper
- Member
- From: East Lothian
- Registered: 2015-12-20
- Posts: 2,180
Re: Citroen Dispatch best route through bulk head
Offline
#25 2021-03-02 00:05:28
- Casper
- Member
- From: East Lothian
- Registered: 2015-12-20
- Posts: 2,180
Re: Citroen Dispatch best route through bulk head
You want the 2nd bottom link. Fir forum. Trouble with uploading with no account you can never find the picture again to use another time. Having an account is OK and you get not bad free storage. Just save the link an dont log out and you should be fine unless you clear your cookies or the likes.

Offline