The Dispatch | Expert | Scudo Hub
Get help & share your Citroen Dispatch (Jumpy) | Peugeot Expert | Fiat Scudo tips
You are not logged in.
- Topics: Active | Unanswered
#1 Re: Camper Conversions » My scudo conversion » 2021-05-01 18:26:17
I'd forgotten about this thread!
Yes, it is surpising what you can fit in. Mine is a 4 foot double bed and I could still just about fit a kitchen unit if I was careful. As it is I just trimmed the shelves and put them back in temporarily. Cooking was done on the floor by the side door which was less of an issue than I expected. In fact, having now used for trips away it did very well. About the only issue was the toilet. Fine during the day but when the bed is out about the only place to use it is on the passenger seat. That worked but watching my wife climbing over the back of the seat and perching on the Khazi was quite amusing 
Unfortunately the engine is now a bit poorly and I don't have the time to fix it. 
#2 Re: Maintenance » 98 1.9D Manual Scudo - Replacing Gearbox Oil » 2020-10-13 16:17:37
Some additional info on this in case it helps someone. I used this guide to change my oil so thanks, it was very useful in confirming where everything is.
On my van (2003 2.0jtd) the breather is a a black cap (rather than white). It just pulls off and a smallish funnel fits to fill.
I think my airbox is slightly different too. On mine the lid is held by screws rather than wire clips and the base is clipped to the battery tray. There is an obvious support down the nearside of the airbox but also a clip that is hidden under a radiator hose at the front. So if just pulling up does not work then check you have released this 
#3 Re: Camper Conversions » My scudo conversion » 2020-10-11 19:00:40
Well, it is now done Well, not done, but it is now at least usuable!
The removable piece nearest the nearside side door now mounts as a backrest across the offside side door so we now have a useable bench seat.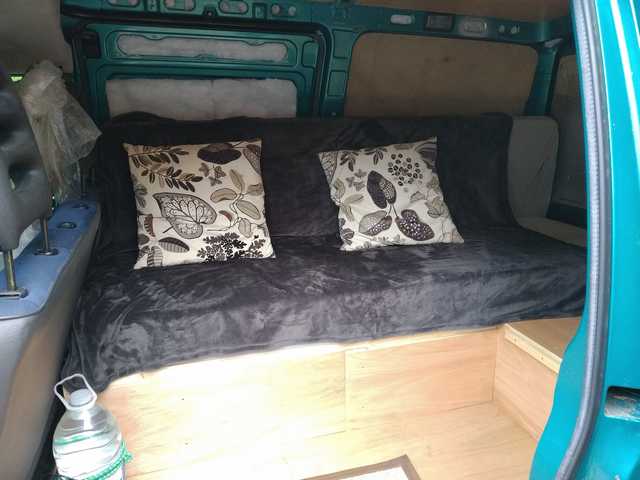
The biggest thing left (apart from the door panels that I keep on forgetting about! ) is some cupboards/selving/table over the nearside wheel arch. That will take a lot of the stuff (cooker, plates, washing up stuff etc) that is currently taking up space under the bed.
But, for this weekend, everything fitted in that we need so we took it out for a couple of day trips. Today being an amble along the south coast near Worthing.
A walk along the beach followed by bacon butties and a cup of tea by the van was a nice relaxing way to spend the day although we did cheat by bringing the washing up home to do.
I have to admit that the thing that impressed me most was the toilet (sad, I know...). I have always hated the smell of chemical toilets so we got a Kampa Khazi (which is basically a bucket with seat and lid) , lined the bucket with a bag and sprinkled a handful of compressed pine sawdust pellets (from a pet shop, sold as cat litter) in the bottom. The pine pellets swell an amazing amount to absorb any liquid and, even after being used all day, the only smell was a slight smell of pine sawdust. Way, way better than any chemical toilet I have used plus at the end of the day you are left with a plastic bag that can be tied up and dumped in any household waste (just like a baby's nappy). We do need to get some properly bio-degradeable bin liners to use with it but otherwise I cannot see any downsides.
Oh, and it was great not having the search for a public toilet and then jostle with plague ridden tourists just because I had too much tea with my bacon buttie
Anyway, enough about toilets. Apart from the aforementioned door panels and cupboard/shelving etc my wifes main complaint was the soft bench passenger seat as she rolled around a lot on corners. At least, I think it was the seat, not the fact I was driving it like I drive my bmw......
Either way, I think some new seats might be necessary at some point.
#4 Re: Camper Conversions » My scudo conversion » 2020-10-07 18:26:29
Finally the bed bases are done.
These are the fixed bits.... (also showing a coat of varnish on the ceiling, floor and beds)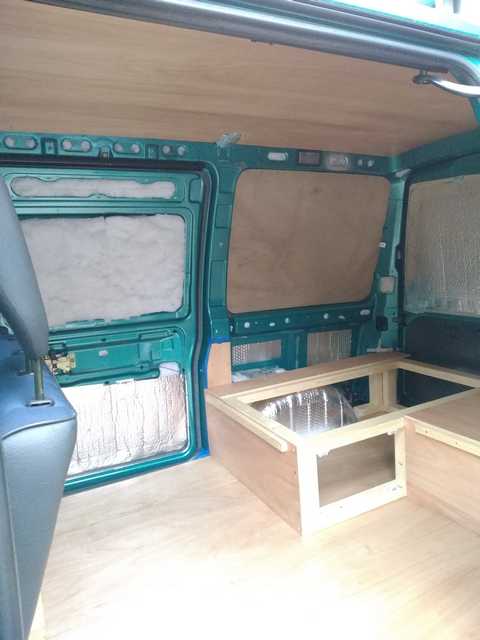
and this is what it looks like assembled as a bed.....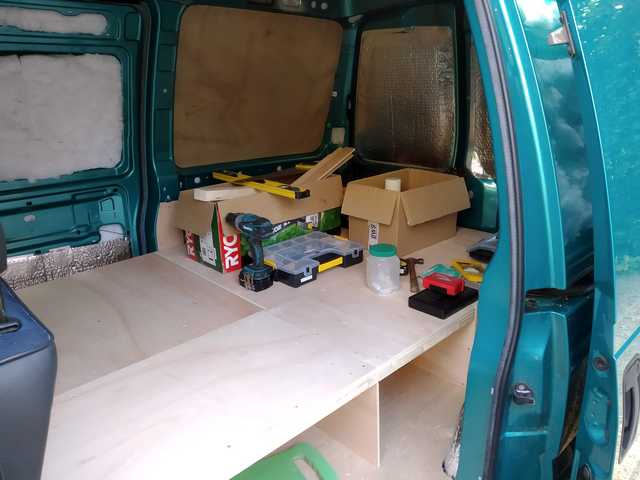
If I did it again I would do some things differently but I am pleased how solid it is.
#5 Re: Camper Conversions » My scudo conversion » 2020-10-03 17:32:36
The weather is now hampering progress but I am getting there slowly......
The offside "infill" piece. This lifts up to get tall things (like the loo) out from undernearth. It will also lift out completely to allow carrying of large stuff.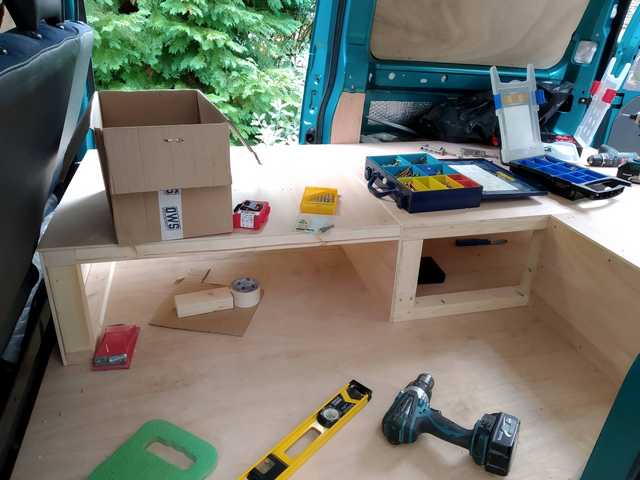
Then the rear fixed section. There is space underneath for the waste water container although there is also space for it to the left behind the wheel arch. Cupboards/sink/cooker are likely to be here but all this will wait until we have used the van a few times so we have got a feel for how will will use it.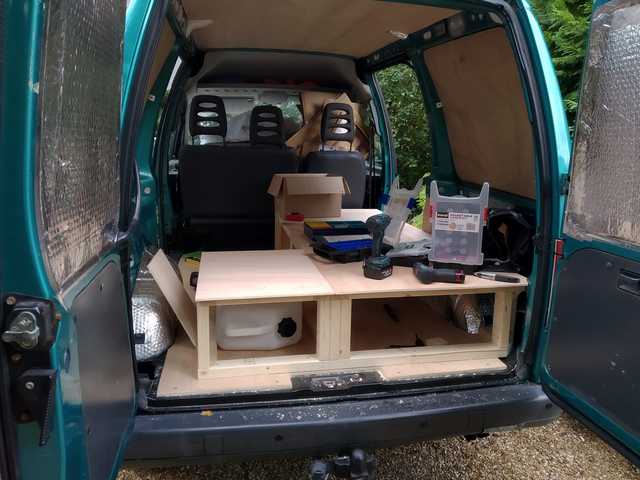
#6 Re: Camper Conversions » Brenda gets Celotexed » 2020-09-29 05:26:27
They're good, you stick them to the inner bodywork then ram the celotex down onto them. It can be tricky lining it up so best to take some time over this.
No need to glue the celotex; once you push the clip down the pin shafts, it grips very tightly. You then snip the pin off with pliers. I've stuck corks on the tips to prevent getting stabbed in the head....they're very sharp :-)
Ah, makes sense. Does sound easier than trying to fix panels while glue sets.
#7 Re: Camper Conversions » My scudo conversion » 2020-09-27 17:11:44
Well, the old shelves did not survive. Mostly because I mis-measured the space required for the bed so they do not fit very well. Maybe they will get a reprive later.
It is now starting to look like it might turn into a camper. A part built bed/seat base with a test fit of the mattress halves to make sure they fit. They do, just......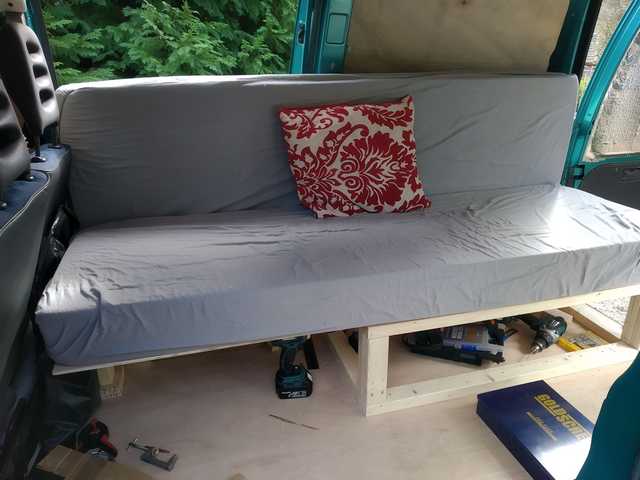
Then an almost complete (ie done bar any cladding ply on the sides of the base) seat base. The top is lift up and removable at the moment but might end up with a hinge later. At the bulkhead there is now a support for that end of the bed base and an infill piece will complete the gap.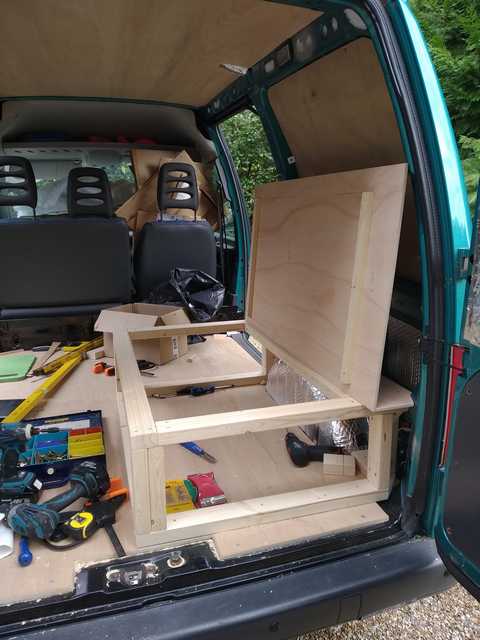
There will also be some boxing around the wheel arch to protect it from stuff sliding around but that is not a high priority at the moment.
#8 Re: Camper Conversions » My scudo conversion » 2020-09-25 18:57:18
Although I have not quite finished the ply lining I decided I wanted to get on with furniture and stuff. Given this is my first camper there is a very high chance I will want to change it after a bit of use. So something quick and easy to make is a good idea.
So, here are some shelves I knocked up earlier......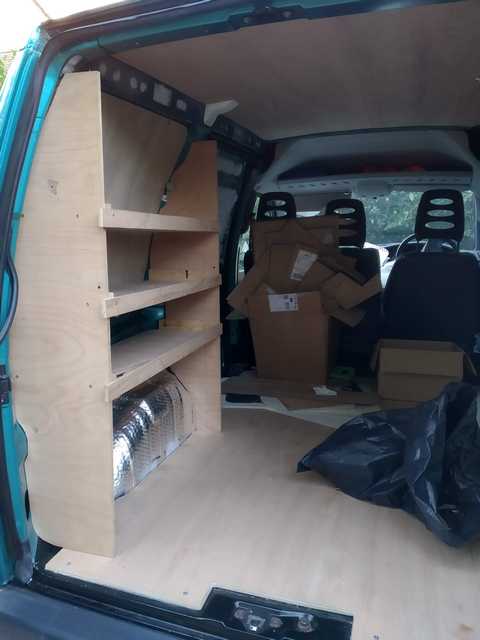
When I say earlier, I mean 6 or 7 years ago when I first got the van!
They are very rough and ready but survived 7 years carrying misc electrical junk so I thought I might as well reuse them. With a bit of trimming I now have exactly 48" between them and the metalwork above the opposite wheel arch. Just right for the bed
Lets hope they survive inspection by my wife tomorrow though 
#9 Re: Camper Conversions » My scudo conversion » 2020-09-25 13:40:15
I have no practical experience but, based on those figures, I would have though that the glow plug is the equivelent of 3 minutes of normal running of the heater. I assume you need 30 minutes running or more to heat any decent quantity of water so probably less than 10% of total power use?
If I got that right then I guess the diesel heater will be more efficent on battery overall, probably by about 30%?
I did see one review of the diesel water/air heaters where it appeared to need to run the hot air heating whenever it was heating water. Doesn't sound great to me and would waste a lot of power, assuming the van does not actually need heating.
I don't know how that compares to the propex? Plus I could have misunderstood that!
edit: btw, I think it was also the other way around. ie he needed to run the water pump when the air was heating otherwise the water boiled.
#10 Re: Camper Conversions » My scudo conversion » 2020-09-24 19:00:09
btw. some small progress (sort of...) on my van. I printed and fitted a couple of covers for the roof cross member ends.....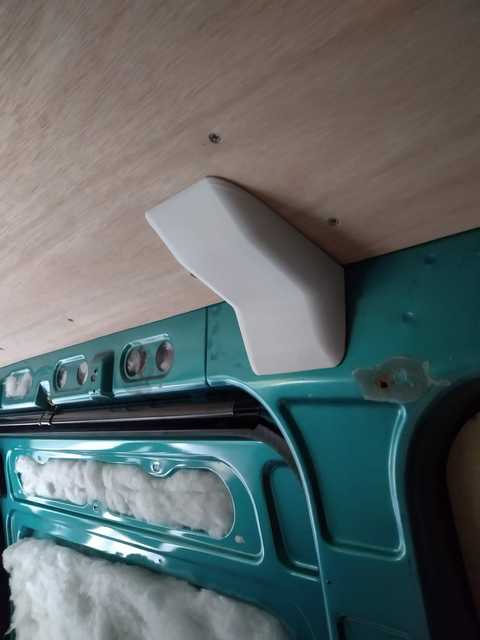
#11 Re: Camper Conversions » Brenda gets Celotexed » 2020-09-24 18:45:43
Nice to see someone doing similar but different to me. Your way looks quicker!
What are stick pins? I assume the things with corks on? Some way of holding the celotex while the glue dries?
#12 Re: Camper Conversions » My scudo conversion » 2020-09-24 18:40:31
It certainly looks like it is going to keep you busy. I think mine is also going to be a running project but I am hoping to soon have a bed so it is theoretically useable. We shall see
#13 Re: Camper Conversions » My scudo conversion » 2020-09-23 22:03:19
looks like you have plenty of space to work with though
#14 Re: Camper Conversions » My scudo conversion » 2020-09-23 09:07:17
yes, I reckon more than enough. Especially given you cannot fall out of the side so you are not edging towards the middle just in case. I also keep on reminding my wife it is still massively better than a tent for space
Yours is looking good. What is the van? It looks like it has lots of straight edges and sides to build to. Something that is sadly lacking in the scudo
#15 Re: Camper Conversions » My scudo conversion » 2020-09-22 16:53:45
Some small progress. The interior is insulated but a few more door panels to ply and then I can get onto making the bed etc. To that end I got my wife to compare our double mattress with the inside of the van and she decided that it would be much better use of the space if we had a 4' wide bed rather than the full 4'6". Which is what I told her from the start but better late than never
So, mattress attacked with a bread knife. There is no going back now!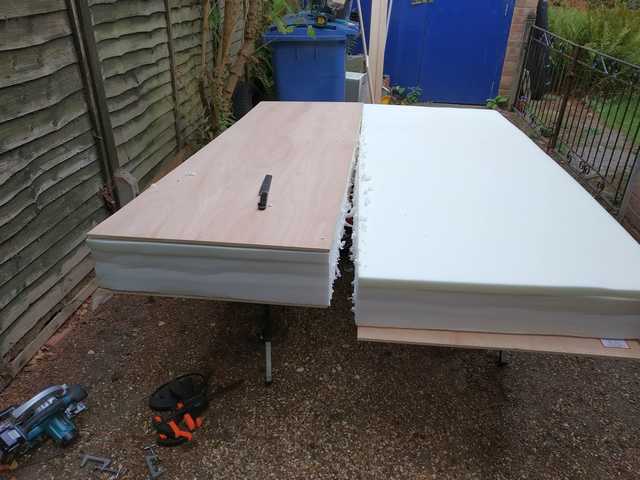
#16 Re: Camper Conversions » My scudo conversion » 2020-09-21 18:10:31
Yes, although I am not sure how much practice I want at van conversion. It is hard work....
#17 Re: Camper Conversions » My scudo conversion » 2020-09-19 15:45:50
Not so my progress the last week. My boss suggested I should actually do some work
Still, I have now insulated (dodo fleece and a layer of foil/bubbwrap) and ply'ed the ceiling.
The ply took a good few hours although about 30 minutes of that was arguing with my wife how to do a template! I think I won the arguement in the end
She also tells me I am being way to fussy with the fit and we could have done it in half the time. She might have a point but I like the results......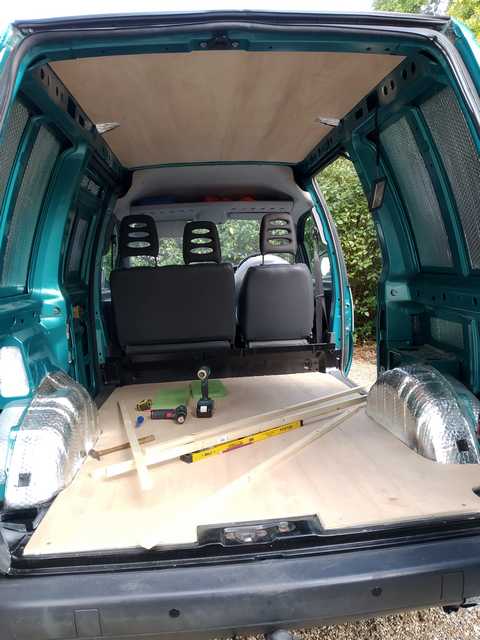
Oh, and halfway through doing the ply my neighbour told me that my wife said we are going away in it next weekend. Which was good, as I really needed a good laugh at that point
#18 Re: Camper Conversions » My scudo conversion » 2020-09-13 16:23:17
Another update....
I finally got the floor joined (rebated and glued lap joint) and bolted down.
To be honest,if I was to do it again I would not do it this way! I decided I wanted maximum insulation in the grooves in the floor and did not want to lose height by putting battens in. So I decided I wanted a one piece floor (as there was not really anywhere to screw down the edges of the ply on a join), hence the glued half lap joint down the length. I also decided I wanted to use closed end rivnuts through the floor so I could seal them from underneath (ie no chance of rust).
All good aims but in reality:
- trying to get a good fitting full floor in is a pain. Even more of a pain when you need to remove it half a dozen times to get the fit and other things sorted.
- Rivnuts are great but in reality the floor is pretty thin so I am not convinced putting M6 bolts though it is really necessary.
- Despite drilling direct through the ply into the van floor (so you would think everything would line up well) the rivnuts needed a lot of tweeking to get the bolts in properly
So, 3 days to fit the floor was a bit much. If I did it again I would sikaflex thin battens in the grooves in the floor (it will take 12mm without raising the floor) a thin layer of insulation over the top and screw down the floor in lots of places to the battens. That could be arranged so the joint could be screwed flat rather than lapped/glued, there would be no bolts/rivnuts bridging the insulation and it would be way quicker and easier. (and probably as strong if not stronger)
Another learning point
Still, I now have battens on the ceiling which I can screw the ceiling to. 18mm thick which is basically the thickness of the ridges round the edge and the reinforcing member across the middle.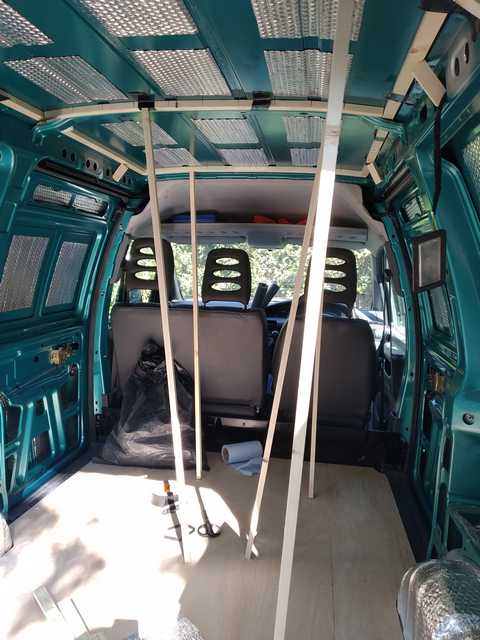
#19 Re: Camper Conversions » My scudo conversion » 2020-09-09 18:43:36
Today's installment - cutting the ply floor (mostly).
I thought about a hour to trace the floor pattern to the ply and cut it out with a jigsaw but no, more like 2.5 hours of blood(*) sweat and tears!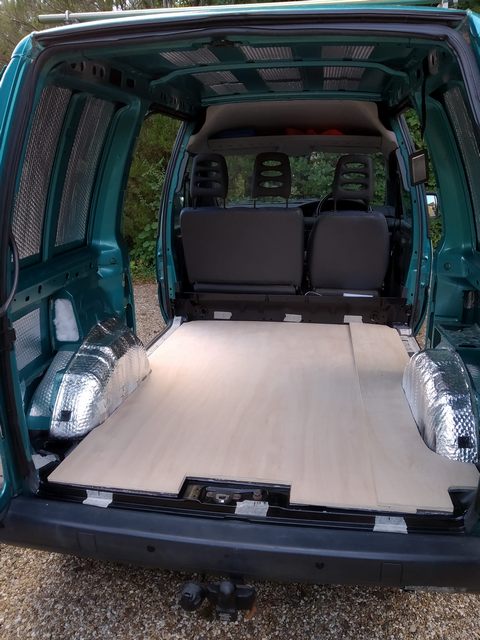
Sorry about the wonky picture, I had a very sore thumb(*) when I took it so was not paying much attention!
It still needs the join between the sheets marking and rebating for a half lap joint. Then screwed down.
(*) the sore thumb was the blood (and almost tears) bit. While I was doing the floor I decided to make a circular saw guide rail and, while screwing two bits of ply together, managed to put the impact driver bit through the side of my thumb. It hurt and bled quite a bit which was a bit incovenient given I had to finish screwing the rail together before some glue set 
#20 Re: Camper Conversions » My scudo conversion » 2020-09-06 20:45:06
Today's installment
Floor has sound deadening and insulation between the ribs (only, to keep height loss down). I have to admit I thought this would only take an hour or so but took more like 3 hours with my wife helping. To be honest I have no clue where the time went! 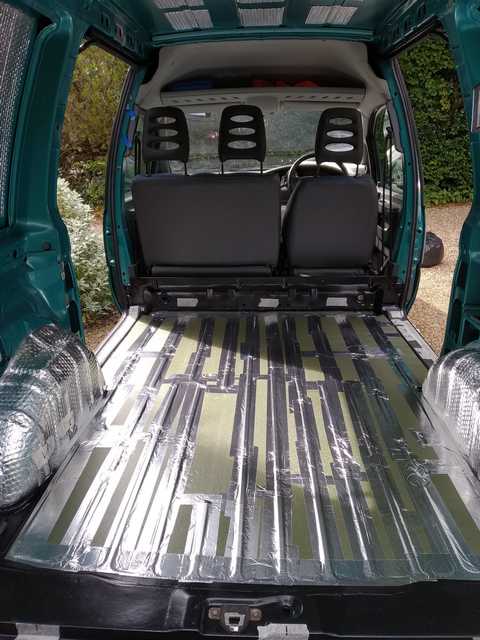
You might notice I have also marked some strategic ribs that the floor will be screwed down to.
I have also cut a foam/foil sheet to shape that will go below the ply floor. It will also be used as a template to cut the floor to shape.
Oh, and the van got used to get some sheets of ply for the floor etc.
#21 Re: Camper Conversions » My scudo conversion » 2020-09-05 16:41:48
Well, I said the hammerite was a mistake and it was! Even after 4 days it stank so bad I got a headache working in the van. I did think of just leaving it and hoping but decided I was likely to regret that (I do have a very sensitive sense of smell.) so......
Masked it up and sprayed on a coat of Zinsser B-I-N Primer/Sealer & Stain Killer. This is supposed to suppress odours and it appears to work. 20 minutes after applying my wife came to see what I was doing and commented she could not longer smell the paint.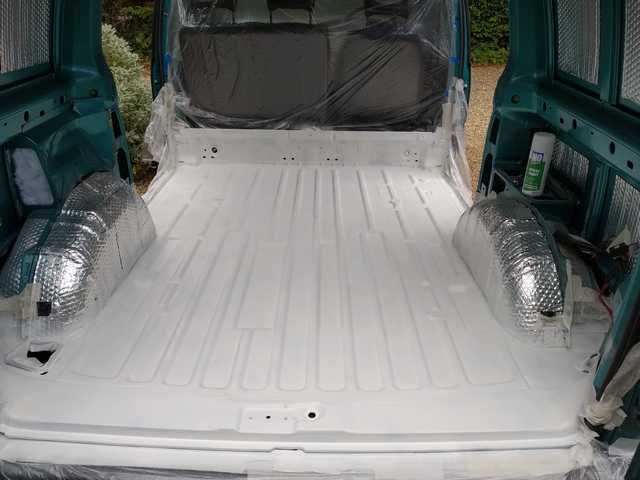
This gives a slightly rough and powdery finish so a couple of coats of black spray paint on the bits that might be exposed after the floor goes down....
Obviously the black topcoat smells but I am confident that will go quickly as it is just normal paint. So hopefully I can actually make some progress (ply the floor) tomorrow!
Oh, and I reckon that spray priming the rusty bits then spraying a top coat as I have done here would have taken half the time and no more money than brush painting the hammerite on. Lesson learnt.......
#22 Re: Camper Conversions » My scudo conversion » 2020-09-03 17:55:07
I don't think I will be use kitchen units. They are heavy and are very unlikely to fit the space as I want. So I think I will be making my own. (famous last words...)
#23 Re: Camper Conversions » My scudo conversion » 2020-09-02 18:28:05
Today was interrupted by work and having to fix my car (aux belt tensioner failed yesterday...) but some progress - sound deadening is going in.....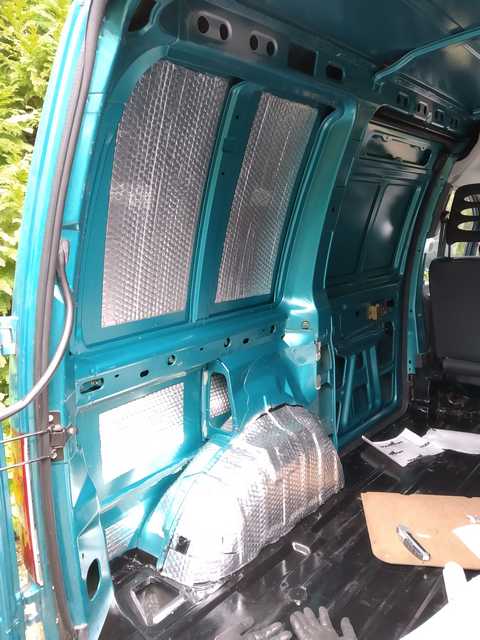
Side doors, floor and ceiling still to go then I can start on the floor and insulation.
#24 Re: Camper Conversions » My scudo conversion » 2020-09-02 11:14:54
thanks, yes I have already found your blog and have been using it for ideas 
#25 Re: Camper Conversions » My scudo conversion » 2020-09-02 07:54:01
.I wouldn't worry about the paint at all. I recon you have done more good with bushed hammeriite than spraying.
You asked about toilet facilities above...
My own van was factory converted from new. It is about as small a conversion as posible to alow for 2 beds while still leaving room for a portapoty and more importantly, the space to use it. They only achieved this though by using the 4 seats as beds leaving clear space to the rear even when beds are down for kitchen & barroom "facilities".
I have never used it myself. I use it's cupboard for a gas bottle.
Bottle and bag for me. But as I said, I am usually solo. (Perhaps that's why? ☺)
Edit...
You might want to check the cab floor while you've got the paint out. They have a very thick and absorbant fibre type matting with a rubber skin. If water has ever gets in, it tends to stay. Could easily go unoticed until too late.
I think the plan at the moment is to have the toilet under a bunk and it can be brought out for use in a toilet tent if necessary. Or, in an emergency, in the rear when it is in seating arrangement.
A good point about the cab floor. I am concerned about that as water has definitely got it over the years (the passenger seat frame is rusty). Again though, I am burying my head in the sand and ignoring that for a few months. Once we have proved we want to continue with using the van as a camper I will sort that, maybe even fit a swivel seat (or two) and also sort the rust at the rear underside. That is phase 2 though