The Dispatch | Expert | Scudo Hub
Get help & share your Citroen Dispatch (Jumpy) | Peugeot Expert | Fiat Scudo tips
You are not logged in.
- Topics: Active | Unanswered
#76 Re: Maintenance » Fiat Scudo 2.0 JTD 2004, Orange K light illuminating on the dash? » 2019-04-25 16:05:10
The big orange light with what looks like a K in the middle is the engine management error light on the electronic injection models just get it plugged in with an ODB2 reader and get the codes then you can work out what is going on. The ODB socket is above the drivers side footwell, I just use an ELM327 interface from ebay with Torque and this works fine, just costs a few quid.
#77 Re: Camper Conversions » Blueberry Muffin, the camper, the build! » 2019-04-25 14:00:34
Next to come was the furniture, I had already bought a fridge and knew my basic layout copying other campers.
I was originally going to buy from a supplier then modify to fit but a local supplier who was making it for me went under and so I decided to scratch build the entire thing myself, using white melamine covered chipboard (15mm) and using a heavy duty titanium finish wrap, I also used 15mm T moulding in blue too match the van.
 20180819_115558 by phataardvark, on Flickr
Cut the first two bits to length then using a pen spaced out from the side of the van marked out the worktop piece
 20180821_192356 by phataardvark, on Flickr
This shows the corner trim in place and the "sink" fitted (sink is a stainless salad bowl off ebay cost about £5 and with a camper drain fitted which cost £6, the small cutout on front edge of worktop is for the fridge safety catch, this will later get bigger so fingers can reach round and T trim can go behind.
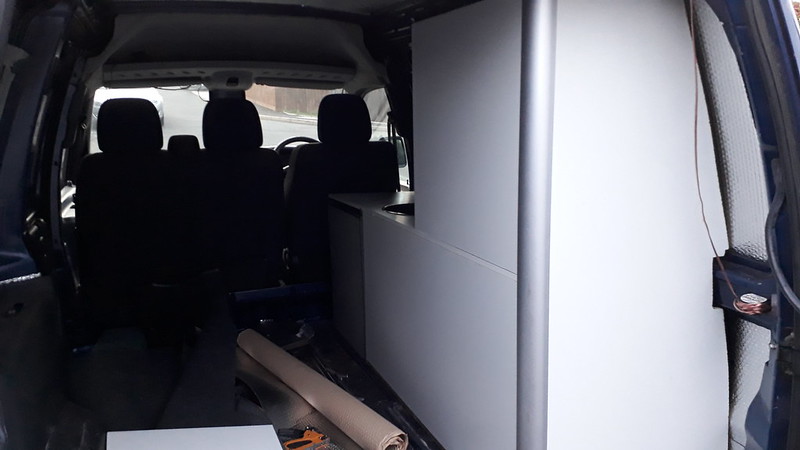 20180822_200128 by phataardvark, on Flickr
Upper part fitted to make high cupboard and fitted rear panel.
 20180924_213844 by phataardvark, on Flickr
Rear panel with twin tambour doors edge trim and wrap fitted.
 20180926_201247 by phataardvark, on Flickr
Rest of unit covered and other two tambour doors fitted, I accidentally ordered a black one for the upper cupboard I might get round to changing that at some point. You notice I have hard mounted a basic single burner camping stove as my cooking facilities, as long as it fries bacon it should be good for what I need.
#78 Re: Camper Conversions » Blueberry Muffin, the camper, the build! » 2019-04-25 13:37:31
Next work was putting through all the electrics for everything I wanted so it was all behind any carpet or panelling this far as I was concerned was best fitted at the same time as the insulation, in this case I have been using two layers of sticky back bubble foil.
 20181111_084815 by phataardvark, on Flickr
 20181023_190136 by phataardvark, on Flickr
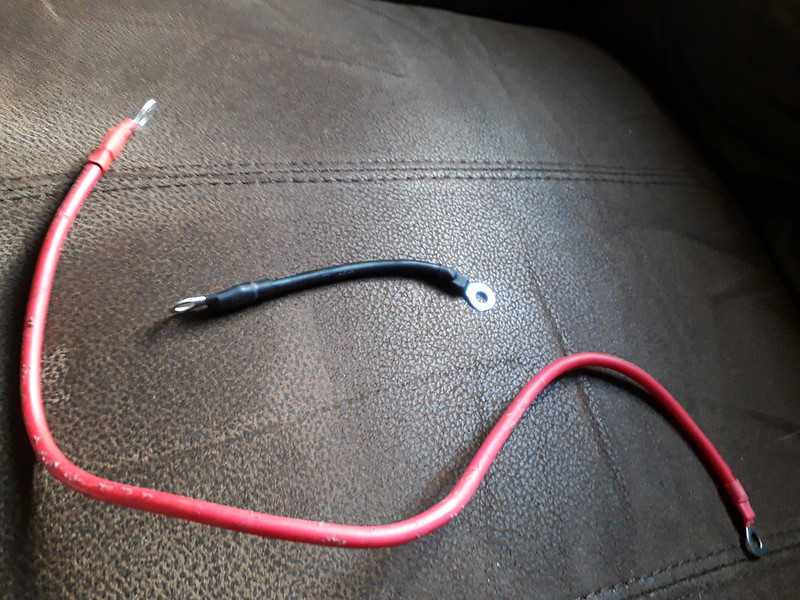 20181027_115916 by phataardvark, on Flickr
 20181027_131439 by phataardvark, on Flickr
Moved the interior light to other side as it will get obscured by kitchen unit.
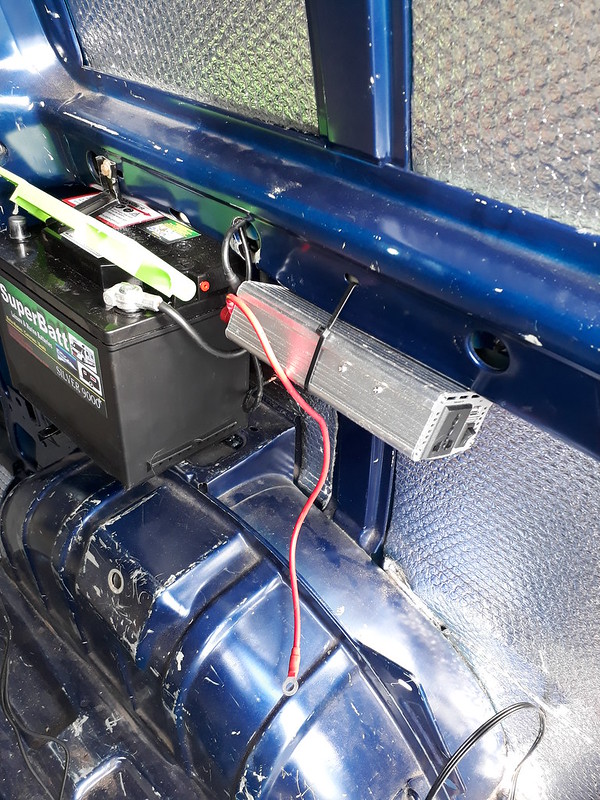 20181027_134618 by phataardvark, on Flickr
The leisure battery doesn't quite fit on the extra shelf at the back it needed the inside of the door runner massaging a bit with a ball peen hammer. A 1500W peak output inverter is fitted to power my single mains socket.
#79 Camper Conversions » Blueberry Muffin, the camper, the build! » 2019-04-25 13:23:21
- k_wyndham_t
- Replies: 42
Hi guys and girls
Thought I would finally start a thread about my camper build should probably done it rather sooner so I could get advice along the way rather than waiting till its all DVLA approved and starting then.
So I bought Muffin almost exactly a year ago as a "non-runner" with 11 month MOT from central wales, much to the shock of the owner I intended to drive her home to Devon despite he said it would be luckily to get to the garage down the road.
She did (and sometimes still does) have an issue with the 5V line on the engine management, at the time this meant that no 5V powered sensors were being read by the ECU this inc things like the TPS so you can understand the owner being sceptical I could drive it home. However basic sensors and the MAP etc were being read fine.
She actually drove home pretty well as long as you didn't use the throttle peddle in anger, I think when it used to cough and splutter the previous owner used to try accelerating, where as if you lift off slightly to allow the injection to catch up with the extra air coming in it picks up.
I got her home and all seamed to go well after just cleaning all the sensor contacts with switch cleaner and replacing any rotting loom cover with fresh (although very occasionally the error comes back)
She has the "hot" engine so is pretty quick.
I bought her specifically because she was the smallest van I could convert to a 2 berth camper without messing with the front seats or having slide out cookers that are only any use in dry weather.
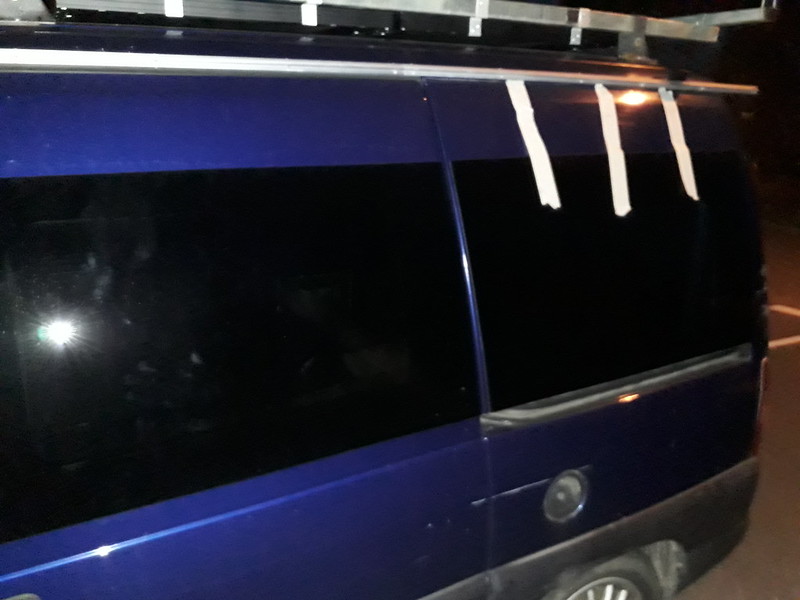
I started by fitting some side windows, initially one of these was going to be a window from a taxi but then I found out the rear panels are shaped specially on the Taxis and the windows dont fit so instead I have 3 surface mount door windows, the rea quarter one is turned upside down so the slope matches the one on the door.
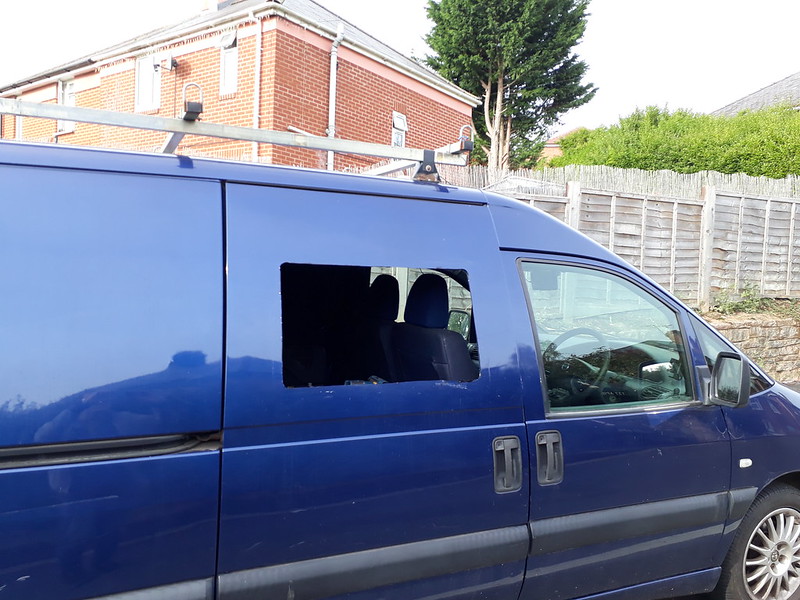 20181007_103730 by phataardvark, on Flickr
 20181007_105014 by phataardvark, on Flickr
 20181007_111443 by phataardvark, on Flickr
 20181007_183529 by phataardvark, on Flickr
 20181011_185103 by phataardvark, on Flickr
 20181018_184548 by phataardvark, on Flickr
 20181018_190131 by phataardvark, on Flickr
 20181018_190142 by phataardvark, on Flickr
#80 Camper Conversions » Its a camper!!! » 2019-04-24 16:25:21
- k_wyndham_t
- Replies: 2
Well had some excellent news earlier, the DVLA has approved changing the body type on my Scudo to being Motor Caravan with 5 seats.
No inspection, just a brief document detailing the work with some pictures, I am well happy so I will find somewhere to shove some pictures online and will do my build post 
#81 Re: Camper Conversions » Headliner » 2019-04-17 13:55:35
I also got mine from a Taxi, cost £50 but was pretty filthy, managed to get mine pretty good with a lot of chemicals and a steam cleaner.
#82 Re: Camper Conversions » Project Fraya - Peugeot Expert Conversion » 2019-04-12 13:44:51
You can get several layers of insulation behind those side panels. I used a headlining in mine too and got a couple layers in behind that too using the typical aluminium bubble wrap stuff although the headlining is pretty well insulated it self.
#83 Re: Camper Conversions » Dispatch Expert, Scudo Hub Meetup? » 2019-04-05 14:21:27
Much as I like Devon k, it's a bit far for me for just a couple nights.
How far North would you be able to manage?
TBH dont worry about me however much I want to meet up with you guys if you are all "up norf" I probably wont be able to manage it anyway, I have a lot of my weekends already sorted and no Holiday available from work either.
#84 Re: Camper Conversions » Dispatch Expert, Scudo Hub Meetup? » 2019-04-03 16:46:57
I am in sunny Devon, lovely place to come in a camper, I rarely have time to do anything so nearer the better for me.
Toilets are good but I can always bring a spade 
#85 Re: Camper Conversions » Trying to camperize my Fiat Scudo (second try) » 2019-03-26 15:21:29
I also put my leasure battery in that location although to get my big battery in there did have to manipulate the metal above it a bit just, I added a computer chasis fan to the hole in the floor and used as an air vent, I have a Taxi side panel there which has vent holes so it can extract moisture.
#86 Re: Camper Conversions » Insulation » 2019-03-26 15:15:41
I used two layers of bubble foil then used a Taxi headlining, the headlining itself is really thick and so must work quite well to insulate too.
#87 Re: Camper Conversions » Taxi bulkhead » 2019-03-26 15:13:25
I looked at getting one but ended up with a van, I thought it would be good to keep two of the fold down seats and only remove the persex bit and keep the rest of the bulkhead as the starting point for the conversion. Think they just bolt in to the B posts either side.
#88 Re: Camper Conversions » Gemany Emissions Sticker » 2019-02-27 17:01:48
So only the facelift HDI models onwards then
#89 Re: Camper Conversions » Fitting rear side window. » 2019-02-21 17:01:35
Each window inc fitting kit is about £130-150 so about £400-450 is what it cost for the 3 windows I fitted (2 on passenger side and one on drivers as I have a full height cupboard on drivers side rear quarter)
Doors I cut from the inside out, I used a high quality tank cutter in the corners to match up the curve of the reinforcing plate. so just the single skin bit gets cut out, then used masking tape to join the holes on the outside and marked the line joining the outer edge of the holes I had cut, this should in theory follow the line of the edge of the reinforcing except where it crosses the vertical piece which needs to be cut through. Then I covered the metal base of my jigsaw with tape to avoid scratching paint and cut along the lines, if done slowly you wont wreck the blades (i used one blade to do all three windows!)
The rear quarter windows I measured the position of the clear part of the window then marked the same on the outer panel as I knew the single skin area inside was bigger than the see-through area on the window. Then I cut out as above but this time used tank cutter from outside.
Paint the cut edge then attach the supplied edge trim.
Bonding on the windows is the easy bit, follow their instructions but basically use the correct prep solvents on the window and the metal work then put a bead of bonding agent on the inside of the window reasonably close to the edge, then stick it on and press evenly as hard as you can to attach, stick tape from top of window on to van so it wont slide down panel, leave over night.
Done!!!
#90 Re: General Discussion » Off road (ish) » 2019-01-16 17:01:09
Would be fun though 
#91 Re: General Discussion » Off road (ish) » 2019-01-16 16:57:52
I make that about 400 total and as there are none before 2012 they must be the 2012 onwards model.
#92 Re: General Discussion » Off road (ish) » 2019-01-16 12:47:39
I know these models exist, but can you actually buy one, for one to be sold now it first must have been bought by someone new, and I dont think anyone really bought these in the first place. Its like trying to buy an all electric Berlingo yes you could buy one when new but if no one did in first place you try buying one now.
#93 Re: General Discussion » Newbie (soon) » 2019-01-11 15:45:57
Another camper, awesome. Mine is very nearly finished, then I am going to upload the whole build at once.
#94 Re: General Discussion » Newbie (soon) » 2019-01-09 15:45:25
Look on Facebook marketplace there are loads around here (Exeter) at good prices.
#95 Re: Maintenance » Diesel's........................................Stating the Obvious » 2019-01-09 15:41:59
Does remind me I should probably at least look at the oil in my van some time, although as I have been building it for last 6 months and it had just had full service at the time of purchase should be fine, probably only done 500 miles since then.
#96 Re: General Discussion » The scariest car park I've ever been in » 2018-11-12 08:47:40
I forgot my local shopping centre has a height restriction going in, its open air so its just there to annoy van owners, it has a fixed metal bar at 2 meters. I drove in to it in my Scudo with a roof rack on and back half of roof rack scraped the paint off the metal bar, think it would be fine loaded though as back end will be lower.
#97 Re: Maintenance » Floppy stick » 2018-11-12 08:42:43
I have checked the gearbox end and everything seams good, so I am suspecting ball joint, or maybe both cables are stretched
#98 Maintenance » Floppy stick » 2018-11-09 15:38:39
- k_wyndham_t
- Replies: 3
Hi all
My Scudo has a floppy gear stick since I got it, unlike a lot of vehicles this doesn't appear to be a common issue on these vans.
I can select all the gears (vaguely) but once selected I have 4-6 inches of circular movement in the stick, has anyone had similar problems, to me it sounds like its probably a broken ball socket at bottom of the lever or similar.
The cable ends seam clipped on OK and have minimal play.
#99 Re: Camper Conversions » Fitting rear side window. » 2018-11-09 14:33:03
Well didnt look like they would fit in any way that was effective, what you could do is buy standard universal window seals then you could maybe make them work. If anyone wants to try they can have my side window as its too much hassle to post so probably going to tip.
I have now fitted a bonded on door window, upside down so it lines up with matching door window and it looks good but cost 3 times as much.
#100 General Discussion » Performance Suspension » 2018-11-09 14:28:23
- k_wyndham_t
- Replies: 0
I'm nearing the completion of my camper conversion and looking for the next thing to work on, and as I find the suspension ride a bit choppy compared to my old Berlingo was wondering what if any suspension upgrades people had done.
I have noticed that Eibach do a spring kit and Bilstein do a damper kit, has anyone used these, if so how were they?
Is there any other kit out there?